How do you make a mountain appear as large to the viewer as it does to you? How do you get rid of noise in your nightscape images? How can you get everything in perfect focus, from front to back? This might as well be titled 5 things you can’t do in one shot, since each of the following techniques relies heavily on layering multiple exposures. But these are the techniques I often use to translate my vision, and turn questions like the above into reality. Let’s go!
1. Perfect focus through focus-stacking
We’re kicking things off with a technique that originated in macro photography, which captures a sharp subject and retains a creamy background. But what if you wanted to also capture a sharp background? That’s where we shift our attention to landscape photography. With focus-stacking, you can fix everything in place throughout multiple exposures.
Using a solid tripod and shooting with a cable release will ensure the camera doesn’t move. For the best results, every setting on the camera should also be exactly the same: white balance (fixable in post when shooting RAW), shutter speed, ISO, and aperture.
The one difference is the focus distance. Start by adjusting focus to the closest object in the scene and wait for the wind to die down (if applicable). Hit the cable release and adjust to focus a little further into the scene. Repeat this process until you’ve reached infinity focus distance. You will need more exposures at shorter distance intervals when you use a larger aperture, like f/5.6.

Can we do without?
Sure. Dial in f/22 on your wide angle, set it to its hyperfocal distance and everything should be tack sharp. Right?
Well, it’s not that straightforward. Closing up the aperture has some nasty side effects. For starters, you will let less light in. At the same ISO, this will lengthen the exposure time (shutter speed). Even with the slightest breeze, delicate foreground elements like flowers, grass and ferns will for sure sway and actually make the foreground look less sharp than say, f/7.1.
Ever heard of the sweet spot of the lens? That’s the aperture at which your lens produces the least amount of aberrations, while keeping diffraction to a minimum; usually one to two stops down from wide open. At f/22 though, diffraction plays a detrimental role in the sharpness of your image.

Why is this useful?
As focus stacking will be very useful at your lens’ sweet spot, even the cheapest lens will appear to shoot razor sharp images, rivalling the single shots of the pricey contenders at smaller apertures. But because diffraction is a physical property attributed to the way light hits the sensor, even the sharpest lenses out there will not be as sharp at their minimum aperture.
2. Exposure as seen by the human eye with HDR
A more familiar exposure-blending technique is, of course, high dynamic range imagery. Whether you run Photomatix, HDR Expose or use Lightroom to blend your images together, I’m sure you’ve heard of expanding the dynamic range of your images.
Most often, the idea is that you capture a series of exposures where every setting on the camera is the same, save for the shutter speed. This theoretically makes it possible to properly expose the highlights as well as the shadows in the harshest contrasts. It’s where the name of high dynamic range imagery finds its origin: if one photo doesn’t contain all the information of either shadows or highlights, the dynamic range isn’t enough for the scene you’re trying to photograph.

In practice, just about every photographer has his or her own approach to expanding the dynamic range of any given camera. There’s the dedicated software I mentioned earlier, but there are photographers, including myself, that do it all by hand. The trick is to make a selection of exposure based on that exposure’s luminosity. You then mask out the over- and under-exposed areas to reveal the better exposures for those areas.
It’s a time-consuming process, but with enough practice, your images start to feel more natural than when a computer decides how the blend will end up looking. And all without those unsightly haloes of automated tone mapping.

Can we do without?
There was a time in the late-2000s when HDR photos were all the buzz. Everyone wanted over-the-top processed images for that grungy feel and these images won prizes and popularity contests. However, you can create more natural-looking results with the same techniques, or images that are just as grungy, with one shot. But style changes. In most cases, modern cameras (especially those fitted with a full-frame sensor) don’t even need the expanded range of multiple exposures.
We can also shoot silhouettes. Especially against a bright red setting sun, there’s nothing wrong with pure blacks in any given photograph. Lower dynamic-range images can actually look more graphic and expressive as a result.
But don’t forget that we can’t actually look directly into the sun. Overexposed images in which the highlights are clipped can only work well if you can’t discern any detail with your own eyes.
Pro tip: Keep the sun as the brightest part of the image and your reflections darker than what they are reflecting.

Why is this useful?
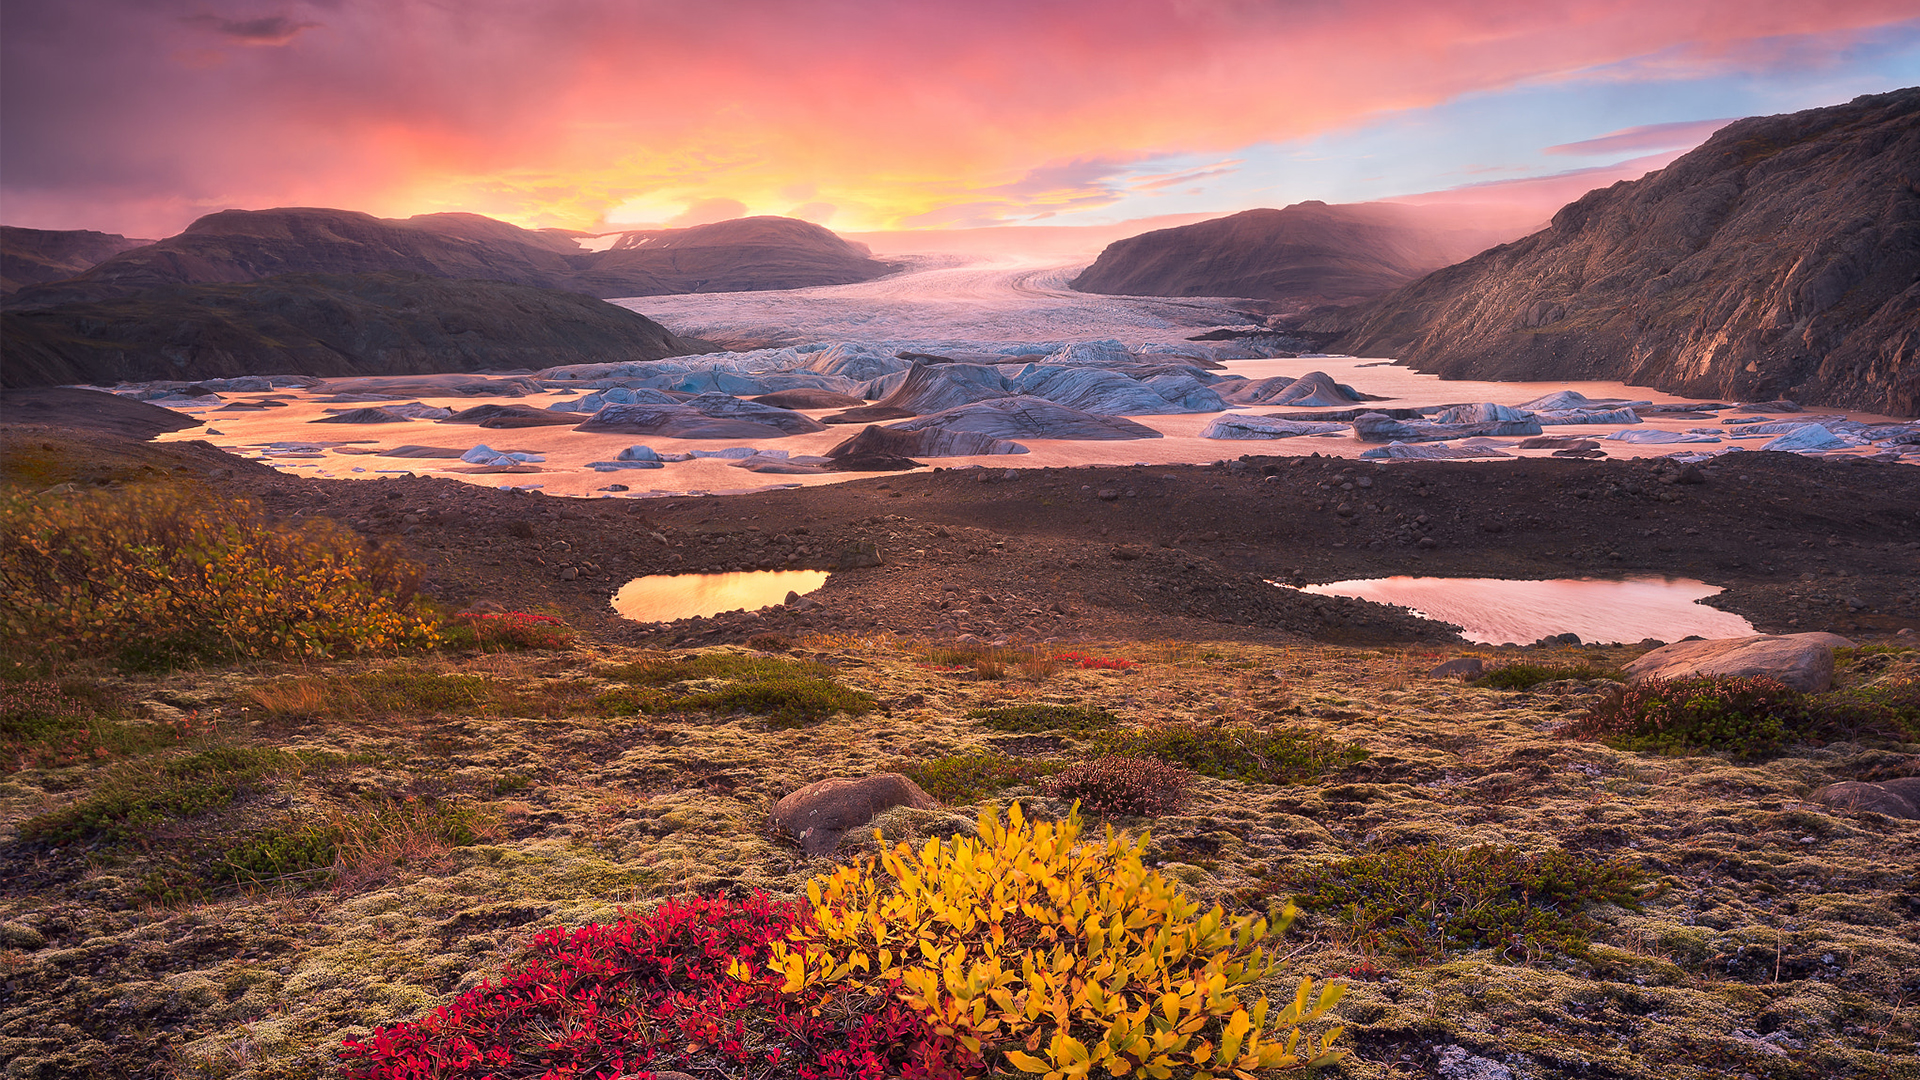
Personally, I only use multiple shutter speeds when the sun is out and overexposes a large area of the sky. In this example though, the sun is only pierced through a small hole in a heavy bank of clouds in the distance, shining directly on a snow-capped mountain. If I had exposed for those highlights, my foreground would be very dark. Brightening that foreground would have introduced noise in the shadows, and that’s something I don’t want.
3. No noise in your nightscapes by stacking
No, we’re not discussing focus stacking again. This is entirely different. The technique only works when every parameter is the same: camera settings, focal length; the whole enchilada. Even the temperature of the camera should be the same for the best results. Stacking works by calculating a difference between two or more images and comes directly from the field of astrophotography. Of course there isn’t just one method out there—that would make things easy!

The easiest method is averaging. After aligning the stars or foreground, depending on where you want your noise reduced, you could set the bottom layer to 100% opacity. The next would be set to 50%, the third to 33% and the fourth to 25%. So that’s 100 divided by your layer number, rounded to whole numbers.
There’s also the Kappa-Sigma Clipping method, the Median method, and a couple of methods that use more complex algorithms, but they all work to achieve the best result of a given set of images.

Can we do without?
During the day, yes. I’ve tested noise reduction methods before in this comparison, including two methods for stacking images. But there’s simply no alternative to the results of stacking if you’re an avid night photographer. As you are increasing the signal-to-noise ratio with each subsequent image you add to the stack, you can extract more detail from highly diffused areas of an image. Say, for example, the Milky Way, or our neighboring Andromeda galaxy. That’s different from how noise reduction works in Lightroom or Noise Ninja, as they get rid of the smallest pixels, based on what’s in the area around them.
Can’t we just extend the shutter speed to a couple of minutes instead? Well, the Earth is rotating, so your stars will appear to trail. Also, a longer shutter speed will warm the electronics of your camera more. That results in a different kind of noise known as thermal noise, which is even more difficult to correct.

Why is this useful?
Less-noisy images have the ability to tell more compelling stories. And less noise also means that you can print larger before random noise becomes an eyesore.
4. Large backgrounds through focal-length blending
When you venture off into the wilderness, it’s sheer majesty you want to capture: sprawling foregrounds and epic mountains. It’s the scale of a given landscape that we all want to share.
This technique is best used with a single-zoom lens, such as the fabled Nikon 14-24mm. I use the slightly sharper (and cheaper) Tamron 15-30mm for this.

First, you shoot at the lens’ widest focal length for the foreground. Expose as you wish.
Then shoot for the most distant subject, and let it fill the frame by zooming in. Think of where you want to blend the fore- and background before you do and make sure there’s enough overlap to accommodate this.
Shoot an extra shot for the sky if you want. It’s an easier blend at the same focal length, but you can go wild and shoot wide again—it’s lot of work in post, though.

Can we do without?
That’s entirely up to you. I can imagine that this one is taking two steps too far for your taste. Our eyes aren’t cameras. The visual cortex of our brain builds up an image as we scan the landscape, piece by piece. This is to show that you can recreate the scene and capture its splendor in 2D.

Why is this useful?
It’s mostly beginners who have trouble with choosing something in a scene and selecting the best part of the landscape. It’s the reason why I teach to use a longer lens. Call me a hypocrite, but I can’t choose either. I love that enormous foreground when I take an ultra-wide and move it close to the ground. But as soon as I do; gone is the giant mountain or glacier in the background.
5. Dramatic mountains with perspective blending
Ever heard of the tilt-shift lens? That’s the perfect tool for the same results as before, at the same focal length. But don’t go spending money just yet, because you could even perform this next one with a single prime lens.
I brought up the tilt-shift because large format photographers like “Uncle” Ansel would have been all-too-familiar with what I’m about to tell you. You wouldn’t want to do portraiture with an ultra-wide-angle lens because faces look stretched, right? That’s a good thing, considering this technique. In perspective blending, we’re using the distortion at the edges of the frame to recreate large mountains, while still having a bit of sky above them.

Can we do without?
With a tilt-shift, you could do this in one shot, but the resulting foreground would not be as wide. You could compensate by tilting the lens upward and shifting it down, but then the mountain looks smaller again.
Why is this useful?
Again, perspective blending is one of those techniques that uses multiple shots to capture a three-dimensional space in two dimensions. It’s useful because you can do this with a 14- or 18-mm prime, without breaking the bank.
Bonus: Doing it all
When you’ve learned all of these advanced techniques individually, you can combine them to make spectacular images. Ryan Dyar and Ted Gore, for example, are adept at combining multiple exposures with stunning results.
Personally, I only take multiple shots when the results are more than worth the effort. There is this one instance in which I could not have shown you the same image, would I have exposed it once.

Because the northern lights are a dynamic display (especially during active conditions or geomagnetic storms), it’s best not to drag the shutter speed. Longer shutter speeds than 10 seconds just smear out the structure of the aurora.
I did have the benefit of stormy conditions, so the foreground lit up nice and green. No need to go higher than ISO 3200. That cut the amount of shots to reduce noise in half, compared to the usual ISO 6400 before I learned that those ISO values should not be used.
So we’ve got an ISO of 3200 and a shutter speed of around 10 seconds. That calculated to an aperture of f/2.8: Wide open. It suddenly became quite the challenge to get the foreground sharp enough, so I focus stacked the foreground, while stacking the night sky to reduce noise, using the average method.
As for the perspective; I finally threw in a shot that was more zoomed in to make the snow-capped mountain in the distance appear as large as it did in the field.
Have you tried any of these tips? Share your results with us in the comments below!
You Might Also Like These Articles:
- 23 Landscape Photography Tips From A Pro
- 8 Posts-Proecssing Tips For Creating Beautiful Landscape Photos
- Everything You Need To Know About Filters For Landscape Photography
- Tutorial: Focus Stacking For Landscape Photography/u>


Leave a reply