
Cover photo by John Wilhelm
Selling your images on 500px Licensing opens up limitless possibilities. Not only will you be able to get paid for your work, but your images will become visible to a creative mix of art directors, magazine editors, web designers, and publishing houses around the world.
When submitting your photography for commercial licensing, you won’t know the end usage of the image. The royalty-free license covers a very broad range of uses from web, brochures, book covers, and magazine articles. We want to provide the buyer with the highest-quality photos to represent you in the best light possible. If there are technical flaws, and the buyer wants the image for high-end or large scale print material, your image may not meet our minimum quality standard. Sharpness of focus, wide tonal range through proper exposure, noise reduction, and prudent use of creative filters are all essential.
Viewing your image
Always view your image at 100% zoom. At 100%, you can check for sharpness and any technical or quality issues. As simple as this sounds, it’s one of the most overlooked steps.
The importance of your histogram
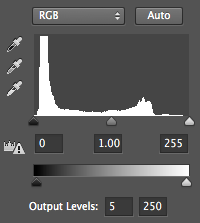
Check your highlights and shadows. If they are too dark or too light, consider reprocessing your files. Be mindful of exposure and contrast. You want to avoid any extreme ranges. In the example levels slider above, the photographer has pinched the shadows and highlights by 5. Your camera’s histogram shows you the tonal range from shadows to highlights. A histogram will show if the image is being under or overexposed. The darkest tone is 0 and the brightest is 255. While processing out your file, a general guideline is to not have your shadows go below 5. Only specular highlights or a light source should have a maximum reading of 253. You can make these adjustments in post-processing using curves or levels adjustments.
When it comes to assessing the quality for commercial licensing, there are some common technical issues that our content reviewers often encounter. Read on!
1. Dust on the sensor
Sensor dust shows up on your image and should be retouched before submitting. A client would prefer to buy a file where they don’t have to spend time retouching something as basic, but noticeable, as dust.

To avoid this scenario, be careful when changing your lenses. Always be aware of your environment and avoid wind, dirt and dust.
Mirror dust is visible when you look through your viewfinder, but sensor dust shows up in your image file. Be extremely careful if you clean the sensor yourself – better yet, get a professional to do it for you! If you do find your files have dust, please spend the time on retouching the image.
2. Using creative filters and HDR
HDR or High Dynamic Range must be used with caution. HDR can cause a ghosting effect, noise, extreme color saturation, and can make the overall image too soft. Be especially careful using HDR when there are people present as skin tones often become too saturated and discolored.
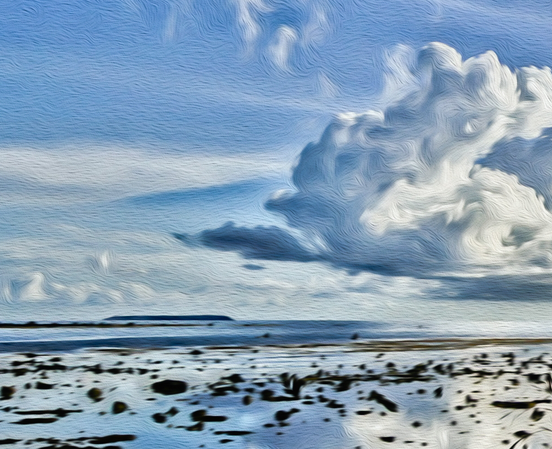
Below are some extreme examples of technical issues seen with HDR filtering when viewed at 100% zoom (magnification):


Filters can produce fun and interesting effects, but be careful not to make the image more about the filter than the content. Don’t limit the sales potential of your image by overusing filters.
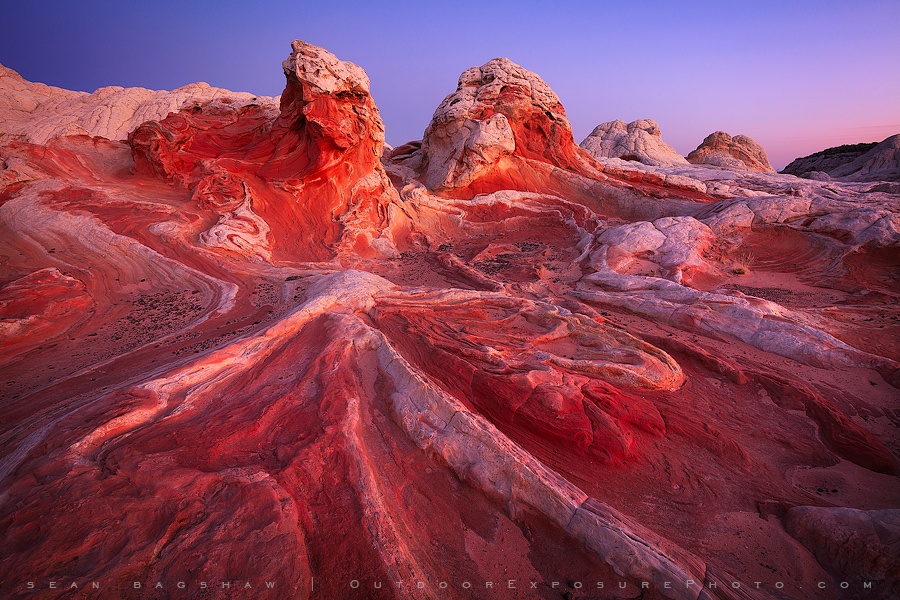
Now, below is a great example of HDR done well. Beautiful tones, no loss of detail, and the right amount of sharpening:

3. Chromatic aberration
Chromatic aberration or color fringing is a line of color, which occurs between a light and dark area of an image. This fringing will show up when the image is printed. You can prevent this by stopping down your lens (use a high f-stop). Avoid using a zoom lens at its maximum length, and use a high-quality lens. You should remove fringing before submitting your file. Additionally, software such as Lightroom now has powerful anti-fringing algorithms that can help remove fringing.

4. Banding and posterization
Why shoot RAW files? By shooting RAW, you are starting with the highest quality your camera allows at the highest bit depth. It gives you a smoother tonal range which helps prevent banding and posterization. Posterization is when there is a lack of tonal range. Be mindful of posterization when processing your files. Watch for excessive saturation and your highlight settings.

Banding is sometimes hard to avoid so be careful with your file adjustments because they might exaggerate the effect. Be careful when adding noise to fix banding.

5. Digital noise and compression
Excessive noise greatly reduces photo quality and saleability. Limiting noise in your images is another reason to shoot RAW. Use a low ISO and avoid low light situations. Underexposing your image may introduce more noise in the shadows. Do not add unnecessary noise to cover up problems. It is much easier to reprocess your file so the problem can be corrected.

Sharpening your file will also sharpen noise. Be careful to look out for this when you are sharpening your images.

Watch for noise when shooting in low-light situations. Shoot RAW if possible. There is software available that is made specially for reducing noise.

Be careful when blurring or adding selective noise. You want the overall grain of the image to be uniform.

6. Over-sharpening
Sharpening is essential with digital photography, but one must be careful with the amount applied. Over-sharpening can cause a haloing effect. You want to avoid “crispy” edges, especially noticeable in trees and any other high contrast areas.

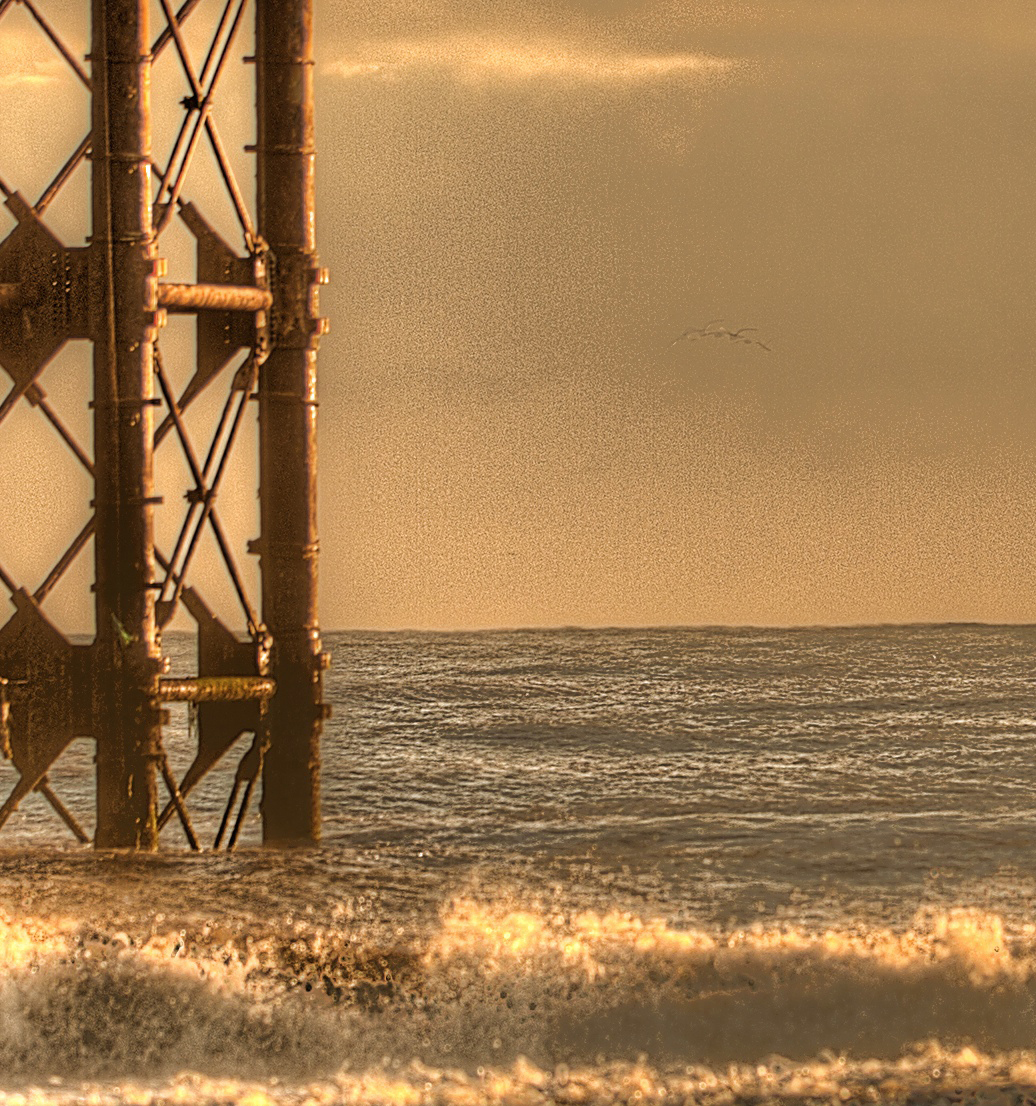
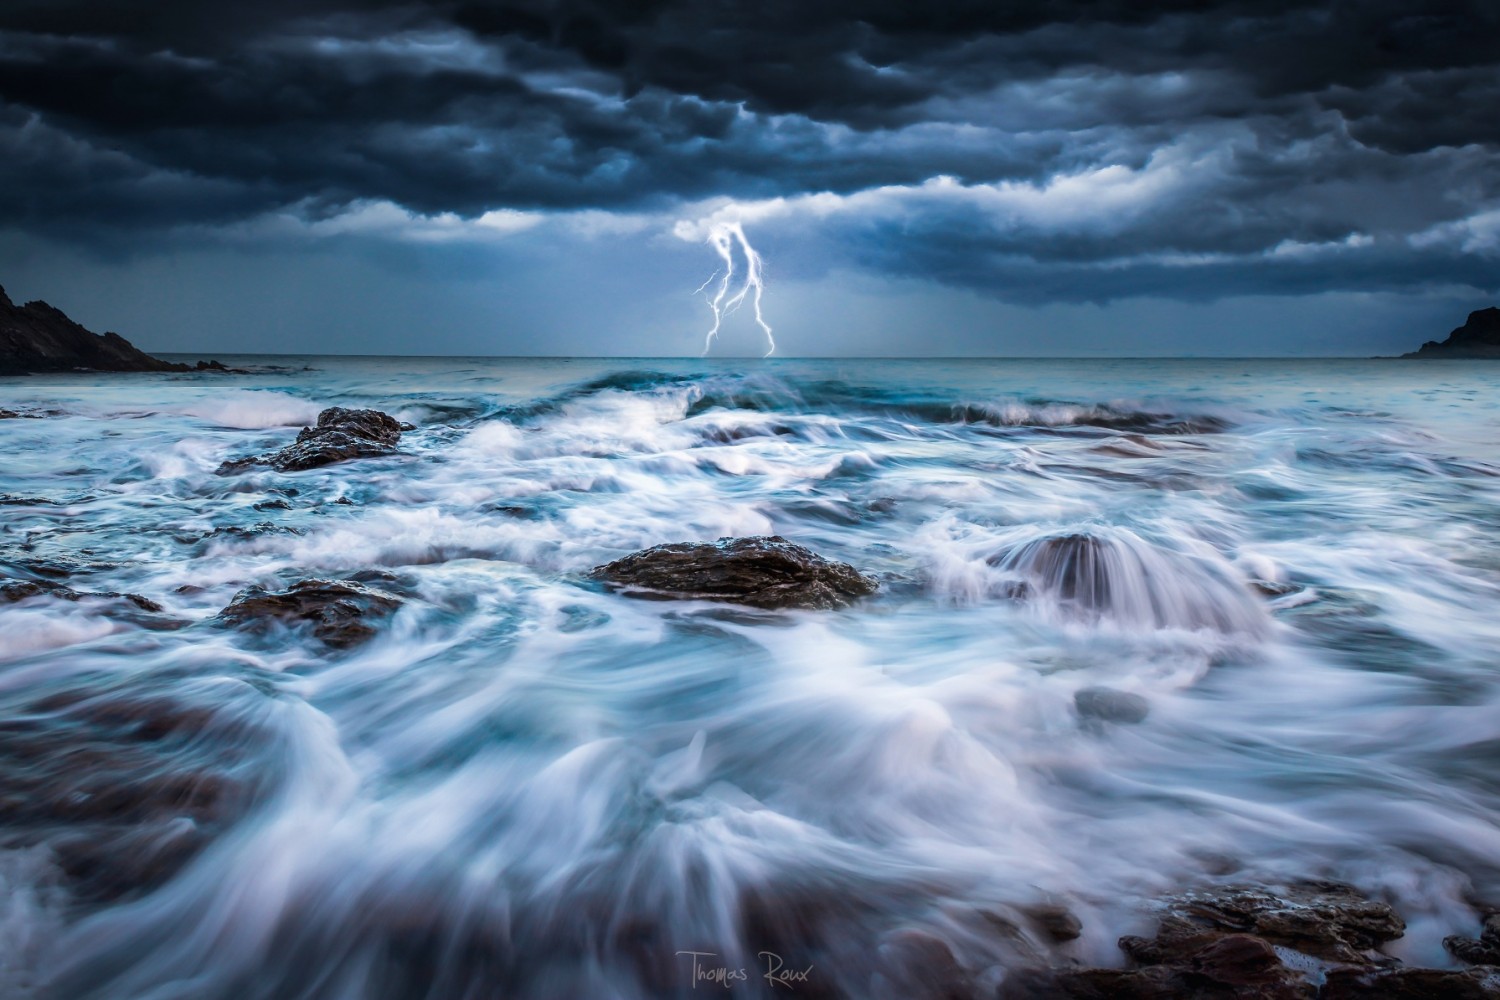
Before and After
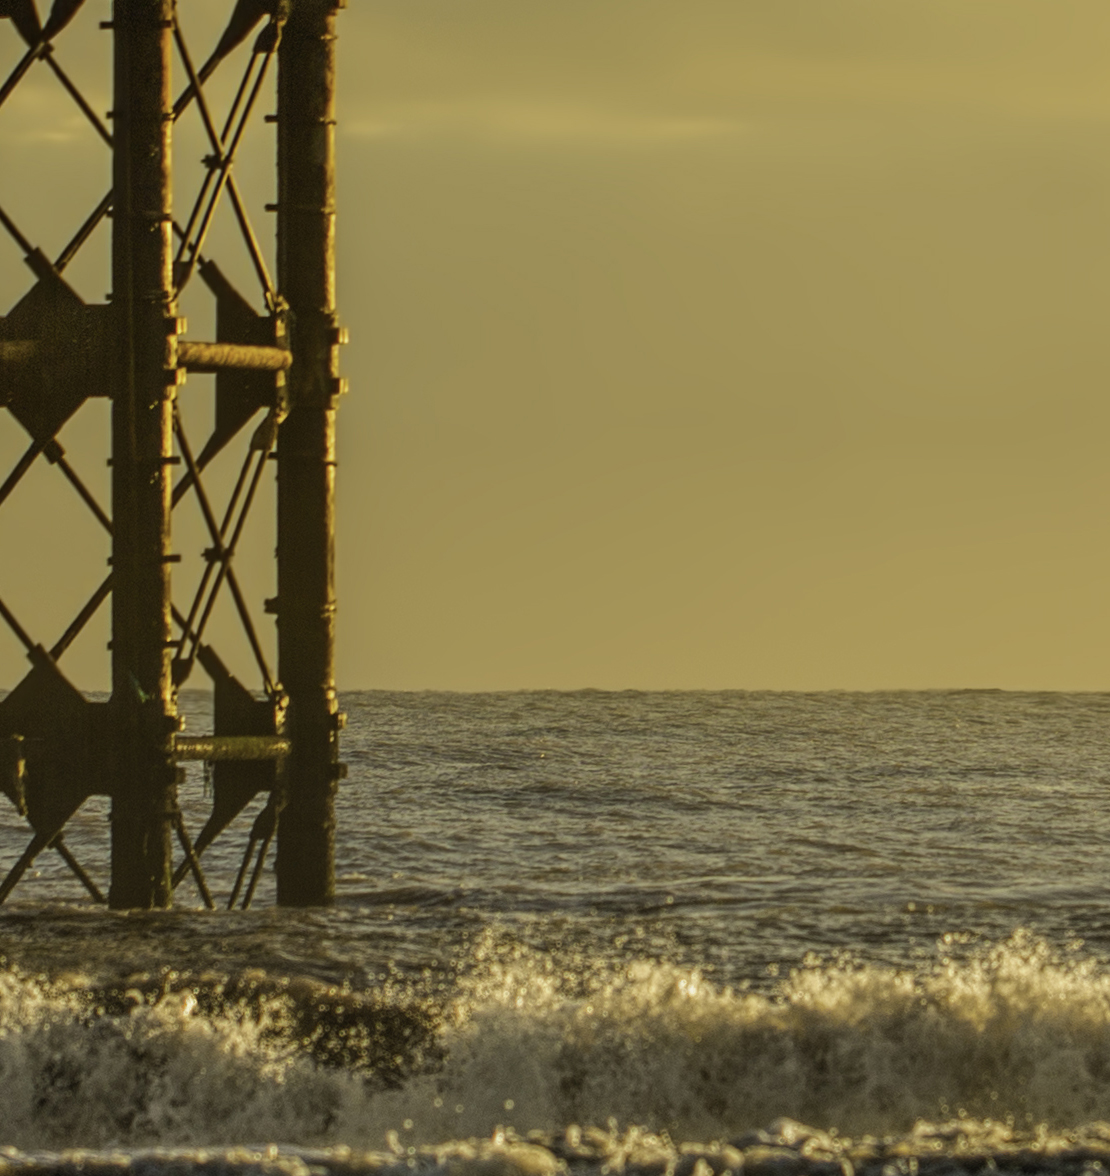
A 500px Editor flagged this file for technical problems. This may have been caused when the file was processed and over-sharpened. Unnecessary noise was created in the sky and the highlights, as seen in the waves. This image was pushed too far, creating overblown highlights and loss of detail. The photographer responded by doing a fantastic job in correcting the issues.
BEFORE
AFTER
The 500px Licensing team is dedicated to helping you pull off that perfect image we believe is in everyone. We’re photographers too, and we strive to create a supportive and rewarding community experience for all our users—buyers and creators alike.
We’re here for you. So when you’re ready, let’s get started!
Need more information on how to submit your photos to us? Read this handy guide.


Leave a reply