Queensland-based Dr. Andrew Peacock is a widely-published adventure and travel photographer, Ted’s Cameras Master, and Zenfolio Pro Ambassador. You can find more of his images on his website. Shooting in extremely cold places can be challenging, especially for your gear. Read on as Andrew shares his personal tips and tricks for improving your cold weather photography. Plus, get inspired with his awe-inspiring nature and travel images!
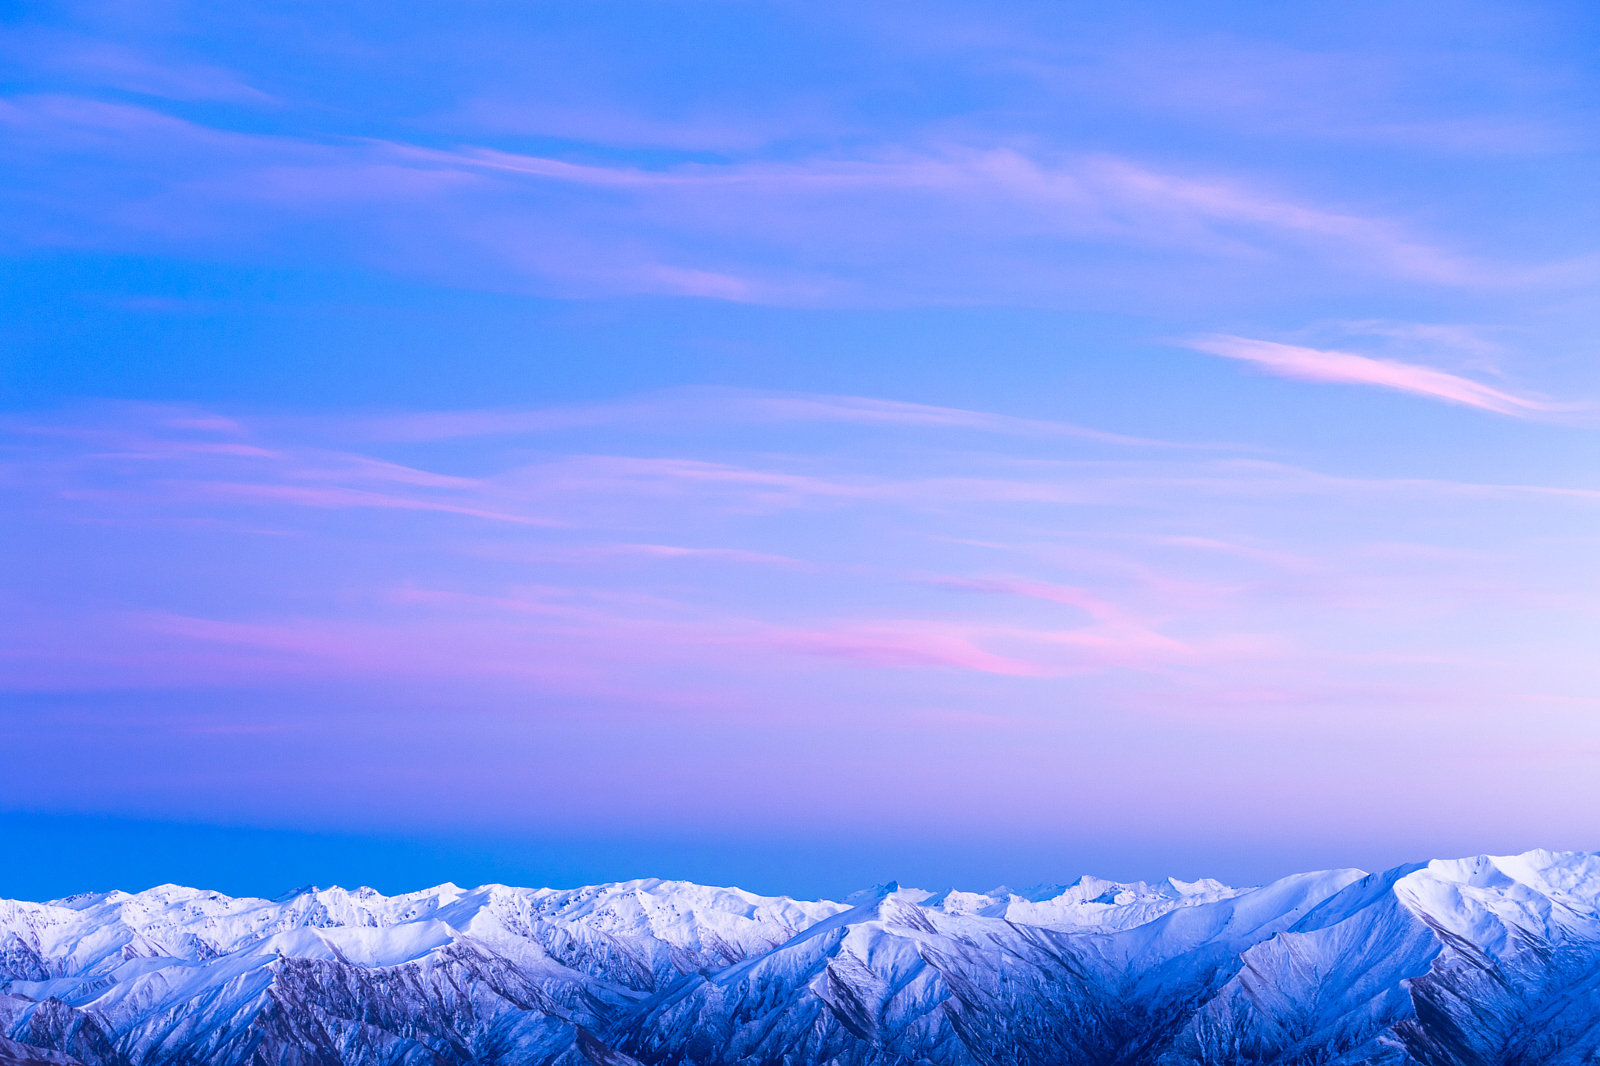
Getting the shot when it is cold presents a set of challenges for the outdoor photographer. But a cold environment is attractive to photograph for all sorts of reasons. Landscapes full of ice and snow allow for abstract and striking compositions. Oftentimes in these pictures, the air is clear and the light clarity can be extraordinary. The photo below that I took of the mid-winter night sky above a snow cave in New Zealand is a good example of this. During this particular occasion, it was definitely below freezing!

Successfully getting that shot meant having control over three aspects of the photo process that is unique to a cold environment:
First and foremost, the personal preparation aimed at the ability to function for a length of time in an extreme environment.
Second, ensuring the camera can function as it is meant to will take some thought.
Finally, the in-camera creative process may need some tweaking in situations, where extremes of lighting contrast are at play.

Personal Preparation
Rarely does a decent camera fail in the cold. It is more common for the photographer to give up because of personal discomfort. As an Expedition and Wilderness Medicine Doctor, I often teach folks about the subject of hypothermia, emphasizing how prevention is far better than the cure. For the photographer handling a cold-metal camera on-the-go, or standing still next to a tripod as the winter night falls, the risk of getting too cold is very real. A drop in your core body temperature can begin to subtly affect your creative decision-making (and the standard of your photos) even before significant signs of hypothermia start to show.
Layers of warm clothing (not forgetting your head), good wind protection, warm fluids to drink, and fuel in the form of high energy snack food to keep the fire burning inside you are all important. Sufficient protection for your precious extremities is just as essential. Good insulating footwear—and most importantly for the photographer—warm gloves that allow for finger dexterity are imperative.

In a really cold situation, beware of water and wind making contact with exposed digits because the time to irreparable freezing will be short. It’s not uncommon for an Everest summiteer to take off down gloves for an all-important selfie on top of the world…only to suffer frostbitten fingers as a result. Gloves that allow for the operation of camera controls are a very useful item. Having said that, if anyone has found the perfect solution for this, please let me know because I haven’t found one yet!

Camera Preparation
There are some simple rules to consider, so that your camera will behave in the cold. Landscape photographer Carl Battreall has spent his fair share of time in the frozen mountains of the beautiful Alaska. He has one golden rule: “Let the camera stay cold, but keep the batteries warm.” When it comes to camera failure, the primary culprit is the battery.
Carl explains, “You don’t want the battery to drain prematurely while in the camera in the cold. It is difficult to warm up to an operating level again in the field once it has died. When really cold [it’s a matter of degrees!] I don’t have a battery in the camera unless I am ready to take a photo.” So I like to keep camera batteries close to my body where they can stay warm. As a battery in my camera drops to around 50% power, I will take it out and rotate it with a warm spare. It’s important to carry spare batteries with you for this tip to work.

To improve battery life, make sure you’re familiar with the camera menu and lens options in order to reduce power consumption. Turn off all camera beep functions. Turn off screen review after every shot. Minimize the use of Live View. Turn off any lens or camera image stabilizer function. Mirrorless cameras require that you use the power-hungry LCD screen for composition; for this reason, many outdoor photographers I know prefer cameras with an optical viewfinder option that allows you to compose without using power.
Cameras and lenses at the more professional end of the spectrum (i.e. more expensive end) are better weather-sealed, and will resist moisture ingress. So it’s a case of “buyer beware” when it comes to what you can expect as a cold-weather photographer. The danger is that your cold metal equipment will form some condensation all over and within itself when brought into a warmer environment. Then, when returned to a sub-zero temperature before that moisture can even evaporate, ice crystals may form and damage the sensitive electronics of your digital equipment. Cameras with better weather sealing are less likely to have this problem.
When I’m on a ship in Antarctica, after shooting outdoors, I remove the camera batteries to take back to a warm cabin, but I leave the rest of my gear in a bag under cover outside in the cold. Similarly, Carl leaves his gear outside his tent when he is up in the mountains. He also suggests putting the camera in a ziplock bag to help keep condensation from forming on the camera.

The Photographic Process
Snow and ice in a scene force creative decisions to be made by the photographer because there are often extremes of contrast. The bottom line is that we want the snow (and other elements) to look ‘right’ in the final image, and to include whatever detail there was present in the original scene.

Our eyes can see perceive detail in shadow and in bright areas within the same scene that our cameras cannot. What the camera can record is represented by a histogram which is a graphic representation of the dark to light spectrum of light (from left to right) captured for each photo. Find the menu option to turn on the histogram on your LCD screen either in live view or on the photo review screen to give you feedback.
The lightest part of your photo, snow or white ice, will register on the right of the histogram. The key is to get that edge of the graph to extend to the far right without ‘peaking’ beyond what the camera can record in the light part of the spectrum – a tall line will appear on the right if this occurs. Then detail in the whites will be retained. I also monitor this by using a menu setting that causes any over exposed areas to ‘blink’ when I review an image on the screen. Note that I’m now recommending using the LCD screen to review image histograms to help your creative decision making, this will use more power and needs to be considered in the cold!

Importantly an inherent characteristic of camera sensors is that there is more tonal detail able to be recorded to the right hand side of the histogram than the left. Any detail on the left side can’t be as easily recovered by post-production software ‘shifting’ of the histogram without compromising the quality of the final photo. So getting exposure right ‘in camera’ is important. An underexposed file is not the basis for a high quality photo with snow and/or ice as a main feature.
Exposure compensation for a scene with ice and/or snow can be done via a menu function allowing you to override the camera metering and adjust the exposure upward. Given time to set the shot up I will experiment with just how much I increase the exposure and fine tune it based on histogram feedback. Once set then I leave it like that while shooting in that environment. Don’t forget to turn exposure compensation off afterward otherwise you’ll find your next set of photos from a more neutral contrast situation will be way overexposed.

One last important point is that I highly recommend selecting RAW file output rather than jpeg in your camera menu settings to improve your ability to get a great shot from a high contrast scene. Jpeg files have already been interpreted and processed by your camera and if you do make a mistake with the exposure on a unique, one off, shot it’s very difficult to ‘fix’ it afterward unless it’s a RAW file. Of course that means having the time to first learn and then use a RAW file editor like Adobe Lightroom to process your files.

Photography in cold environments can be fun and very rewarding and with careful planning you and your camera will perform flawlessly so get out there and be creative.

To see more of his incredible images, follow Andrew Peacock on 500px, his website, Instagram, or Facebook page.
Leave a reply