Janet Kwan is a Content Editor at 500px and a lifestyle photographer who loves food.
Architecture photography encompasses more than exteriors or real estate. It involves capturing all kinds of spaces, buildings, and details—indoor and outdoor. So we asked Toronto-based architecture photographer Edward Yang to share his top tips for photographing architecture and interiors—from collaborating with a designer to creating a shot list. Read on, and get inspired!
1. Learn as much as you can about the project beforehand so you can get a better understanding of what to expect. This information can help you prepare a shot list, and ensure that you bring all the necessary gear for the job.
2. Follow up with the designer throughout the briefing, planning, construction, and the unveil. All this information gathered will help clarify which highlights to focus on. It’s easy to get lost in the beauty of a space, so prepare a shot list to help stay on schedule.
3. If a composition has a window or display panel, take two photos and stack them together in post. One photo will have the appropriate exposure for the room and the next photo will expose for the light coming from the window or display.
4. Interior designers often suggest to their clients to spend more on things that their hands will come in contact with such as: handles, hardware, surfaces, and textiles. Photograph these at waist height to capture the most interesting details.
5. Always arrive extra early on location to shoot the exterior. This buys you time because you don’t need special access to begin shooting, and everything looks better during the morning golden hour. When the interior designer arrives, do a walk through with them to learn even more about the project and update your shot list.
6. Create a shot list. Every shot list is tailored to the uniqueness of the location. Shot lists are great for keeping me on schedule but I like to allow some time to explore a space and be more creative. This is the pattern I like to shoot in when photographing a room for the first time: wide, tight, vertical, and close up.
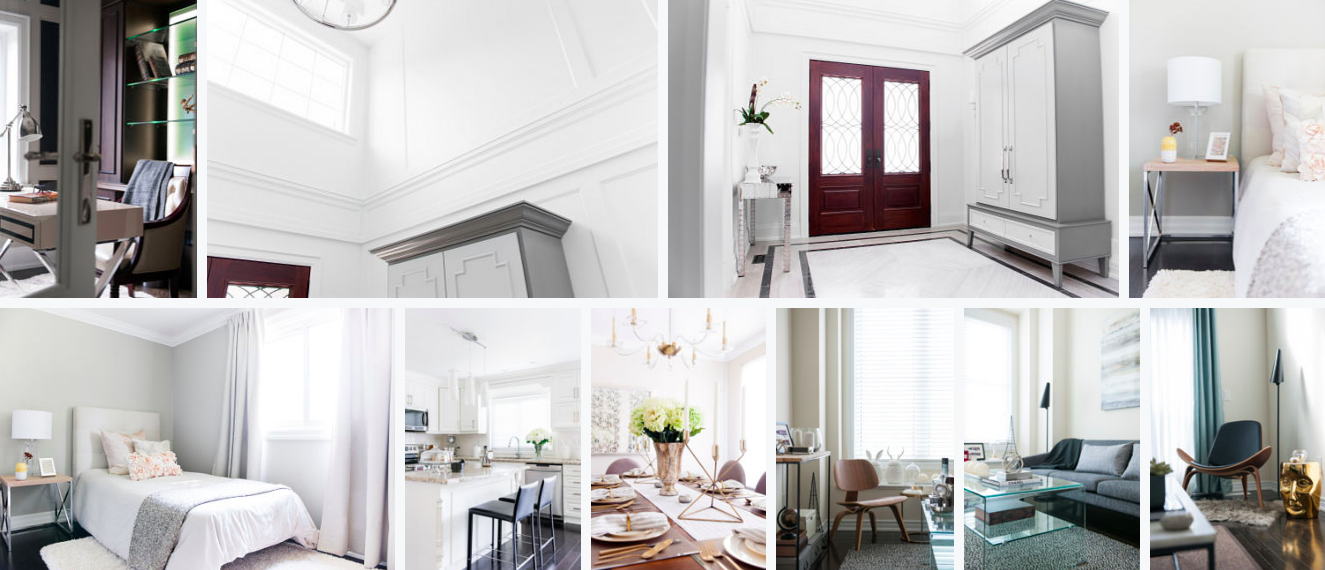
Examples
Wide shot:
Details shot:
Tight shot:
Want to learn more and meet the guy behind these handy tips? Scroll down, and read on for an exclusive interview with the photographer himself as he sheds more light on this niche category of photography.
Interview with Edward Yang
How did you get started with photographing architecture?
I was actively exploring different genres of photography and discovered that I loved photographing architecture. As my interest grew, I began reaching out to people in that industry. Over the years, I’ve been fortunate to work with talented interior designers and have had the opportunity to photograph unique Toronto spaces. One of the most enjoyable parts is the walkthrough with the designer and hearing about the craftsmanship and attention to detail that went into getting a finish just right. It is remarkable to think that these people are able to turn raw material into spaces where some will raise their family or announce revolutionary products.
Which lenses do you find are crucial for your work?
My favorite lenses to bring on location are 14-24mm and 24-70mm. It’s funny how many designers often do the cult-classic Titanic “I’m flying” pose to show me the framing they have in mind. The 14-24mm is able to get this shot every time. I appreciate the versatility of the 24-70mm because I can still shoot in my preferred 50mm range and save time by not swapping lens to get a tighter or wider shot.
How long do shoots take on average?
The duration of each shoot varies from project to project but one thing I found common was that every shoot goes by quickly, especially if the space requires multiple exposures for image stacking in post. Often I have limited time to shoot because professionals need the area to do their job and other times I’m fortunate enough to be able to shoot the entire day.
To see more of his charming and striking work, follow Edward Yang on 500px.


Leave a reply