Meet award-winning photographer, educator, and new 500px ISO contributor Dave Brosha. Based in Yellowknife, Northwest Territories, Dave expertly photographs extreme and pristine landscapes and personal portraits.
In this tutorial, Dave shares steps, tips, and gear for photographing soft and dreamy portraits under the aurora or Northern Lights — at 30 degrees below zero! Brrrr…
Read on, and add aurora portraiture to your list of must-try shots, especially for engagement photo shoots.
The Making Of “A Love
Story For Yellowknife”
by Dave Brosha
One of the greatest joys in photography is the simple act of pushing your creative and technical boundaries. It’s the act of mastering (or at least becoming apt) in one aspect of the craft before taking a critical look and asking yourself, “How can I push this further? How can I make this thing that I captured become even more alive, more real, more memorable?”
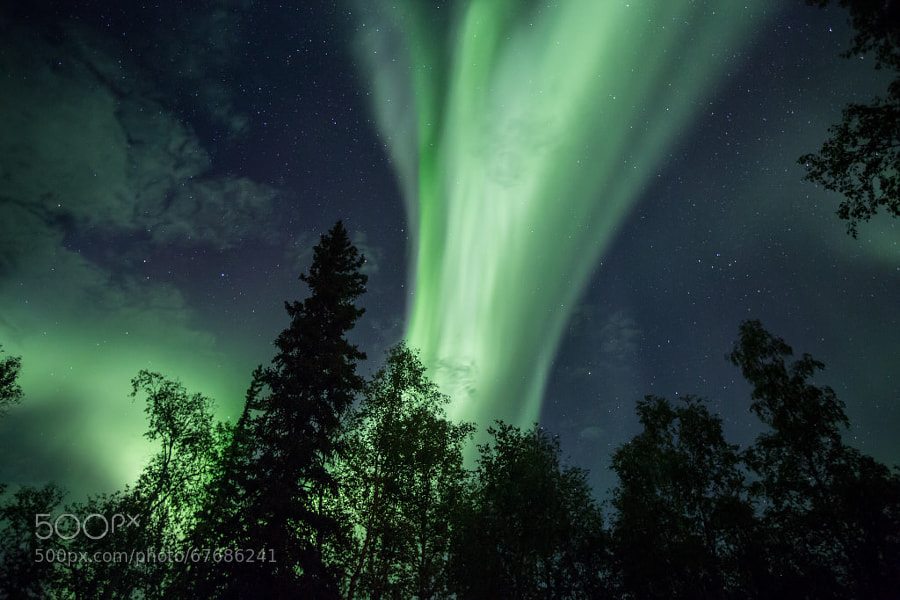
For me, photographing the aurora borealis has, of late, become all about trying to push my boundaries.
I believe that many aurora photographers follow a similar track. At first, you’re satisfied — no, flipping excited — with simply pointing your camera towards a night sky, and ending up with a green streak of wonder on the back of your camera. You don’t even care it it’s in focus. You’re just so excited over being able to translate that surreal glow you see in the sky to memory.
The next stage in becoming an aurora photographer is remembering that you’re actually a photographer. After looking through hundreds of images of blurry green streaks, or the aurora over a blackened foreground, you ask yourself why you’ve allowed the rules of daytime landscape photography to simply go out the window when you’re shooting the night sky. You want to kick yourself for forgetting about a little thing called composition.
So immediately, your compositions get better. Instead of streaks of green with nothing to anchor them to our little planet Earth, you start using all the so-called rules that crotchety-old photography writers and instructors would scream about:
Foreground elements
Rule of thirds
Mirror images
Wow — and just like that, your aurora photography takes a giant leap forward. You even become bolder and break the rules…but only when no one is looking.

Finally, after shooting hundreds and hundreds — if not thousand and thousands of aurora images — you reach a point where everything that you’ve been doing is “nice”, but no longer satisfying. So you ask yourself, “What can I do that’s unique?”
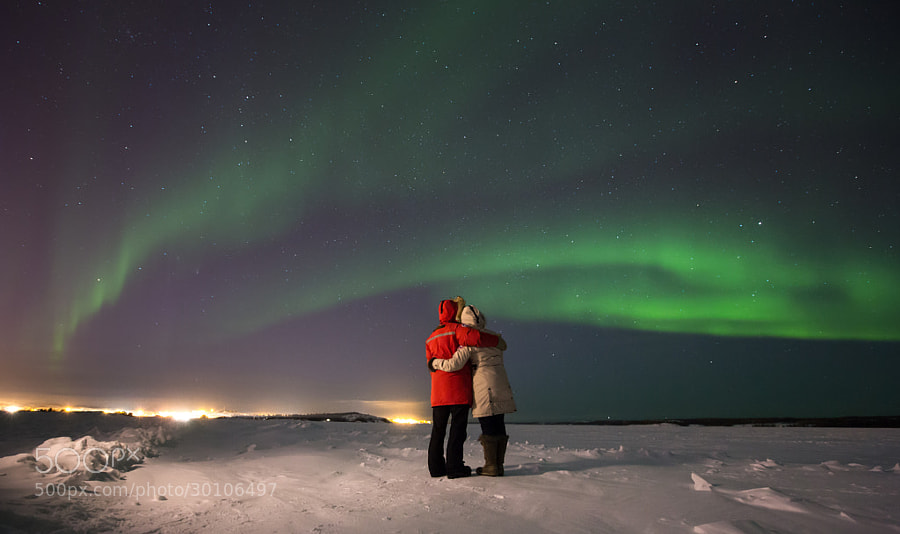
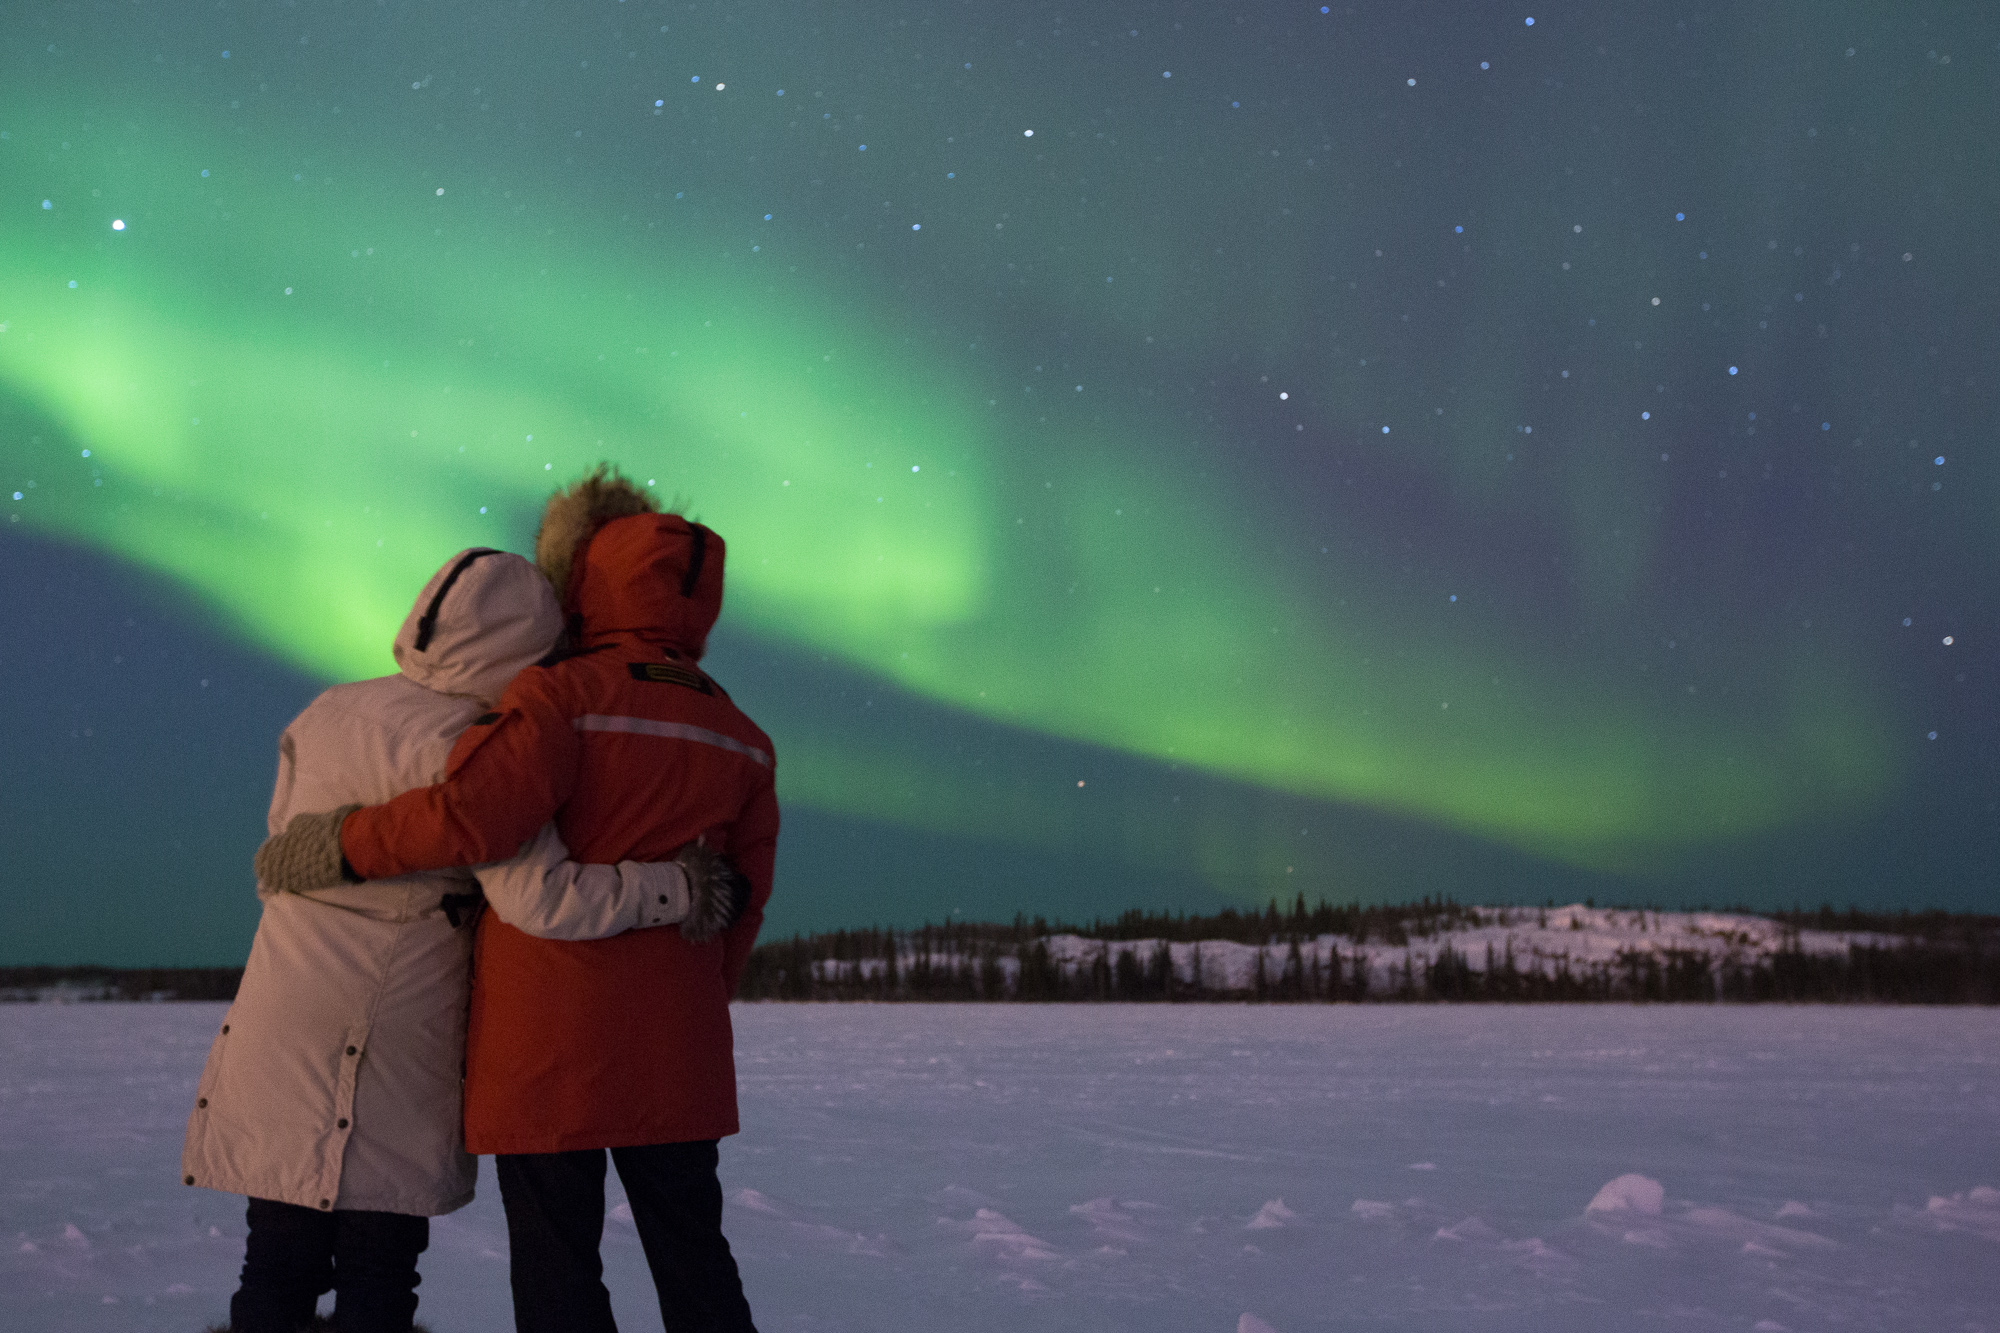
In the late winter and early spring of 2013, I had the opportunity to create an aurora image that was unique. It all started when a couple came to me with the idea of shooting an engagement portrait with the aurora borealis. Over the past couple of years, I had been incorporating more and more people into my aurora compositions, marrying my love of landscape and portraiture. But up until this point, I had primarily stuck to my night portrait weapon of choice: the silhouette.
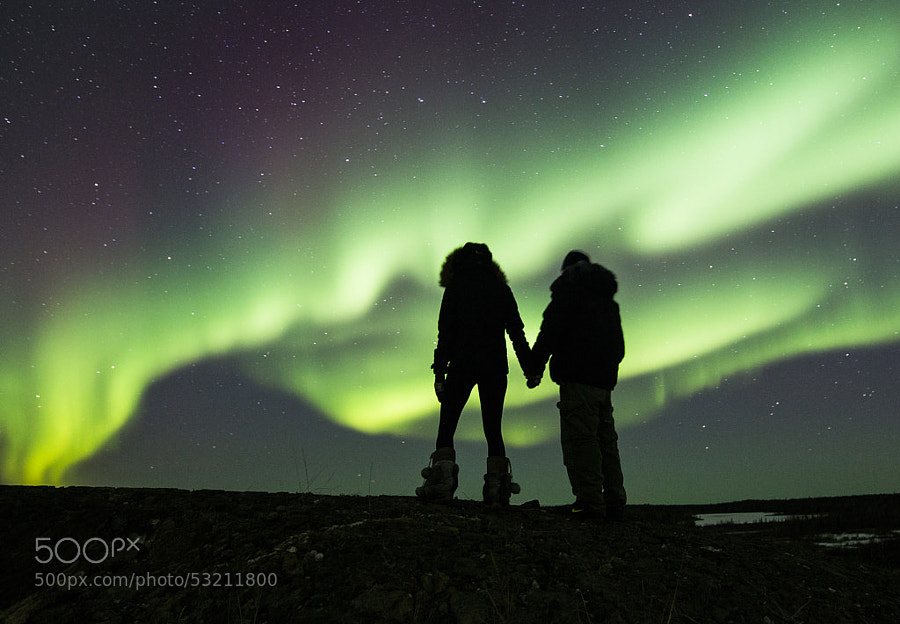
Now, silhouettes are great—I’m a self-confessed silhouette junkie. But there are details that silhouettes fail to capture. By their nature, silhouettes make your foregrounds devoid of color, and sometimes color can be important to a scene.
So for this image, I wanted to push myself from a technical yet artistic perspective. It would be a challenge to capture an image — at night — which will combine a long exposure to bring in the Northern Lights and an image with introduced lighting (like flash). Plus, the fact that I was dealing with temperatures around -30 Celsius (-22 Fahrenheit), added another level of complexity to contend with.
How To Shoot An Aurora Portrait With Lights, 30 Degrees Below Zero
So, how do you create a long exposure portrait with mixed lighting at -30C (-22F)?
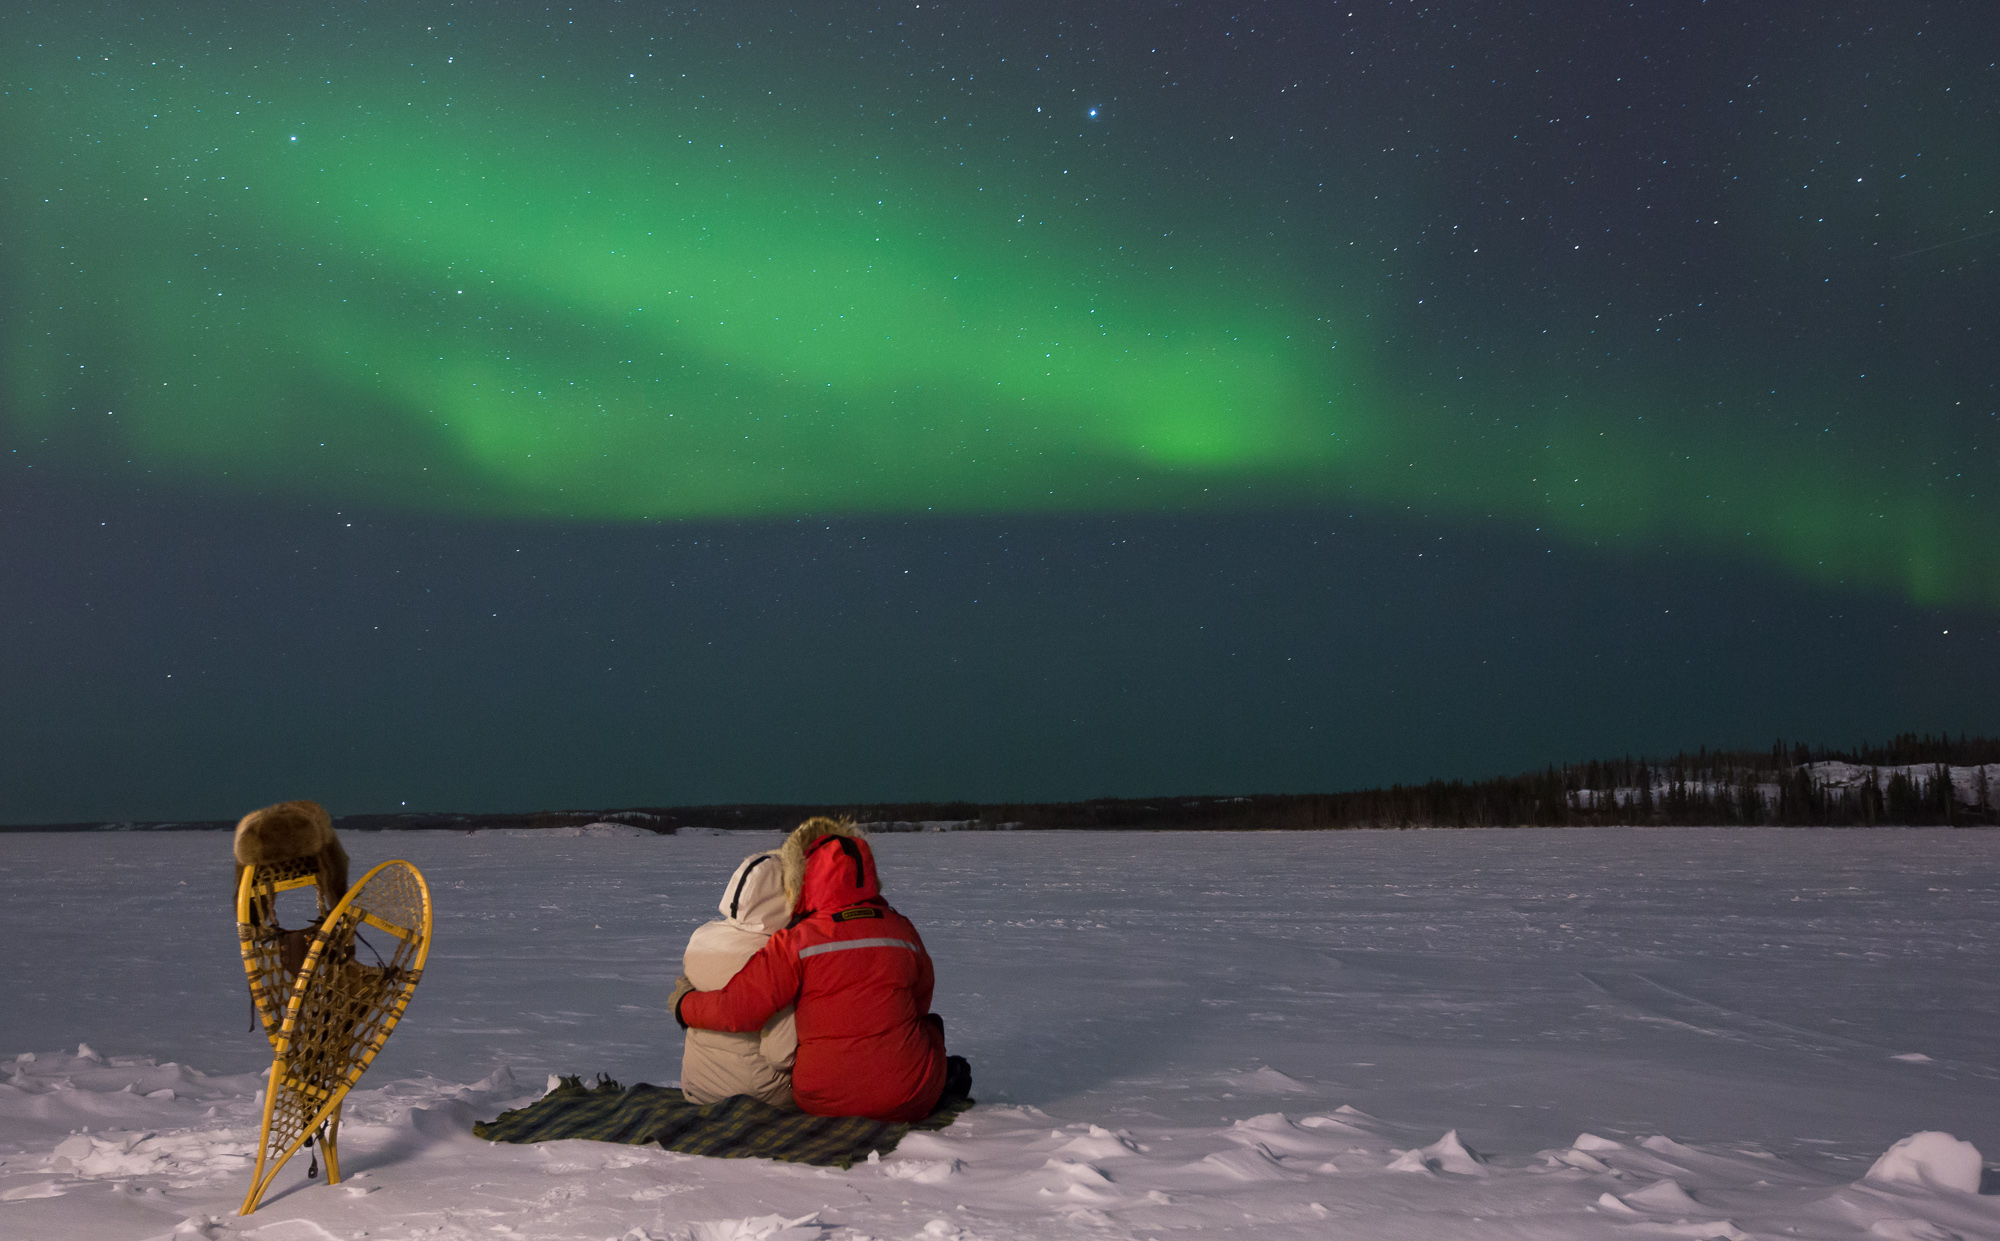
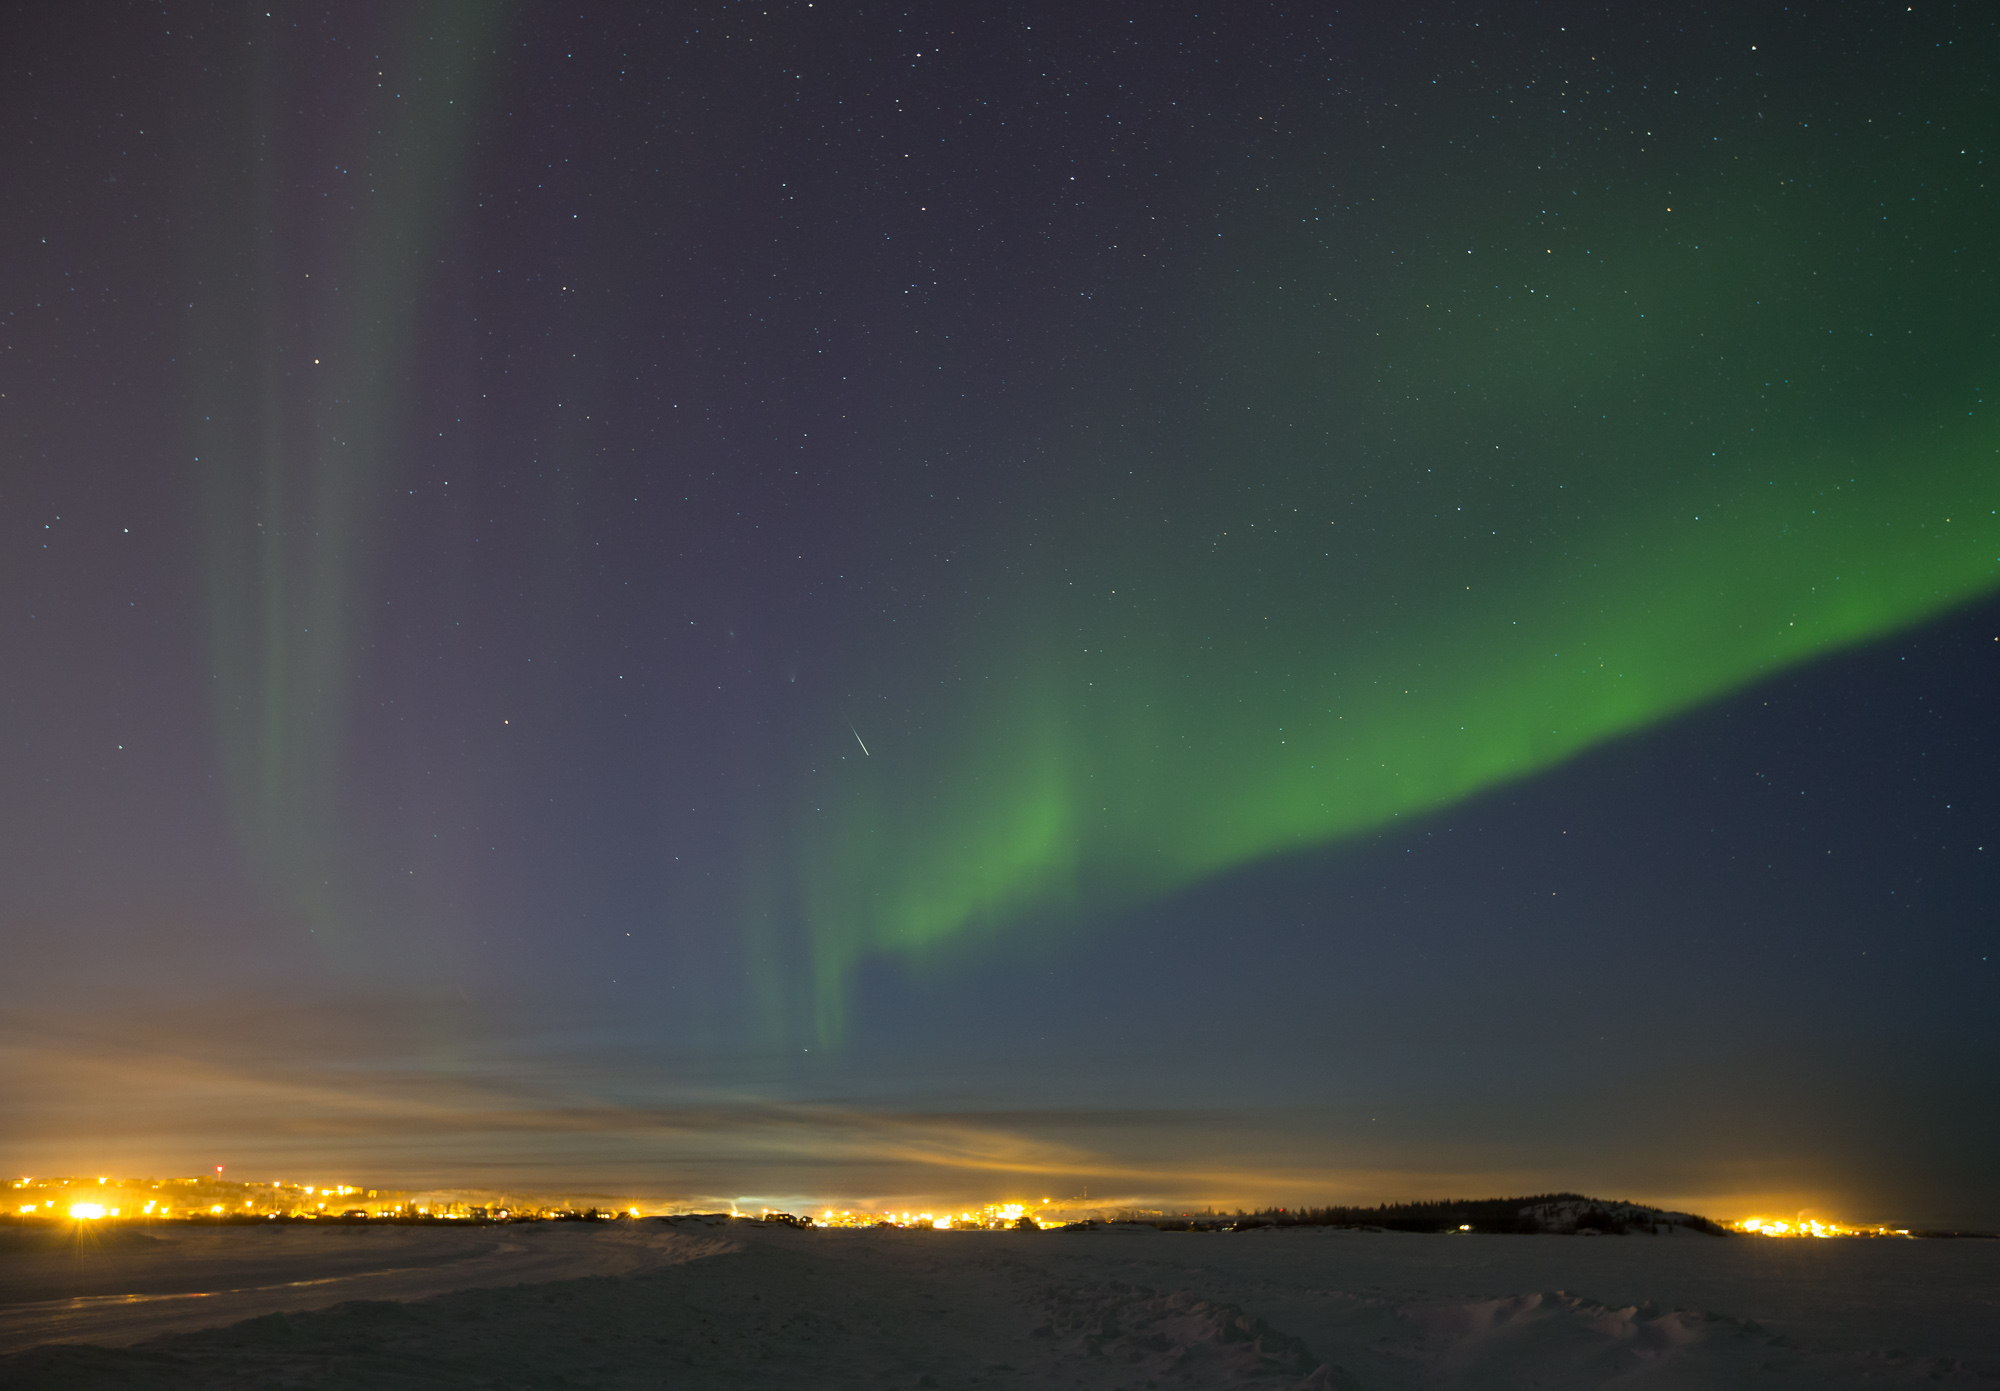
1. Find your scene. This doesn’t apply specifically just to aurora borealis portraits with flash, but sometimes we photographers rush over the most important steps. It can be tough photographing long exposure portraits when you have too much movement. If I had to choose a location with a lot of foreground, trees, and even a bit of wind, I would end up with a lot of distracting, blurred elements in my image. For this image, I wanted a real, clean canvas to work with — where the focus would be on my subjects, the engaged couple and the aurora; the city would be an important background feature. For me, that meant taking to the frozen waters of the Great Slave Lake, which luckily has a winter ice road that’s kept plowed. We were able to drive to within 15 meters of where this image was shot. Aside from composition, the location is very important for matters of safety and warmth. Ever try to take an image with a bunch of lighting equipment at -30C (-22F) after hiking for 30 minutes? It becomes way more problematic. With this location, I was able to keep my subjects warm by keeping them in a vehicle, while I set up and pre-tested everything.
2. Whenever you’re dealing with people and long exposures, eliminating movement becomes very important. Even though flash can freeze motion, it only does so to a point. The stiller your subjects are, the less likely you are going to get “motion ghosting”. My subjects did a fantastic job of staying still for the 20-second exposure time this image took. It took several attempts to nail a sharp image, but that was a minor concern.
3. Expose for ambient. When I’m doing my first test shots, I worry about getting the background or ambient exposure exactly how I want it in my image. In other words, I’m taking a series of exposures to see how much available light I want in a scene.
I do this with daytime photography too. But when you’re capturing the aurora at night — routinely making exposures in the 7 to 30-second range — this is a very important initial step. Aurora borealis requires long exposures and a tripod to be effectively captured within your camera. My base settings when I head out to photograph the aurora are generally around ISO 800, f/2.8; a fast aperture helps prevent extremely long exposure times in the plus thirty-second range, which is important because you start getting noticeable star trails after 30 seconds. My shutter speed, as mentioned, is in the 7-to-30-second range.
This is just a starting point. Of course I’ll make adjustments, depending on factors such as the intensity of the aurora display, whether or not there’s moonlight, whether there’s light pollution in the scene, and so on.
For this particular image, I used settings of ISO2500, f/5, and 20-seconds. Why use a higher ISO when I could have gotten away with a lower ISO and a more wide open aperture? Well, in this image, I had to keep both my subjects and my sky in focus. I needed a depth of field that wasn’t quite as shallow as normal. (For my aurora compositions without people, f/2.8 does the trick because I normally don’t have anything in the immediate foreground. I keep my foreground elements at least 25-30 feet away and focus to infinity, which keeps everything in the image reasonably in focus.) The higher ISO allowed me to shoot with a much smaller aperture than normal.
I also make sure that I have a solid grip on my exposure settings before I expose my portrait subjects — the engaged couple — to extreme temperatures. For this, I had them stay put safely inside a nearby vehicle, while I figured out everything for the photo shoot. This took me about five minutes. It’s not long, but five extra minutes of warmth equals much happier subjects.
4. Consider your lighting. During my first aurora portraiture attempts, I used straight, unmodified flash — initially on-camera before moving my flash off-camera. Although off-camera was a step up in quality (as I was able to control shadow placement), the harsh, direct light coming out of my small flash was just that: harsh. Shot against the night sky background, my subjects certainly “popped”, but not in a good way. They looked like the proverbial deer blinded by the proverbial headlight.
I didn’t have to get too fancy to get better-looking light. This image was shot with one off-camera flash (a Canon 600EX flash), triggered by an unsexily-named ST-E3-RT Speedlite Trigger with a fairly small softbox, 60×60 cm Lastolite Ezybox Square softbox.
As the name implies, the soft box softens and diffuses the light, which is the effect I wanted for this image.
Normally, when shooting portraits of people that involve their face and wanting really soft light, I keep my modifier as close to my subject as possible for the best quality of light. But in this case, I wanted some spread to the light, so that my foreground would be light in a way that somewhat jived with the spread and spill of the background city lights. If I kept my radius of light really small, it would’ve lit up my subjects but they would’ve stood out too much against darkened. While it’s not a perfect foreground spill, it doesn’t unnecessarily pull my eye away as if it looks unnatural.
For power of the light, I am a very unscientific shooter. I rarely meter. I usually take a test shot. If it’s too bright, I make a guess and lower the light output by dialing -1 or -2 into my Speedlite Trigger and checking my screen. If it looks right, then great. If not, I make other quick, minor adjustments.
Aside from the quality and spread of the the light, I also had to pay attention to the color of the light in my scene. I’m referring to the color of the Yellowknife city lights and how it would interact with the color of light coming from my flash:
The light that comes from flash is pretty white.
The light that was coming from the city was fairly orange.
To match the two, I had to change the color of my flash to orange, so I placed a CTO (orange) gel on my flash. This allowed the two light sources to be fairly close in temperature.
So if both my flash and the city lights are orange, why don’t they appear orange in this photo? That’s the beauty of matching your light sources! You can now take advantage of using the tungsten white balance setting on your camera and shift the orange to more of a neutral, whiter color. In this case, I shot in RAW and simply made the white balance change in Adobe Lightroom after the shoot.
5. Be careful with your gear and bring lots of battery power. Plastic pieces snap very easily at -30C to -40C, so I never force anything, like my flash onto my Ezybox coldshoe. Batteries freeze very fast in that kind of cold weather condition. I always carry backups, both for my flash equipment and my camera.
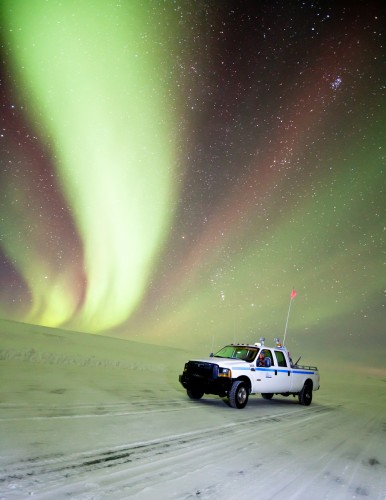
6. Experiment. Don’t be afraid to just go out and play. Experiment. That’s the name of the game and what makes photography interesting. Some of my favorite nighttime shooters, like Paul Zizka are those who go out and obviously approach night photography with the philosophy, “What can I do tonight that’s different from what I did last night?” Try it!
I returned from this shoot with fingers that were borderline frozen. What did it feel like? It’s as if your hands are hollow pieces of driftwood; you can bang them against surfaces without feeling anything until they start to defrost, then the burning pain starts. But I returned with happy spirits.
I love capturing a story in my images. The story that this couple wanted me to capture here was their love for each other, and for their city. At the end of the day, it was mission accomplished.
To see more of his inspiring work, follow Dave Brosha on 500px.
You can also visit his official website and like his Facebook page.
Got any questions for Dave, or similar tips for aurora photography to share with us? Comment below!


Leave a reply