Meet Matt Molloy, a photography enthusiast and budding professional in Canada. You might’ve seen some of his jaw-dropping Impressionist painting-inspired landscapes on 500px. So many people have asked us how to create this technique, so he’s here to share it with us! Scroll down and learn some neat processing tricks with this Time Stack tutorial.
I’ve always been amazed by timelapse photography and the unique perspective of time it gives you. Once I got into photography, it was a natural direction for me to go. The more I explored timelapse photography, the more I realized how versatile it is. Whether it’s the perfect shot (selected from several hundred photos of the same scene), enhanced details and distortion correction (often done in astrophotography), or removing elements from a scene (like cars or people), you can get so much out of a timelapse. Last, but not least, my favorite is often what I call “time stacking”. This technique of layering multiple still photos has been used for years to create “stars trails” from timelapse sequences.
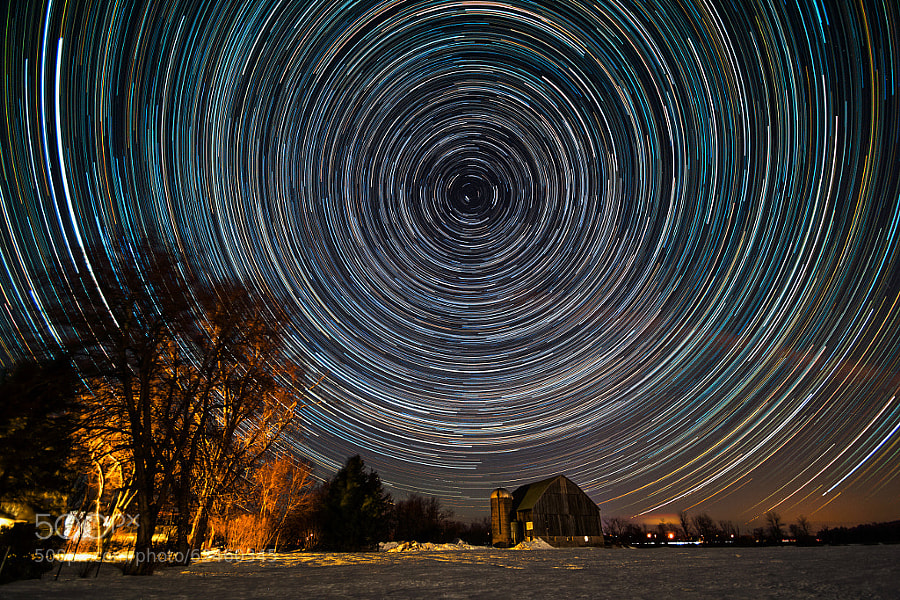
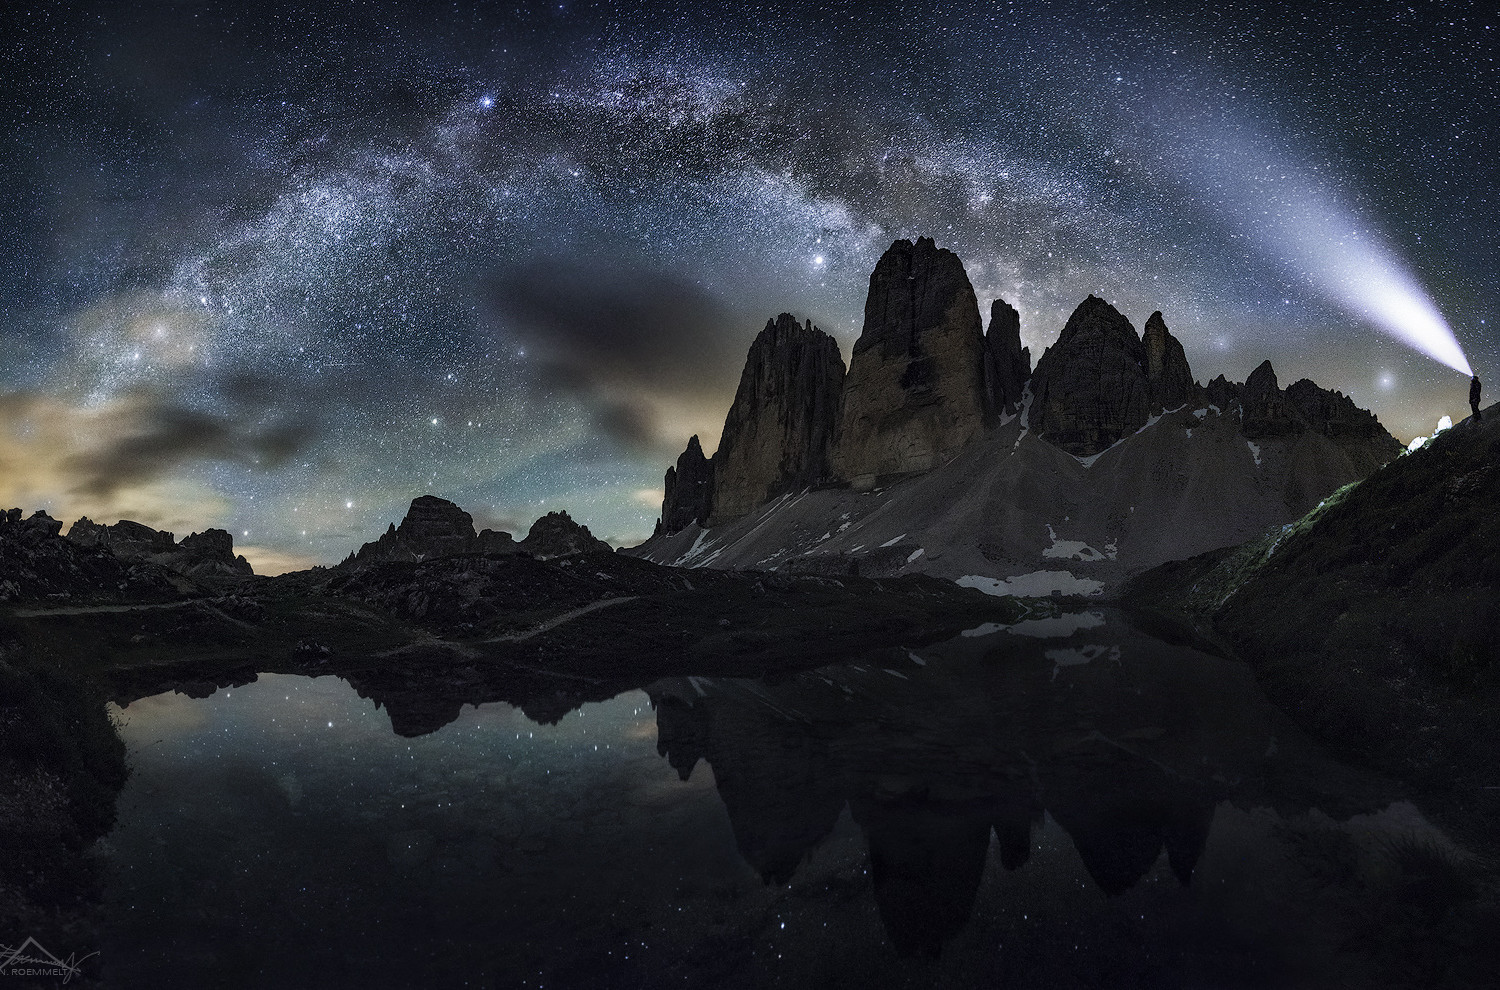
Below is an example of a “star trail” image I created from a series of 305 photos.
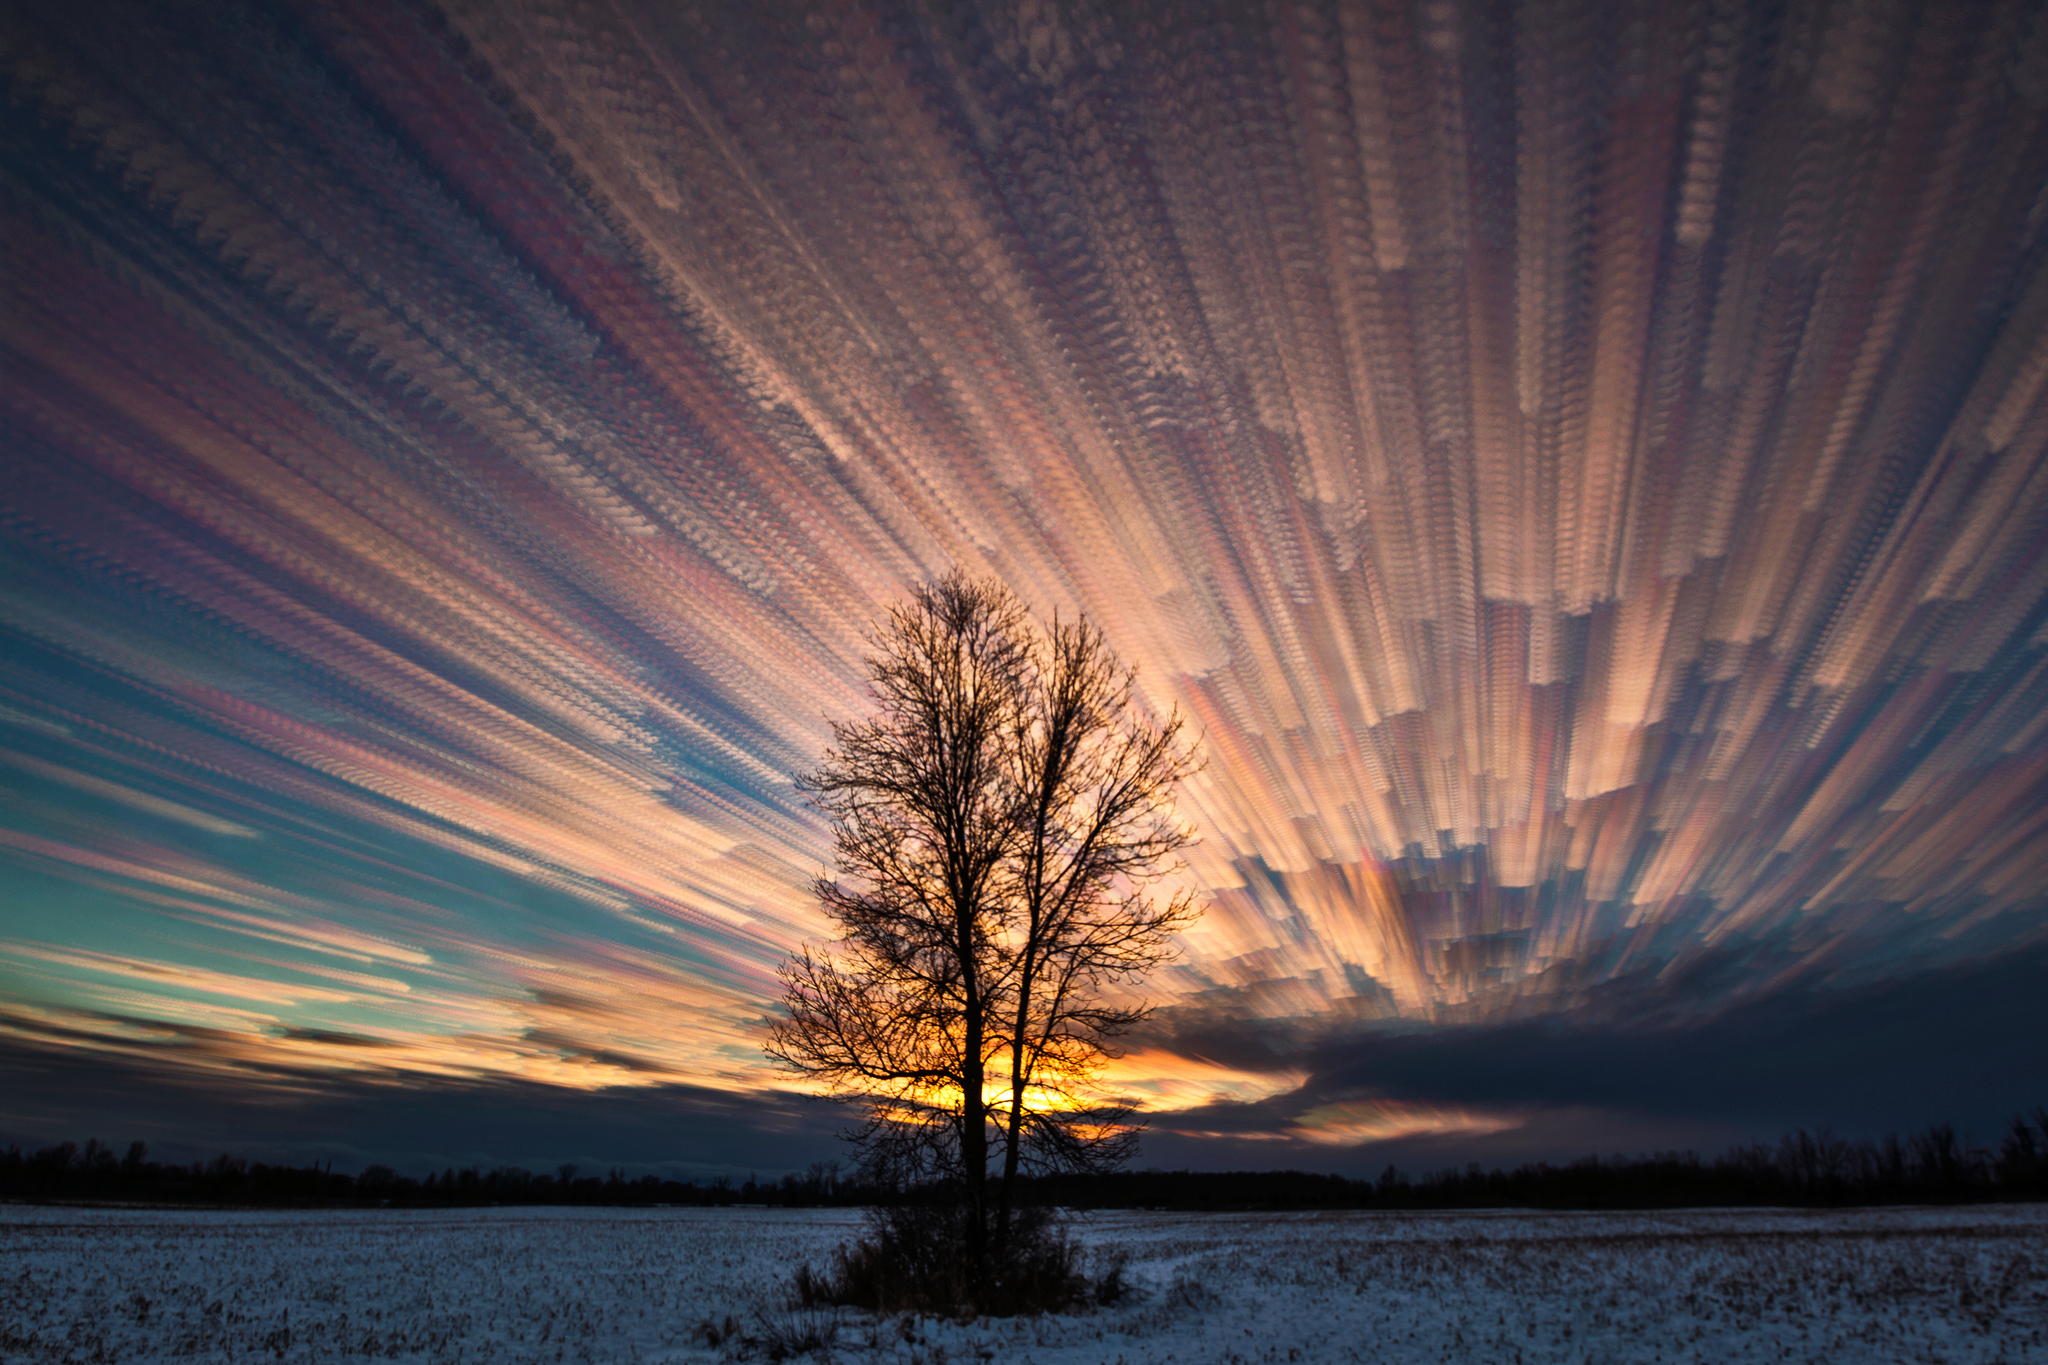
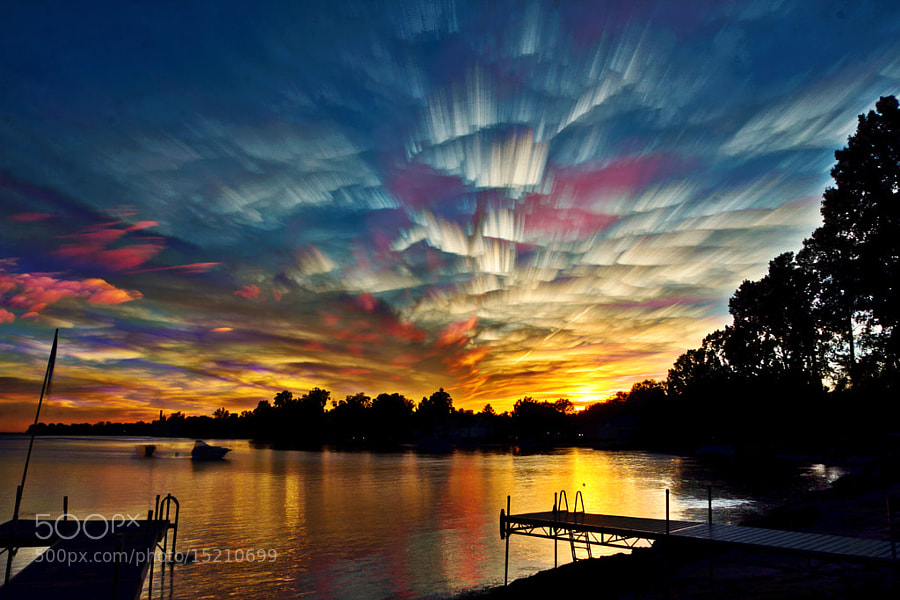
Once I made a few star trail images, I wondered why I’ve never seen this technique used on daylight timelapses. So I tried it. And after a little tweaking here and there, I was astounded by the resulting images! They are kind of like a super long exposure, showing a large chunk of time in a single image, which is very much like the Impressionist movement that some clever painters came up with around the year 1870.
Below, you’ll see my very first attempt at a daylight time stack.

GEAR
Here is a list of equipment you’ll need to make a time stack image:
1. A camera and an intervalometer An intervalometer is a device to make your camera take pictures repeatedly at a given interval. If you have a Canon camera like I do, there’s a good chance that you can download free software called Magic Lantern that gives you lots of new features, including an intervalometer built right into your camera. Perhaps there’s a similar software for other brands of cameras. If not, most cameras will be able to use a remote control that includes intervalometer function. Click here to view a bunch of different remotes.
2. A stable tripod, or something to fix your camera in position while it shoots multiple photos. The sturdier the better! I’ve found that a weight on a rope attached to the center of the tripod helps a lot when it’s windy. I am speaking from experience here! It doesn’t take a lot of wind to blow your tripod over, sending your precious equipment for costly repairs. I use a good size stone block with a hole drilled through it hung on the tripod, just below my camera.
3. Photo editing software. I use Adobe Photoshop. So that’s what I will demonstrate in this tutorial, but I’m sure there’s lots of other software that can achieve the same effect. I’ve even seen mobile apps that do everything you need to make a time stack.
4. A little time and patience. Photography aside, I think most of us could use a little of both.

TIME STACK TIPS
Here are a few things to keep in mind regarding timelapse source material for creating great time stacks:
1. Think of your source and subject material.
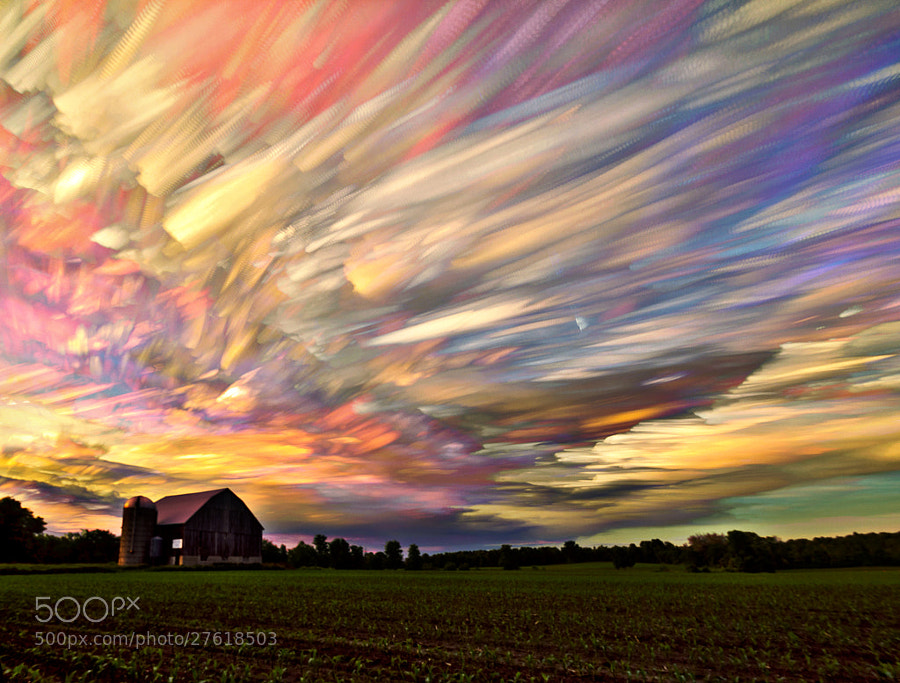
I have found that my best results come from shooting a scene which contains both fixed and moving elements. For example, a field with a barn and clouds moving overhead. A sunset thrown in the mix makes for some beautiful, colorful, smeared clouds.
2. Set your exposure levels on the brightest moving elements.
Your exposure levels play a significant role in the successful creation of a great time stack. Set your exposure based on the brightest moving elements. For example—with bright moving clouds, expose for the clouds. Aside from the sun, the clouds are usually the brightest part of my photos, so I use them to judge my exposure levels. If they are overexposed your time stack will have pure white streaks in the sky. Add too many of those together, and you’ll have a solid white sky.
3. Take note of the interval between shots.
Figure out the speed things are moving. You don’t need a radar gun. Just take a few test shots (two or three), and take note of the interval, which is the time between shots.
I’ll use clouds as an example, but this applies to any moving or changing elements in the timelapse. The speed that the clouds are moving along with the interval between shots can drastically affect how a time stack will look. For smooth-looking, painterly strokes made by the clouds, you’ll want to keep the distance that the clouds travel very short from one shot to the next. If the clouds are moving fast, you’ll want to use a shorter interval between shots.
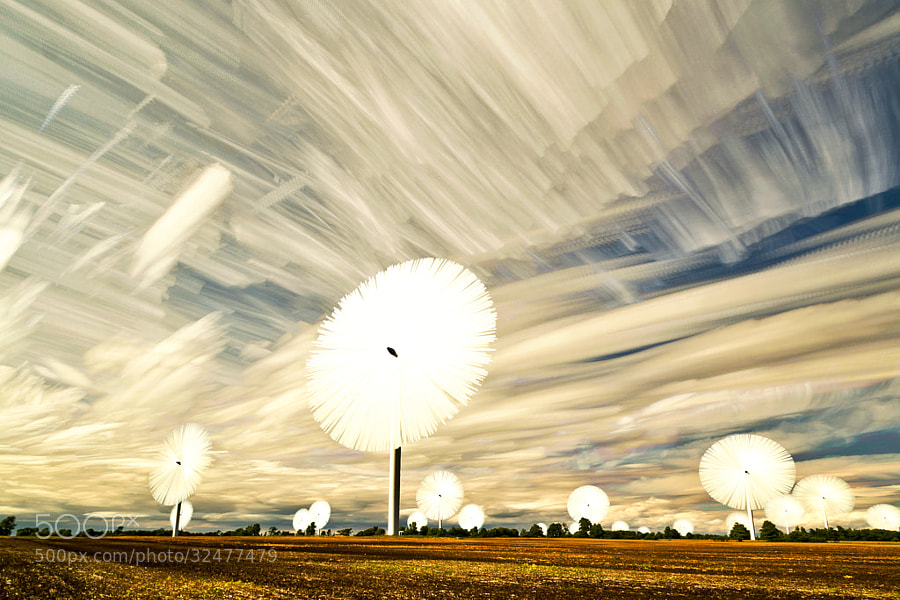
If the clouds are moving slow, you’ll want to user a longer interval between shots, so you don’t end up with a ton of photos that show little movement of the clouds. For a different look, you can set an interval that allows the clouds to move further between shots. This gives an interesting stepped repetition to the moving elements in the resulting time stack. I know this can sound a little confusing, but it all becomes very obvious once you try both methods.
HOW TO STACK MULITPLE PHOTOS INTO ONE IMAGE
There are a lot of different programs that can stack photos. I use Photoshop, so this is the program I’ll be talking about. But some of these steps might relate to other programs as well.
Here’s the basic idea. Open the first photo of your timelapse—this will be your bottom layer. Add the second photo from the timelapse on a new layer. Change the top layers blending mode to lighten. Merge both layers together. This adds only the parts of the second image that are brighter than the same area on the original image. Repeat with as many photos from the timelapse as you like. You will get used to selecting the right number of pictures for the effect you want.
That method takes a long time! (Trust me, I’ve done it a few times.) I even tried to write a script to automate the process. I got pretty close, but in the end, I couldn’t figure out how to make it work. Luckily, I found a website called starcircleacademy.com that offered a Photoshop script that did exactly what I wanted. I bought it for a small fee, and I’ve been using it ever since. It’s faster than stacking photos manually, and you can do other things while it’s running.
I usually try stacking all the photos from a timelapse first. If that becomes too much (they can get messy sometimes), I take some out and try again with less photos. I’ll keep doing that until I find the sequence of photos that look best.
Once I’ve got the photos stacked, I make a few adjustments with Shadows and Highlights to bring back some details in the bright areas. Then, I add some contrast, or use levels to make the blacks darker, because things can get a little washed out when stacking with the lighten blending mode.
There you have it. Now go shoot some timelapses, and try it for yourself if you like! I’m curious to see how your time stacks turn out, so head over to my Facebook page, and post a link to a time stack you made.
Also, feel free to leave a message for me by following me on 500px or in the comments below if you’re having trouble, and I’ll do my best to help you out.
Best of luck, and happy stacking!


Leave a reply