Jimmy McIntyre is a world-renowned travel photographer, educator, and 500px ISO contributor. His photos have been published in local and national magazines, including the BBC. His online courses on digital blending and post-processing can be found on his official website.
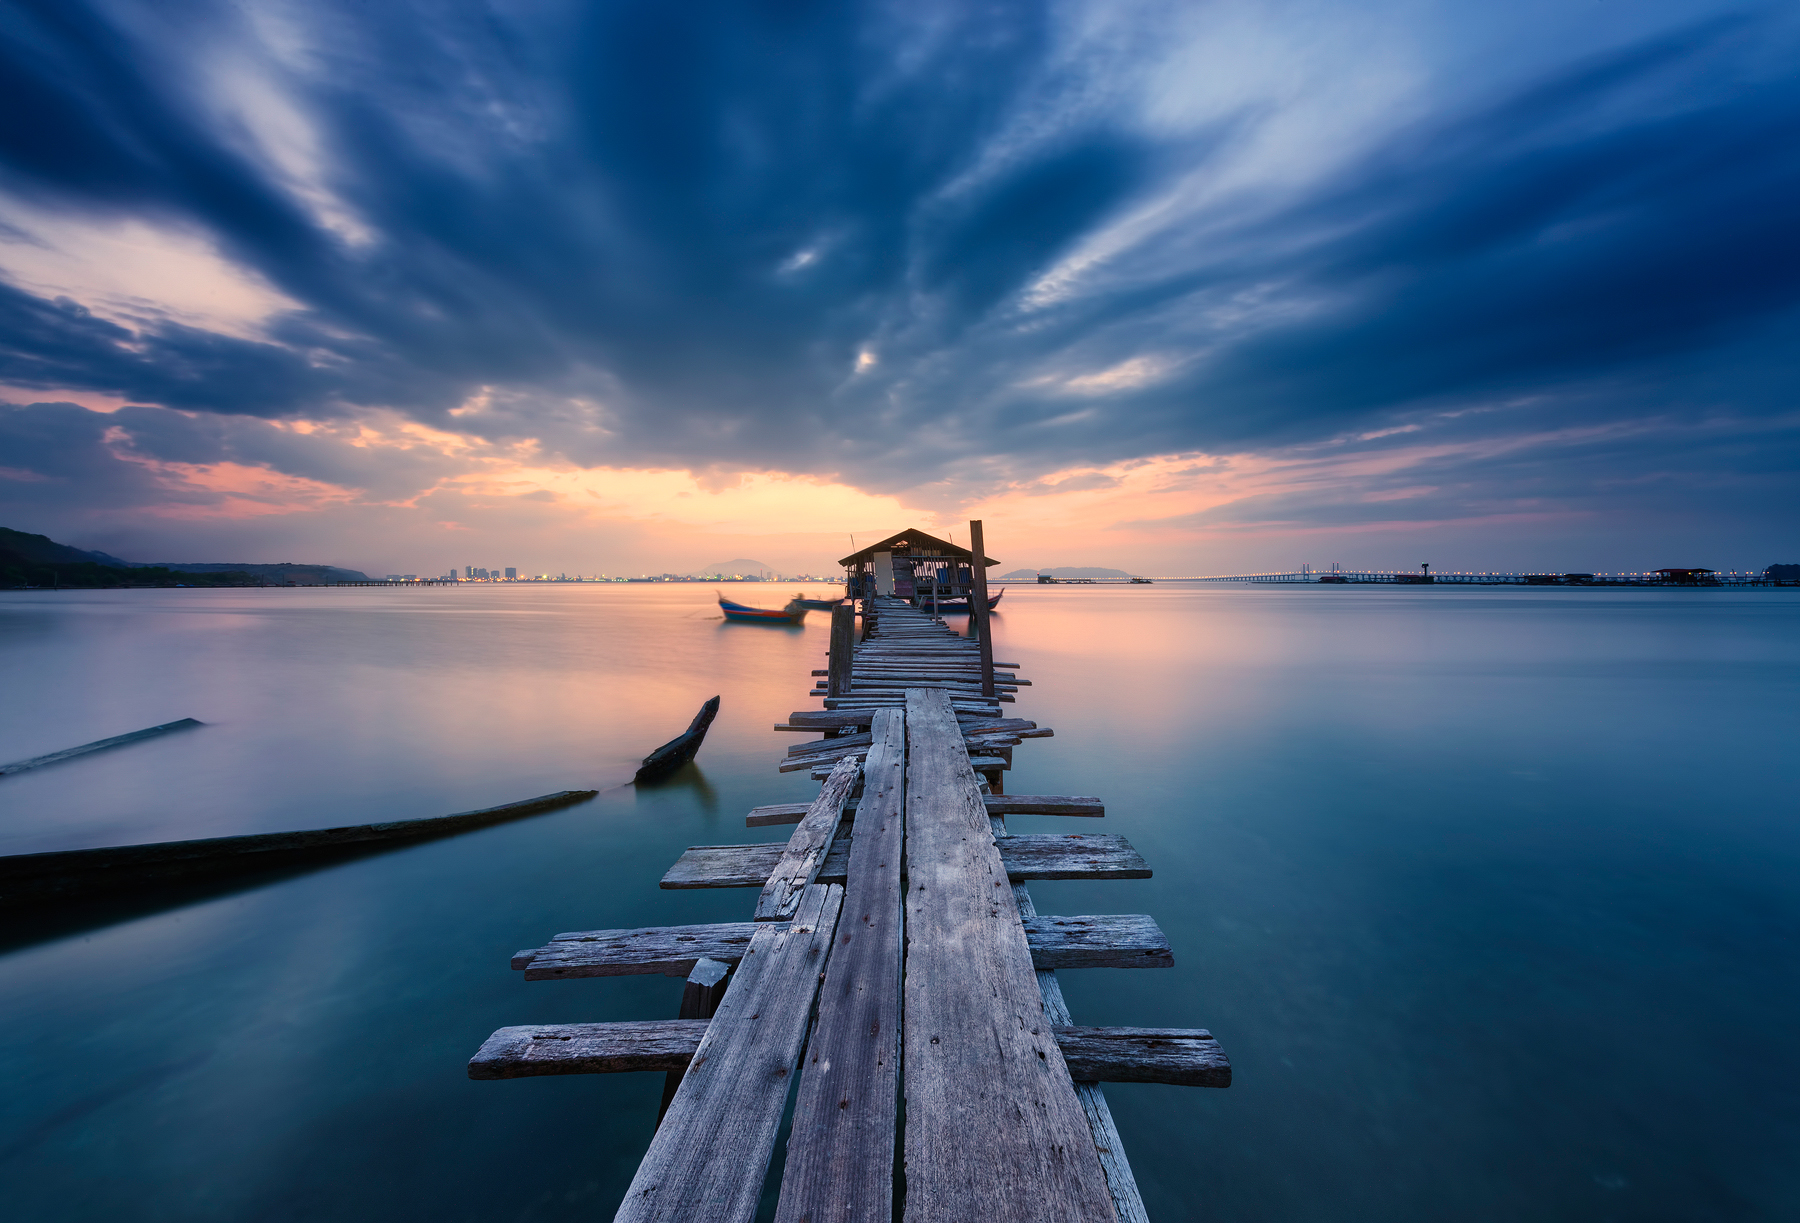
Golden Hour is the Holy Grail of photography. Capturing a beautiful sunset or sunrise can be the difference between a stunning image, and a flat image.
If we’ve done everything right in-camera, there is little for us to do in post-processing. However, as we all know, RAW files are almost devoid of contrast and colour. With just a few tweaks, we can turn that flat image into something beautifully impacting.
In this tutorial, we’ll look at a very effective technique in Photoshop that will help add more warmth and vibrancy to our Golden Hour images. Please follow the steps below the video if you prefer a written tutorial.
You can download my free actions, and Easy Panel here: Easy Panel for Photoshop
How To Make A More Impacting Sunset/Sunrise
1. Add a New Layer. Go to Layer>New>Layer and press OK. Make sure it is transparent.
2. Select Paintbrush and Change the Foreground Colour. Once you’ve selected the Paintbrush, click on the Foreground colour at the bottom of the toolbar on the left. Now choose a deep, warm colour, similar to the colour of your golden hour. Then press OK.
3. Paint Over the Golden Hour Areas. Start painting on the new layer over and around your sunset/sunrise. It’s okay if you paint over other objects too. We can control that in the next step.
4. Change the Blend Mode. With the new layer selected, at the top of the Layers panel you’ll see a dropdown box with the word ‘Normal.’ Click on this and choose either ‘Soft Light’ or ‘Overlay.’ You’ll see the colours from the new layer blend nicely with your image.
5. Create a mask. With the new layer still selected, go down to the bottom of the Layers panel and click on the ‘Add a mask’ icon (the square icon with a circle inside).
6. Let’s target the highlights only. Now we’re going to create a mask that targets only the highlights. With the mask of the new layer selected, go to Image>Apply Image. In the box that appears, make sure your settings are the same as mine:
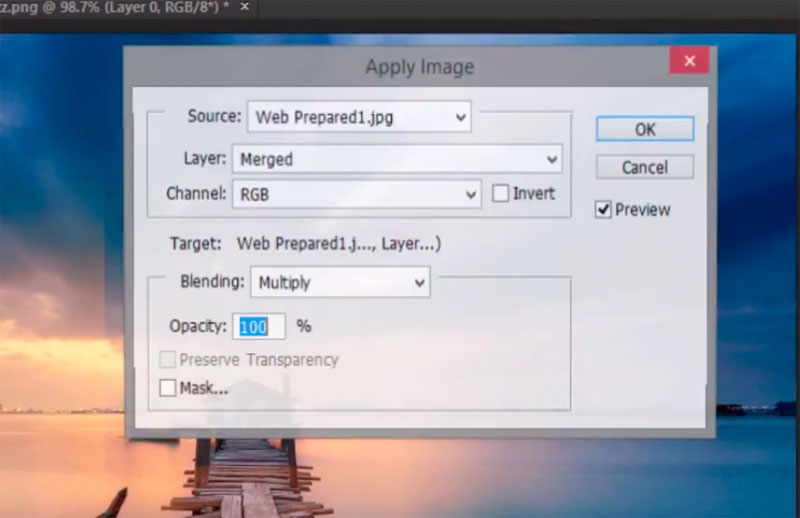
When you’re finished, press OK. You will see that a mask has now been created, which now excludes many of the darker objects from the new warm layer. If you want to make an even more precise mask, and affect even fewer dark objects, while targeting specifically the highlights, just repeat the last process and Apply Image again.
And that’s it, a more impacting Golden Hour!
I’m always happy to connect with other photographers! You can visit me through the links below:
My website
My Facebook page
Youtube Channel for more videos
My photography newsletter Including The Free Easy Panel—sign up now!


Leave a reply