The idea of capturing movement in a photo is not something people think of doing often, but if done right, it can significantly improve a photo. Though motion blur is quite difficult to capture at times, with the correct equipment and patience, you can have a fascinating action photo.
Motion blur can be achieved in two ways:
- By having moving objects within a still image.
- Tracking a subject with your camera to have a blurred background.


Gear
Before you go out and shoot your motion blur photos, there’s a couple things you will need.
Required:
- Camera
- Patience
Optional:
- ND Filter
- Tripod
I personally carry only my camera and preferred lens to keep the weight minimal. My camera of choice is the Canon 6D with the Canon 16-35mm f/4 L. However, there are often times when I use my 50mm f/1.8 STM for panning shots, depending how far I’m standing from the subject.
When taking a motion blur photo, you’ll need to hold your camera still as possible or balance it on a nearby structure like a park bench or street sign. Using your tripod makes taking the shot much easier since you don’t have to worry about keeping your camera still. Additionally, an ND filter can help to reduce the amount of light and overexposure, essentially allowing you to take motion blur photos during the day.
Camera Settings
Most of the time you will need to shoot on manual for motion blur photos, strongly depending on the amount of motion you wish to have. Depending on the time of the day, my settings always differ and there are few things that stay the same. For the sake of this article, I’ll go over the process and settings I had to take the photo below.

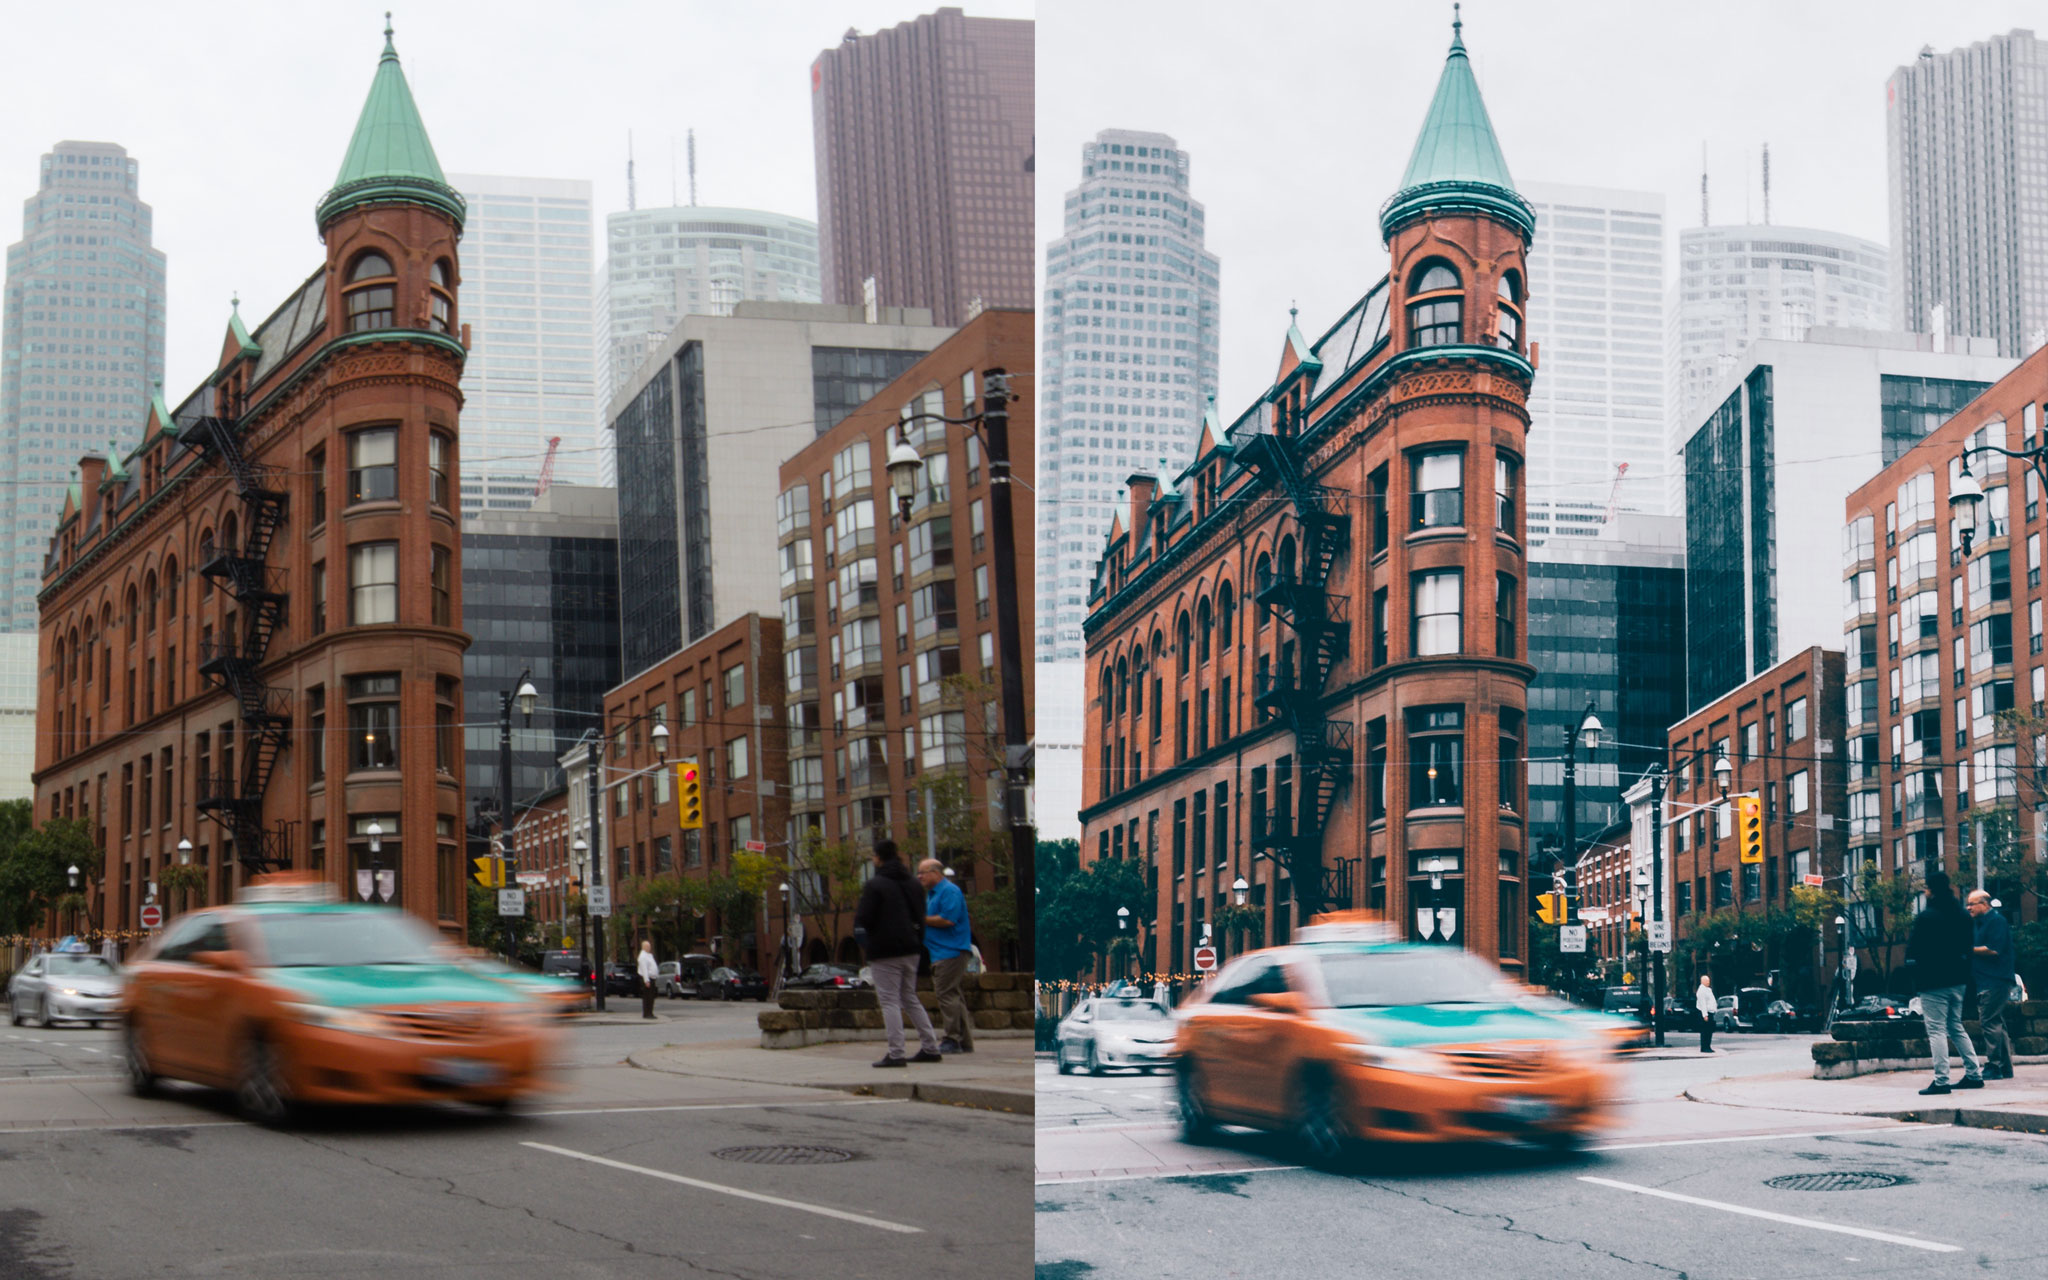
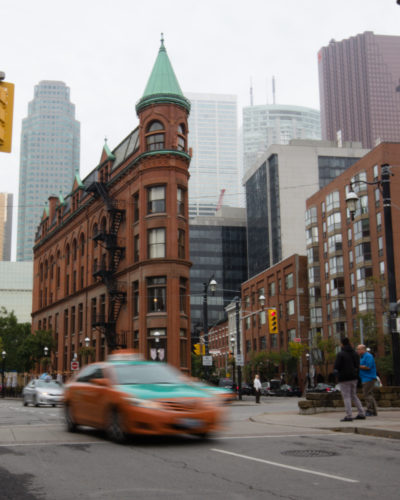
For this photo, I had a couple goals: to not have too much blur and to have a taxi in motion. Also, as the roof of the taxi was the same color as the tip of the Gooderham—and the doors were the same color as the side of the building—I had to wait for that taxi, rather than a regular car. As I wasn’t carrying a tripod, I found a newspaper stand to prop my camera on and wait for the perfect moment. I was out shooting during the day and visited one of Toronto’s popular locations, the Gooderham building; since the building has been shot from every angle, I decided to put my own spin on it by adding motion blur.
My ISO was set to the lowest possible, which was 100, due to the fact that there was a vast amount of light. Thankfully, the overcast skies gave me room for flexibility. Additionally, to reduce the amount of light entering my camera, I set my aperture to the highest possible, which was f/29. To capture the actual motion blur, I had to play around with my shutter speed before I was able to get the shot I wanted; it was all dependent on the speed of the car. If the car was moving too slow, I would have to lower my shutter speed significantly—which would result in an overexposed photo. I managed to capture my photo at 1/10 of a second, without any overexposure—which was perfect.
With that being said, it is critical to understand that lighting situations will be different, but if you’re shooting during the day, the optimal settings are to have your ISO as low as possible and your aperture high. Your shutter speed depends on the light, speed of moving objects, and essentially what you’re shooting.
Post-Processing
The last step is post-processing. I think it’s important to be able to highlight the motion blur and bring the viewer’s attention to it. With this photo, I had the hood of the taxi and body match the Gooderham building; therefore, I increased the saturation on those two colors and unsaturated everything around it. As you can see, the buildings in the background have almost zero color. Additionally, I used the clone stamp tool to remove the stop light in the frame as I found it distracting.
In short, ensure your post-processing maintains focus on the motion blur.
Conclusion

Motion blur photos are one of my favorite types of photos, as they can turn an ordinary scene into something spectacular. Always try to keep things in the frame interesting by capturing complimentary colors, interesting buildings, and whatever catches your eye.
Just remember, all you need is your camera and patience to get the perfect shot. If you do go out and take some, share them with me on Twitter or Instagram (@typicalmitul) – I’d love to see them!
See more of Mitul Shah’s photography on his 500px profile.


Leave a reply