
Jimmy McIntyre is a world-renowned travel photographer, educator, and 500px ISO contributor. His photos have been published in local and national magazines, including the BBC. His online courses on digital blending and post-processing can be found on his official website.
After a recent trip to the Middle East and South East Asia, I returned home with a trove of cityscape images. Some of the scenes were naturally dynamic, with little post-processing needed. With other scenes, however, I enjoyed adopting a more creative workflow, to give them a more dynamic edge.
The amount of post-processing you choose to use in your own workflow is, of course, a matter of personal taste, but I hope you take one or two new techniques away from this cityscape tutorial.
Before and After Post-Processing


What You Will Learn
- How to blend exposures naturally without HDR software, by using Luminosity Masks.
- How to blend light trails instantly.
- A unique way to affect colour changes in Photoshop, using Color Lookup.
- How to add dynamic contrast and a natural vignette.
- How to create smooth water.
- And how to correct perspective distortion, should you wish to.
What You Need Beforehand
PSD File
If you’d like, you can download the full PSD file for this image. I saved the workflow so that you can explore it and see what steps I took to arrive at the final image. And you may experiment with the original exposures too. If you choose to publish this photo online, please credit me as the original photographer. If the link doesn’t work, please try it with a different internet browser (Internet Explorer, Firefox, Chrome etc.).
You can download the file here: http://www.mediafire.com/download/fq26yff3t8t1c07/Jimmy+McIntyre+-+Marina+Dubai.zip
Easy Panel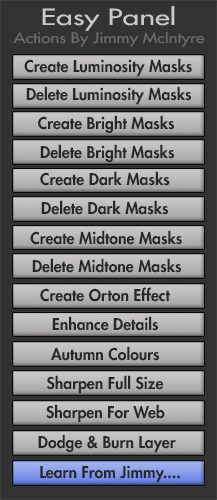
The easy panel is a free tool I created for Photoshop (doesn’t work with Elements or Lightroom, sadly). It will allow you to instantly create Luminosity Masks for the digital blending part of the workflow.
Link To The Easy Panel: http://www.throughstrangelenses.com/easy-panel-download-for-photoshop/
If you’d prefer not to download the Easy Panel, I have also created a tutorial on How To Create Your Own Luminosity Masks
Video Tutorial – How To Create A Dynamic Cityscape In Photoshop
Below is the video tutorial I published on my Youtube Channel, showing you how I created the above image. If you scroll down past the video, you will see an explanation of how I shot each exposure in this scene.
How I Shot The Scene
I didn’t auto-bracket this scene. Instead, I shot each exposure differently using Aperture Priority, changing my camera settings depending on which element I wished to capture. To make this simple, I will break each image down and explain the shooting method.
Image One – The Cloud
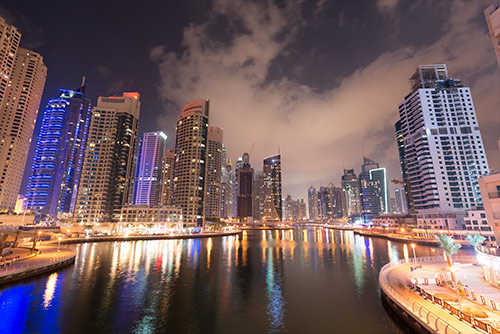
This cloud is the reason I stopped and shot this scene. Clouds are so rare in Dubai, especially clouds as dramatic as this, I knew I had to take advantage of it.
Since there was nothing else of interest in the image, I choose a reasonably quick exposure (3 seconds) given the low-light conditions. This ensured that the cloud was fairly in focus, avoiding any long-exposure blur.
To create this ‘quicker’ shutter speed, I used an aperture of f/5, and ISO of 400.
Images Two & Three – The Light Trails
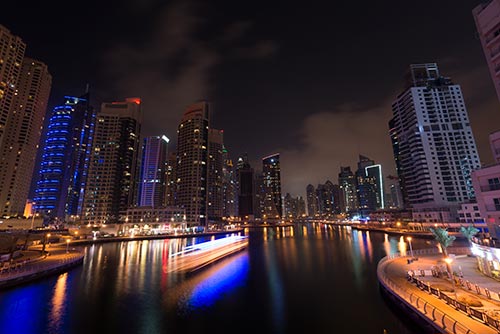
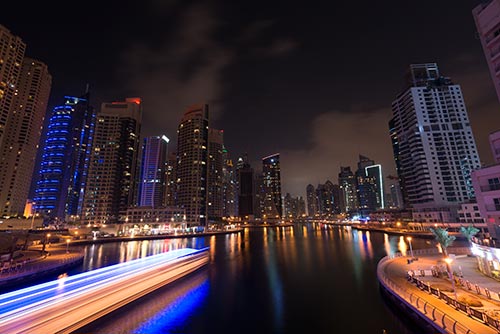
With the clouds captured, I knew the image was still flat, without any interesting foreground element. So, I waited for something to happen. A boat appeared on the horizon. To capture the long light trails I needed a longer shutter speed. I created a smaller aperture of f/11 and the ISO to 100, and reduced the exposure by 1 stop so that the light trails were correctly exposed for.
The boat was traveling extremely slowly, so I needed two exposures of 20 seconds to capture its journey.
Image Four – Base Exposure
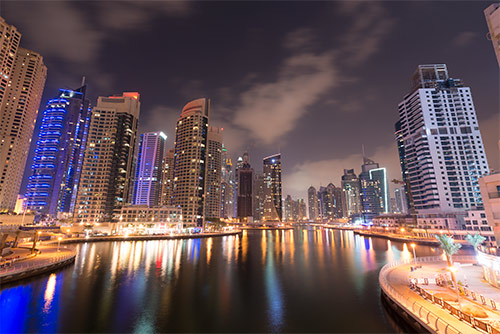
With my style of Digital Blending, I always look for a solid base exposure. This is the exposure which will contain the bulk of the information around which you will build your final image.
I chose this exposure because it was correctly exposed for, had nice, smooth water, and was sharp despite the hazy conditions. I shot this at f/8, ISO 200, and a shutter speed of 15 seconds.
Image Five – Under-Exposed
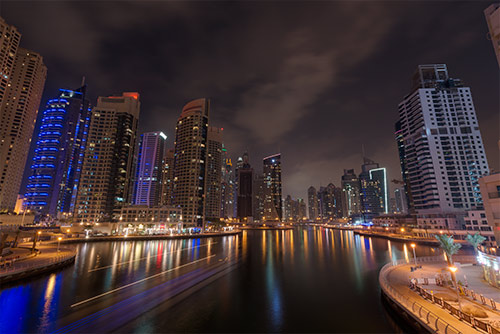
I needed a darker exposure to recover the highlights in the water and buildings in the foreground. So that the blending process was easy, I needed to make sure the water was also smooth, like the water in the base exposure. I chose an ISO of 320, and an aperture of f/18, which gave me a shutter speed of 10 seconds and a sufficiently dark image.
And that is how I created this cityscape, from shooting to post-processing. As always, I hope you have found this tutorial useful. Thanks for reading!
I’m always happy to connect with other photographers! You can visit me through the links below:
My website
My Facebook page
My photography newsletter Including The Free Easy Panel—sign up now!


Leave a reply