Francesco Gola is a talented seascape photographer who started taking pictures few years ago and immediately fell in love with the endless borders of the inner frame. Photography is a source of inspiration that allows Francesco to reveal the relationship between the outside world of Nature and the inside world of dreams, thoughts, emotions, desires, and wishes.
You can find more of his work by following his 500px, visiting his website, or checking him out on Twitter and Facebook.

Introduction
Despite unstoppable technological progress, unfortunately our camera is not yet able to see like our eyes, especially when it comes to dynamic range (the ability to see details in bright areas and dark areas at the same time). Surely we all remember the disappointment of our first sunset photo—our eyes saw a magic moment, but the pictures we got showed a white ball with black all around it.
Sure, at first we were quite happy with the idea of ??the silhouette, but soon we wanted something more.
Fortunately today there are several techniques to help our camera to see as we do, and in the end everything can be summarized in two categories: Digital Blending and Photographic Filters. Today we will talk about the second technique.
Before We Begin
Before we start, I want to answer a question I often hear: “why do you use filters instead of digital blending techniques.”
This is a bit like trying to find an answer to the age-old Canon vs Nikon debate, for me the answer is actually very simple: First of all, I really suck at post-production; and second (and I think most of all), I really love to spend as much time as I can in the field struggling to get my shot in-camera with a single exposure.
If you want to put a little bit of technique in this answer, as we will see later, it’s also because there are filter effects that cannot be reproduced in post-production.
Maybe this is not the best method, but it is the one I use, and I will now try to share the experience I’ve gained over the years in order to let you choose and use your filters to the best of their (and your) ability!

Screw-On or Slot-In?
In order to choose the filters that suit us best, it’s necessary to understand the different types of commercially-available filters.
The first great division that needs to be explained is between the screw-on filters and slot-in filters.
The screw-on filters are screwed to the thread in front of your lens. They don’t need additional mounting accessories, just a lens with a thread to allow filters to screw in. The only lenses that cannot use these types of filters are ultra-wide angle or fisheye lenses, where the curvature of the first lens element is very pronounced.
The biggest advantage of these kinds of filters is that they prevent leakage of light between the filter and the lens, a problem that may affect the slot-in filter (but we will talk about this later).
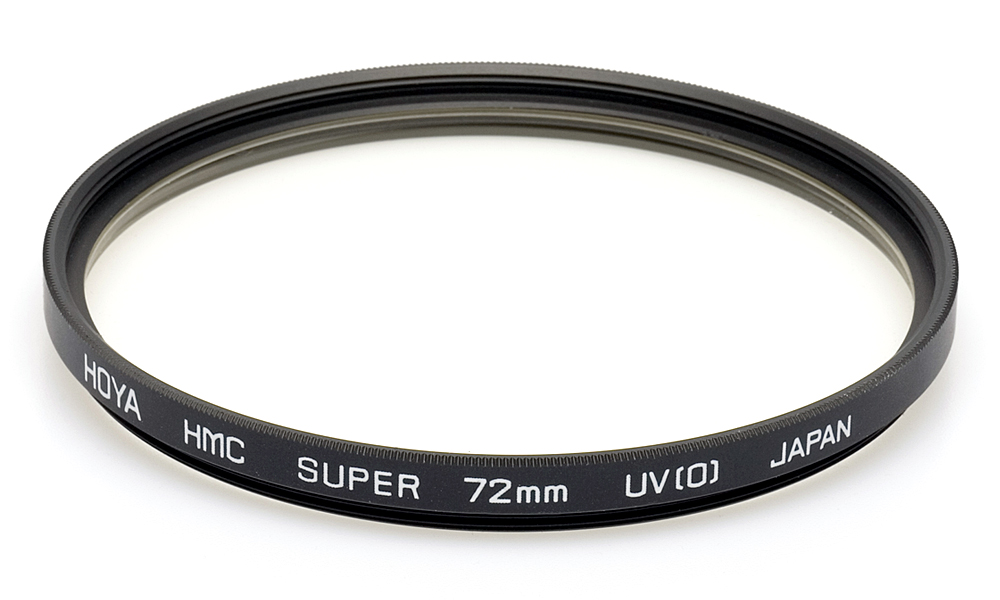
Hoya screw-in filter
Almost all of these filters allow stacking one above the other to use them simultaneously, but this is not advisable for two reasons:
1. You will find that stacking is not practical in the field, because when you’re taking pictures, any changes you want to do, you’ll want to do them really quickly.
2. Stacking filters (or using thick filters) will introduce the issue of vignetting on wide-angle lenses. For that reason “Slim” filters are available—they lack of front thread in order to reduce thickness.
When you buy a screw-in filter you must choose the size according to the size of your lens. As you can easily understand, another disadvantage of this kind of filters is that you need one filter for every size of lens you own.
Tip: You can buy an adapter ring called a “step up.” This allows you to mount filters with a diameter greater than your lens. For example, if you have a lens with 82mm filter size and one with 77mm, with this adapter you only need to buy the 82mm filter!
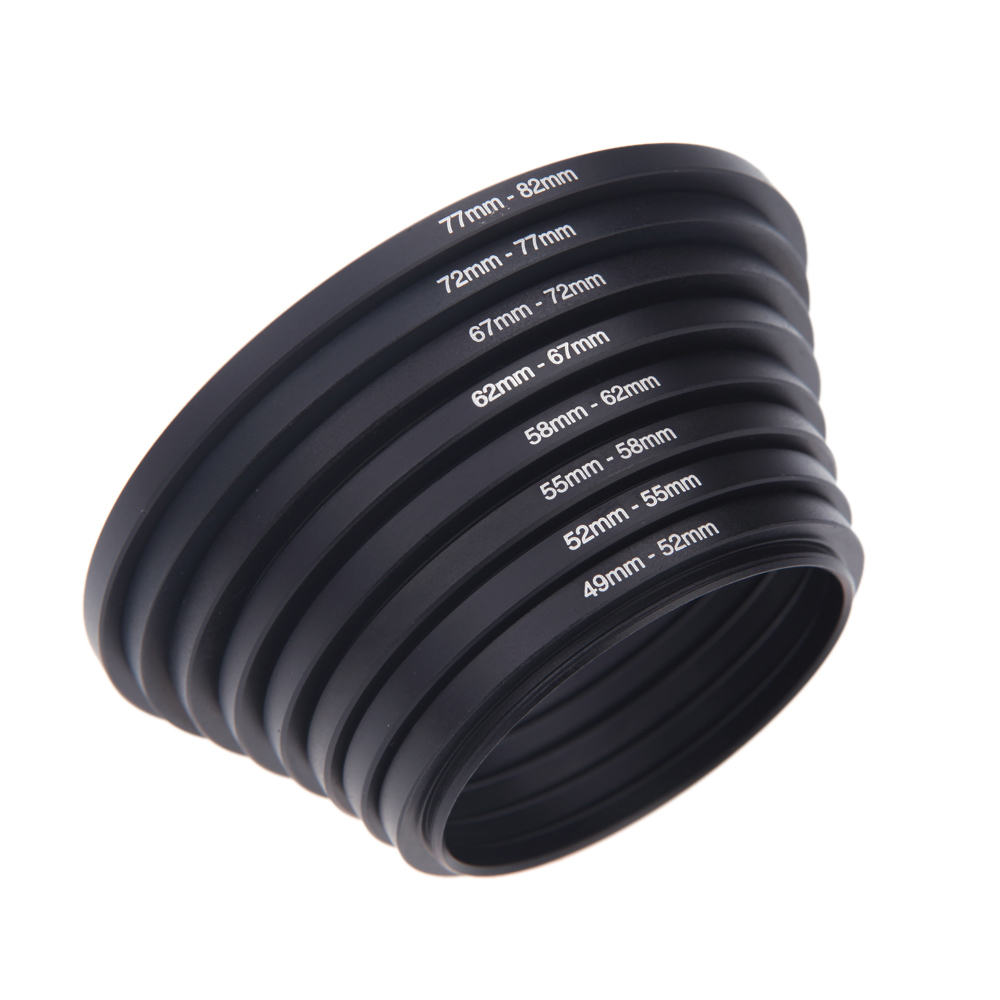
Example of a “step up” adaptor
The slot-in filters are the second big family of filters. The main characteristic lies in the fact that they cannot be screwed onto the lens, and instead require two special accessories: an Adapter Ring and a Holder.
The Adapter Ring is a special threaded ring that mounts onto the thread of your lens (the same place you install the screw-in filter). The purpose of this ring is to allow the Holder to be mounted on the camera, not to attach filters.
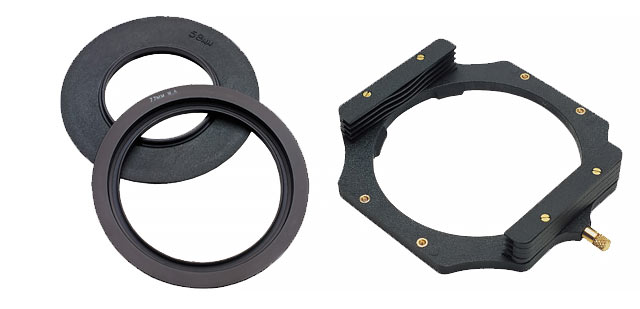
Lee’s Adaptor Ring and Holder
Slot-in filters (and the adapter ring and holder) are generally more expensive compared to the screw-in solution, but they introduce a few advantages that make the choice of this family almost mandatory for landscape photographers:
1. You can install many filters without having the vignetting issue
2. Replacing filters in the field is really fast and comfortable
3. Some slot-in filters are not available as screw-in
4. If you are using ultra-wide lenses you can still use filters with a special holder system
The most common slot-in systems support 100mm filters; these are designed mainly for DSLR with lenses from wide angle to telephoto. Recently, specially sized systems for mirrorless cameras and ultra-wide lenses have been introduced on the market, allowing you to use filters up to 165mm in size.
There are many manufacturers of Adaptor Rings and Holders, but I would certainly push you to focus on quality and longevity, so my suggestion is to choose between Lee, Formatt-Hitech, and Lucroit.
Since the filter systems above are anything but cheap, if you are just curious about the slot-in world or you just want to experiment with this solution, a good idea is to buy a Cokin system.
Tip: You do not need to have the Holder and filters of the same brand to use them together! It’s possible to use a Lee Holder with Formatt-Hitech filters and vice versa! You just need to keep in mind to use filters of the same size (e.g. you can use a Formatt-Hitech 100mm ND filter with a 100mm Lee holder). Yes, another parameter to check is the thickness of the filter, but they are almost the same for all brands and I’ve never found an issue on that.
As we finally know something more about the two main families of filters, let’s have a look inside them!

Types of Filters
A note about suggested brands
Before starting, an introduction is mandatory. The goal of this tutorial is not philosophy, but to give you the concrete elements to let you buy the filters you need.
When deciding what filters you need, you’ll discover that there are several brands making each of the types below, and therefore it’s essential that I suggest some brands above others. My suggestions, however, are not gospel, but only the result of experience acquired in search of one thing above all others: quality.
You have a $3,000 camera and lenses that cost you thousands dollars, do you really want to put a coke bottle filter in front of them? I didn’t think so.
UV Filters
The UV filter is generally the first filter we come across during our photographic career. Even if it’s available also as slot-in, this filter is widely used as a screw-on version.
The main point I should make about this filter is that, in the digital era, it’s absolutely useless.
The benefit of the filter was to protect the film from UV rays, but today this function is already integrated in your camera. For this reason, this filter is often used only as lens protection from scratches and dirt. It may be a reasonable choice, and I confess I’ve used it for several years, even after I started using slot-in filters.
After some time, however, I also came to the conclusion that they are perfectly useless for these reasons:
1.We do not need to protect the lens. If you are reading this article it is because you want to use other filters, and the lens will be protected by whatever filter you happen to be using this time.
2. Although only slightly, each filter we use reduces the overall quality of the image, so it makes no sense to place a useless piece of glass in front of our lens.
3. Every filter you install increases the possibility of vignetting issues, and believe me, every millimeter can make a difference.
4. The front element of your lens is the easier and cheapest one to replace in case of damage. In addition to this, a small scratch on it will not affect the image quality.
I’ve just mentioned UV filters, but the exact same thought applies to variants that are called Protector and Skylight. If you have money to invest on filters, we will find a better way to spend it.
In my bag: none

ND Filters
ND (or Neutral Density) filters are the first example of filters that cannot be recreated in post-production. They have a different use depending on the applied field, but in landscape photographytheir task is to decrease the shutter speed. Yes, if you love long exposures, you cannot live without them.
These filters are sold both as screw-on and slot-in, and the choice between the two depends only on your needs. We can compare the two filter families for hours and hours and it will still be difficult to find an absolute truth, so my advice is as follows:
1. If you don’t need to use Graduated ND filters (we will discuss about them shortly), the screw-on solution is for you. This solution is great if you only photograph waterfalls, rivers in forests, or, generally, in places where there is no big difference in the exposure between different areas of the scene.
2. If you are going to use GND filters, the slot-in solution is recommended as the use of a screw-on ND with a slot-in GND is uncomfortable in the field.
Each filter, both slot-in and screw-on, is characterized by a fundamental parameter: namely, the ability to reduce the passage of light. The higher is the value, the longer it takes for the sensor to get the same amount of light.
Manufacturers express this value in different ways: f-stop reduction, optical density, and ND filter factor. Below you can find an example of correlation between the aforementioned classifications.
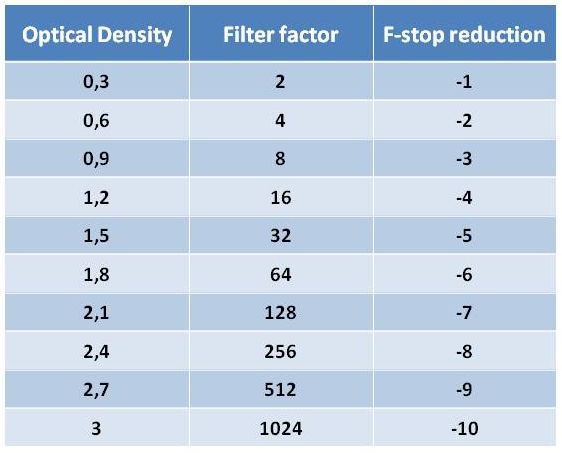
Filter factor, optical density & f-stop reduction table
The most obvious question is: it is good to have them all? And the answer is really simple: no.
First of all, having all the possible gradations in our backpack is impractical, as it would require a dedicated backpack, in addition to being a very costly solution!
My advice is to select two or three filters at most, according to your photographic habits. You will see that using say, a 6 filter stop properly (i.e. not to push to the limit the settings of your camera to get a correct exposure), you’ll be able to move from 5 to 7 stops just by changing your camera’s basic settings (ISO / shutter speed / aperture).
As I am a lover of seascape long-exposures, my choices are: 3, 6, and 10 stop. Three filters, and with these I can handle all of the situations I run across.
As we’ve seen, both screw-on and slot-in filters have advantages and disadvantages. If you are entering the world of filters for the first time and have no idea if you will love it or not, the choice could be complicated.
My advice is not to immediately buy all the filters that you believe you need—start with a good quality screw-on filter with a small price tag. In this case, my advice is the Haida PRO II series, maybe the ND1000 (10 stop) or the ND64 (6 stop). You can find them easily on Amazon.
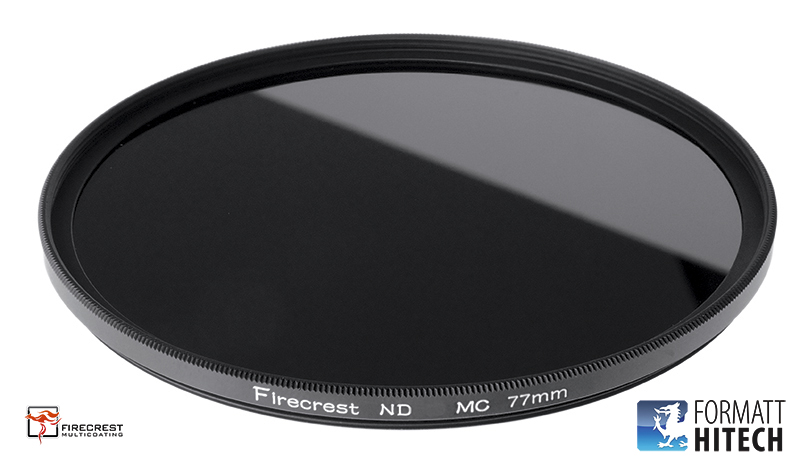
If you have a clearer idea and you know the system that suits you, regarding the screw-on solutions, my choice falls on Formatt-Hitech Firecrest series, which boasts a superlative quality. In addition, for hardcore fans of long exposures, Formatt-Hitech is the only company offering a single 16 stop screw-in filter.
Formatt-Hitech Firecrest 16 screw-on filter
Among slot-in filters, the excellence in quality is a duel to the death between the long-standing Lee Filters and Formatt-Hitech.
Lee Filters boasts the legendary Big Stopper: a fantastic 10 stops ND which, until a few years ago, you had to wait almost 6 month to buy! Lee also listened to its customers and recently added the Little Stopper to their catalog: a 6 stop ND filter that is currently, without a doubt, my favorite filter. Finally, if 3 stop reduction is perfect for you, the ProGlass series is a great choice.
On the other side of the battlefield, Formatt-Hitech provides a wider catalogue of gradations and sizes, making itself the right solution for very specific needs. Moreover, with the Firecrest series, they introduced filters with almost no color cast at all, which makes them truly unique in the panorama of filters.
Lee Filters – Little Stopper
Tip: Are the color casts a real issue? No, only those that are uneven, so when the cast is not uniform throughout the filter or that affect more the shadows or the lights. Lee was often criticized for the presence of a cold cast in its filters, but because this cast is perfectly homogeneous, it can be removed with a single click on Lightroom. This is why these filters are always in my backpack.
Another highly debated topic is the choice between resin and glass filters. From my personal point of view, if you are following the advice in this guide, do not bother even a minute, because in terms of quality the glass offers the excellence.
Just keep in mind that a glass filter will almost certainly break if you drop it, unlike those made in resin. On the other hand, the filters in resin are extremely sensitive to scratches.
Using these filters is very simple: take your camera and make an exposure reading of the scene without a filter, and depending on the shutter speed that you got, calculate the shutter speed correction with the filter mounted. For example, if your reading tells you 1″ and you are going to use a filter of 3 stops, once you mounted the filter you will need to set a shutter speed of 8″.
Tip: It’s almost impossible that the filters you buy have exactly the declared f-stop reduction. It’s always good to know the exact optical density of the filter you’re using, because in a long exposure, even 1/2 stop of difference can cause minutes error!

To measure the exact intensity of your filter do the following:
- Choose a room in your home, turn on the lights and close the windows (we need a place where the lighting is perfectly constant).
- Mount your camera on a tripod and take a photo of the room until you get a shot with a good histogram. Note down all the parameter (ISO/Aperture/Shutter speed) of the shot.
- Mount the ND filter and compensate the shutter speed obtained before according to the f-stop reduction introduced by the filter.
- Take a picture with the ND filter
- Now look at the histogram of the photo taken with the filter and compare it to one taken without. If they are approximately superimposable, the filter intensity stated by the manufacturer is real; if the new histogram is shifted to the left, your filter has an intensity greater than that the one declared; if it is moved to the right, it has a lower intensity.
- If the two histograms are not superimposable, take another shoot changing the shutter speed to obtain a histogram approximately similar to the one of the picture without the filter.
Note: in my life I’ve never used a filter with the intensity stated by the manufacturer. This test will take away a bit of time but it will save you a lot of photos.
Tip: once you get the real f-stop reduction of the filter (that could be something strange like 6 ¾ for example), build your own shutter speed conversion table and fix it to your tripod! Another possibility is PhotoPills app for your iPhone, the only one that allows you to convert the shutter speed for non-standard f-stop reductions!
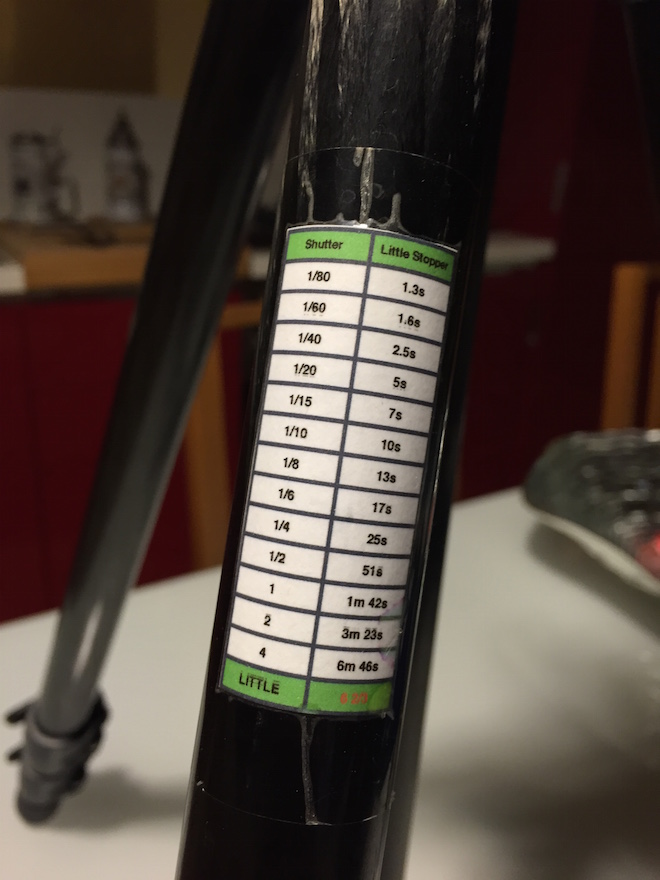
My tripod!
In my bag: LEE Big Stopper, LEE Little Stopper, Formatt-Hitech Resin ND 0.9
GND Filters
Although formally you can find them in the screw-on version, these filters are an absolute prerogative of the slot-in world. (If someone tries to sell you a GND screw-on filter, run!)
GND filters, or Graduated Neutral Density, consist of a rectangular plate of glass or resin characterized by two distinct areas: an area completely transparent, and a dark area, which is nothing more than an ND filter like the one previously discussed.
Those filters are able to overcome the problem we mentioned at the beginning of this article: the human eye sees better than your camera, whatever it is.
As your camera is not able to see at the same time very bright areas (usually the sky) and very dark ones (normally the rest of the scene), you can use these filters to cover with the dark (ND) area the bright area of the scene, matching its brightness with the darker area of the scene.
The transition area on the filter, between light (transparent) and dark (ND) determines the type of GND filter you’re working with. There are four types available on the market: Hard Edge, Soft Edge, Reverse, and Blender.
1. Hard Edge filters are characterized by a clear boundary between the transparent and ND area. They are therefore used when the separation between the bright and the dark areas of the scene is very defined, such as the horizon at sea.
2. Soft Edge filters are characterized by a soft transition, and therefore are used where the transition between light and dark areas is not so clear. A classic example is a shot in a mountainous area.
3. Reverse filters are nothing more than Hard Edge filters with the ND effect that fades away the more you move from the line of separation to the upper border of the filter. Basically they were invented to better manage sunrises and sunsets, where the light is more intense on the horizon line. If you love seascapes like me, this filter will be one of your best friends forever!
4. Blenders filters are used when the brightness difference in the scene is not so pronounced. In these filters the transition zone is not well-defined. They are not widely used, and I really don’t recommend them for landscape purposes.
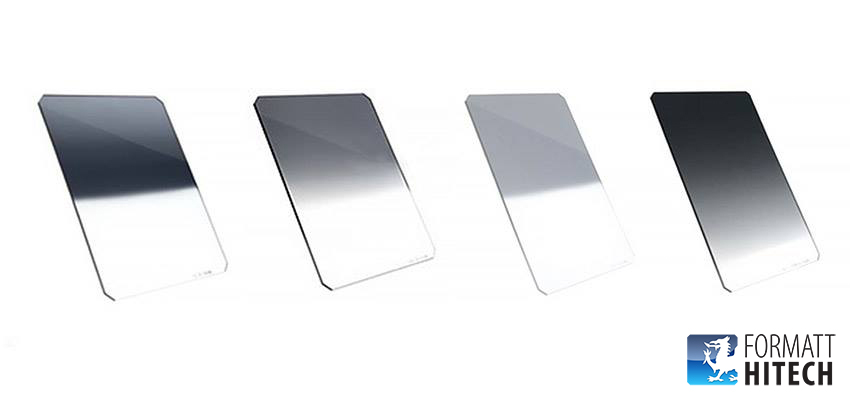
Formatt-Hitech GNDs: Hard, Soft, Reverse & Blender
Using these filters is very simple: make an exposure reading on a light area in the scene, then do the same for a dark area, and finally calculate the difference between them in f-stops.
This difference will tell you the f-stop reduction needed to balance the exposure.
Let’s assume that the light meter reading for the sky is 1/250” and the one for the rocks in the foreground is 1/60”. The difference between those readings is 2 stop, so to balance the exposure you must use a 0.6 (2 stop) GND.
Once the filter is chosen, you should insert it inside the first available Holder slot and cover the bright area of the scene (in the previous example that’s the sky) with the dark (ND) area of the filter.
Tip: A Holder is not mandatory to use a GND filter! You can just hold the filter with your hand in front of the lens! For a shot with a shutter speed up to few seconds, your only problem will be the correct alignment of the filter. For shots of minutes, even if your hand is not perfectly still, the final result will be more than great, try it if you don’t believe me!
The holder is required if we want to use multiple filters together (or when you start having cramps on your hand!)
As you can imagine, just like the ND filters seen previously, different sizes and gradations are available for each of these filters in order to meet the needs of all landscape photographers.
Again, if this is your first purchase, it is quite easy to go crazy.
Similarly to the ND filters, it’s not necessary (in fact it’s almost wasteful) to have all types and gradations of GND filters in your bag. I am convinced that more filters you have in your backpack, the more difficult it will be to choose which one to use when shooting, so as always, the advice is: few but good.
For example in my backpack you’ll find only four of them.

But how do you choose between all the possibilities?
Regarding the typology, forget the Blender unless you know exactly what to do with it. If you are a seascape lover, a Reverse filter could be the perfect choice, but if it is our first purchase focus on Hard and Soft filters.
If you had a look at my gallery you can easily guess that the Hard variant is my favorite, as almost all the horizon lines in my pictures are well defined. A good start may be given by a couple of filters: two Hard and two Soft, or one Hard and one Soft.
Regarding the gradation, I suggest you avoid the 0.3 (1 stop) filters because the situations when these are required are unusual and rare.
During a beautiful sunset, the difference in brightness between light and dark areas will be quite strong, so the 0.9 (3 stop) filters are probably the ones you will use the most. If you are a storm chaser like me and you love taking pictures even when the sky is overcast, the 3 stop filter can be too strong and a 0.6 (2 stop) filter may be a better ally.
Regarding the Reverse filter, I advise you to not go below 0.9 gradation.
Finally, when it comes to materials, the considerations are similar to ND filters: all of these filters are available in glass and resin, but if you are buying a quality product, the difference between them is definitely unnoticeable.
Therefore, my advice is to choose the one that let you save as much money as possible to buy another filter!

The GND slot-in filter market is not as large as the ND filter market.
If, once again, we’re talking about quality, the same two companies lead the market: Lee Filters and Formatt-Hitech.
Both offer filters in resin and glass, but Formatt-Hitech is currently the only manufacturer to offer a Reverse filter of superlative quality.
Truth be told, there is another well-known manufacturer of Reverse filters (which also produces ND and GND filters): Singh-Ray. I’ve owned and used one for years; but unfortunately, due to the presence of a strong cast, these are really difficult to manage in post-production and so I do not recommend it.
In my bag: LEE GND 0.9 Hard & Soft Edge, LEE GND 0.6 Hard Edge, Formatt-Hitech GND Reverse 0.9
Polarizing Filters
The last family of filters I want to talk about is the polarizing filters family. Often undervalued, I think they are absolutely essential to every hardcore landscape photographer’s filter kit. This filter eliminates specific frequencies of the visible spectrum of light.

Example of linear polarization of light
What does it mean in the real world? The following benefits:
1. It removes glares from non-metallic surfaces such as water, glass, wet rocks, etc.
2. It helps to get colors more vibrant and saturated (which is actually a consequence of the first point).
3. It helps to add contrast to the clouds.
4. Reduces haze.
Another feature of this filter is that it cannot be reproduced in post-production, so you should think twice before considering it unnecessary!
There are two types of polarizers on the market: circular and linear, but despite what you could think, the difference between them isn’t that one is round and the other it’s—it’s the working principle of the filter.
Without getting into technical details, it’s enough to say that linear polarizers do not get along with the autofocus of your DSLR. That’s why you’ll find almost exclusively circular polarizers on the market, which of course is the obvious choice.
Despite what you might think, polarizing filters are either round or square. The square version is recommended for studio use, or when no GND filters are required in additions to the polarizer, so we’ll only focus on the screw-in rotating version here.
A screw-in rotating polarizer is made of two metal frames and two glass surfaces. The first frame is screwed on the screw threads of the lens; the second (the outer one) idles on the first one. This allows you to modify the orientation of the polarization and control the intensity of the reflection reduction.

When using a polarizing filter, keep in mind that:
1. The maximum effect of the polarizer is when the angle between you and the sun is 90 degrees (i.e. when the sun is on your left or right). The more the angle decreases, the more the effect of the filter drops… reaching zero when the sun is straight ahead.
2. The effect of the polarizer is not uniform throughout the entire frame, and the wider the lens, the smaller the surface that is polarized. Often, this is seen as a defect and many are discouraged to use one on wide angle lenses, but this is absolutely wrong! The incomplete polarization is an incredible advantage as you can decide what to polarize. For example, we can decide whether to focus on the transparency of the water or let the reflection of a beautiful cloud at sunset colour the surface! It’s up to you to make this “defect” a point of strength, so avoid halos and use this feature creatively.
3. The polarizer absorbs part of the light acting as a 1 or 2 stop ND filter, keep this in mind when you calculate to achieve a correct exposure.
4. If you have a lens that rotates while focusing, remember that the polarization should be made after focusing.
5. Like any other filter that you add to your lens, it’s possible that a polarizer will introduce vignetting, especially on wide-angle lenses. Therefore, opt for the “Slim” filters (i.e. without thread in front of them). We’ll see really soon that it rarely (actually never) makes sense to buy a filter with front thread.
If you want to use a polarizer and you don’t use a slot-in system with Adapter Ring and Holder, the purchase is very simple: you should buy a polarizer that has a diameter equal to that of your lens or, if you are using step-up adapters, to the biggest screw-in filter you have.
On the market there are many manufacturers of polarizers and, as always, the advice is to focus on quality. A polarizer is a life-long purchase.
Without a doubt, among the most popular and famous brands B+W and Heliopan offer a truly vast catalogue. But if you want a quality product at a more affordable price, I recommend Hoya.
Also, remember to prefer the “Slim” filters to minimize the risk of vignetting, and if your budget allows for it, opt for the “Multicoated” versions—this means the company has applied a special treatment on the surface to minimize flare.
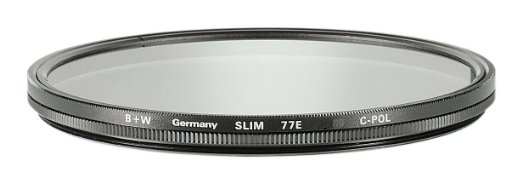
B+W Slim Polarizing filte
As usual, avoid “miraculous” filters; remember that it’s never a good idea to entrust the quality of a shot captured with thousands of dollars of gear to a $10 piece of glass.
If you want to use a polarizing filter with a slot-in system, things get a bit more complicated. In fact, if you have a normal polarizer, there are two cases:
1. If you have bought a “Slim” filter, the lack of frontal thread will not allow you to mount an adapter ring.
2. If you have a polarizer with frontal thread and you decide to mount on top an adapter ring and a holder for slot-in filters, you’ll find out really soon that every time you set the polarizing filter, it will rotate with the whole holder!
So how should we handle this? We have two possible solutions:
1. 105mm polarizing filters: This solution allows you to mount the polarizer after the last filter mounted on the Holder. To do this you need to buy a special ring (that has to be mounted on the holder) and a polarizer with a diameter of 105mm.
Until recently, this was the only real opportunity to use the polarizing filter with slot-in systems, and this is still my favorite one. This solution has no disadvantages, except that if you think the costs of a 77mm polarizer is quite high, wait until you see the price of those 105mm filters! The main advantage is that almost all the filters of this size are of excellent quality.
There are three top players at this size: Heliopan, Lee Filters, and Formatt-Hitech.
Heliopan is often considered the best polarizer on the market, and I’ve been using it for years with incredible satisfaction.
Lee has just introduced a new polarizer for this size, the Landscape Polarizer. The positive thing is that the company has been able to listen to its customers, producing a slim polarizer that has no vignetting down to 17mm, which unfortunately is not possible with Heliopan (you can go down to 20/21mm with this filter). On the other hand, this polarizer is not neutral, but introduces a warm tone (equivalent to a 81A warm-up filter) you might not like.
The game changer at this size seems to be Formatt-Hitech, which theoretically can provide an ultraslim (4.5mm) polarizer with the sensational Firecrest glass that should dwarf even Heliopan. I’m anxious to try it out in the field, but unfortunately my order is still on the waiting list for months and months now.

Lee Filters 105mm Polarizer
2. Badpter: Why you should buy and use a 105mm filter when you can use your old 77mm one? This is what the Spanish guys at 3D Printed Ideas must have thought. Their answer to this question is the Badpter, a special adapter ring that allow independent rotation between the polarizer (strictly slim) and the holder.
The advantages are obvious: cost savings, and no problem of vignetting. The “disadvantage” is that the Badpter must be designed exactly for your combination of lens/holder, and there is not a Badpter for every possible combination, but it’s only a matter of time!
I’ve had the opportunity to test it for two weeks in Iceland, and I must say that I am simply thrilled. I recommend you to take a look at their website.
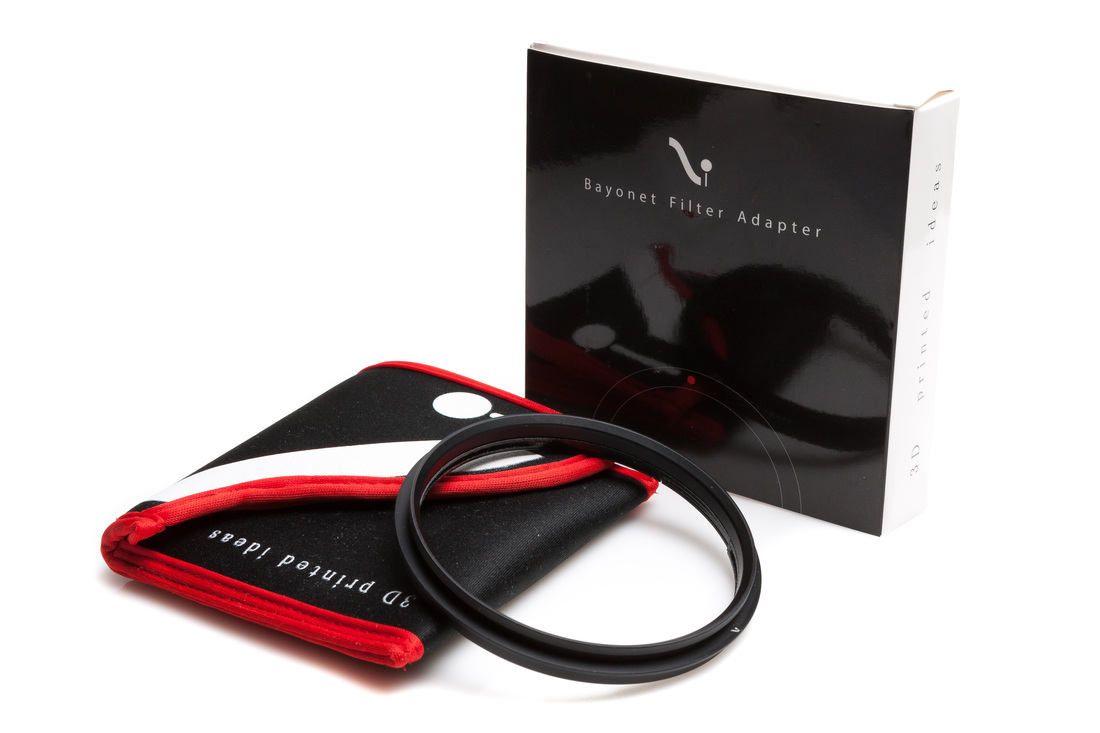
A Badpter adapter
So there are no more excuses for not having a polarizer in your backpack!
In my bag: Heliopan 105mm Slim Circular Polarizer SH-PMC
Conclusions
Round, square, screw-on, slot-in, glass, resin—the possibilities are almost endless, but if you apply the advice in this tutorial to your photographic interests, you’ll find that just few of them are needed to enhance your photography significantly.
At the beginning using filters may seem complicated, but with time it will become as natural as setting the correct shutter speed and aperture in your camera.
As always, my main piece of advice is: have fun and gain experience in the field, perhaps with someone who can help you to get started in this wonderful world!
Editor’s Note: Want to learn more about filters from the master himself? You can! Francesco has scheduled a workshop specifically designed for filters lovers in Brittany (France) for next October. Click here to find out more.

Leave a reply