Rogelio Bernal Andreo is a Spanish-American astrophotographer. He is considered by many as one of the most influential astrophotographers today, having received numerous international awards. His astrophotography work has been featured in television shows (notably, the 2014 revival of Carl Sagan’s “Cosmos” series; plus, BBC, National Geographic, Discovery Channel), international publications, museums, and even in motion pictures such as IMAX Hubble 3D. To date, his images have been selected more than 30 times for NASA’s Astronomy Picture of the Day.
In this exclusive, three-part tutorial series, Rogelio shares his expert tips on creating stunning Deep-sky images, covering everything you need to know to get started—from a gear guide to post-processing techniques. Read on for Part 1 of 3, where you’ll learn about all the camera equipment and tools you need without breaking the bank!
All the Gear You Need Without Breaking the Bank
by Rogelio Bernal Andreo

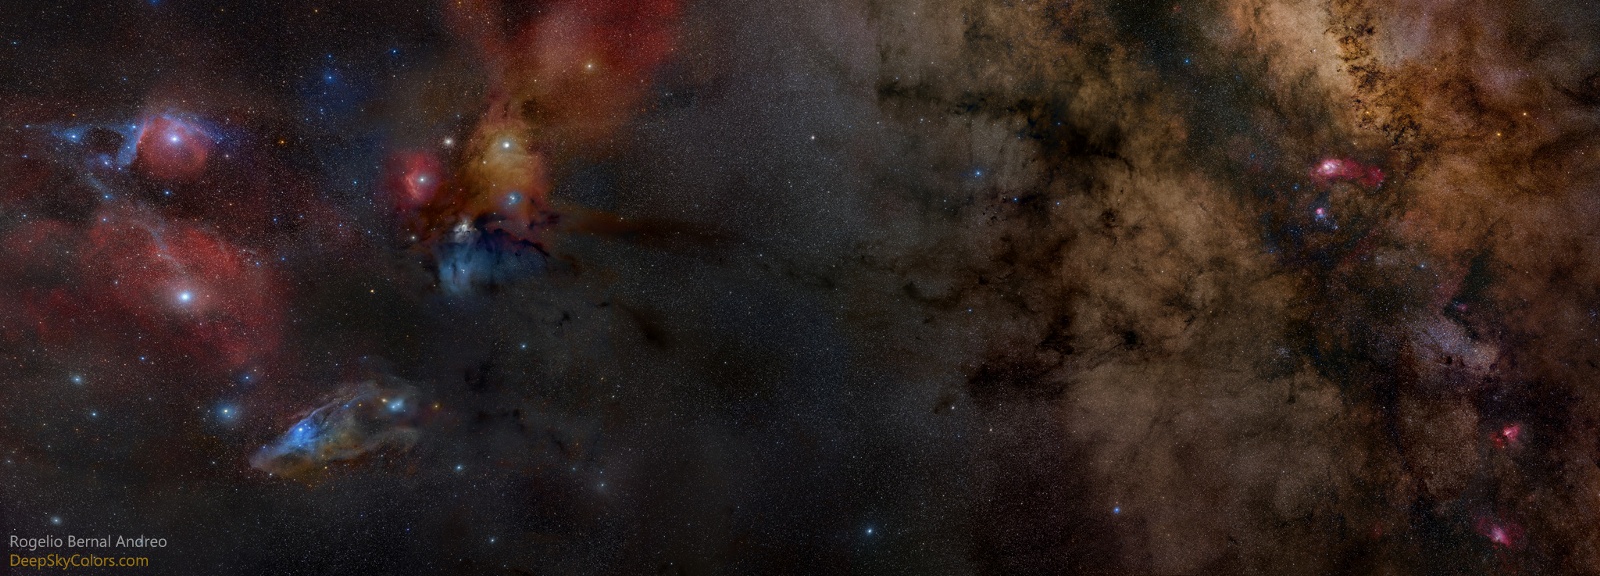
Who has not stared at an image from the Hubble Space Telescope and marveled in wonder about the universe? Not too many years ago, high quality images of the Deep-sky—nebulae, galaxies, star clusters—were only possible with the aid of astronomically expensive equipment, pun intended. Even today, many photographers, including seasoned professionals, can’t look at a high-resolution image of the Andromeda galaxy without a sense of discouragement or look at it as a path that belongs to others: “I will never be able to do something like this.”

However, the truth is that today, taking Deep-sky images is not only within the reach of almost anyone—you can do it without breaking the bank, and capturing all that ancient light can be an extremely rewarding experience. Interested? Then this three-part series guide is for you:
PART ONE: GEAR (Scroll down and on!)
PART TWO: SHOOTING
PART 3: POST-PROCESSING (Deep-Sky Photography Guide Part 3 to be published tomorrow at 1 P.M. US Pacific Time)
What do you need?
Deep-sky photography introduces gear and equipment that is unique to Deep-sky imaging. In fact, the only items from a “regular” DSLR backpack that you can use in Deep-sky imaging are the camera and the intervalometer. Even those are eventually replaced by CCD astro-cameras and a laptop. In any case, what this means is that you need to go shopping.
Since the promise is to show you how to produce your first Deep-sky image without breaking the bank, let’s build the most basic astrophotography rig, while discussing other options as we go along.
The most basic Deep-sky rig includes:
1. A DSLR camera
2. An equatorial mount
3. A telescope
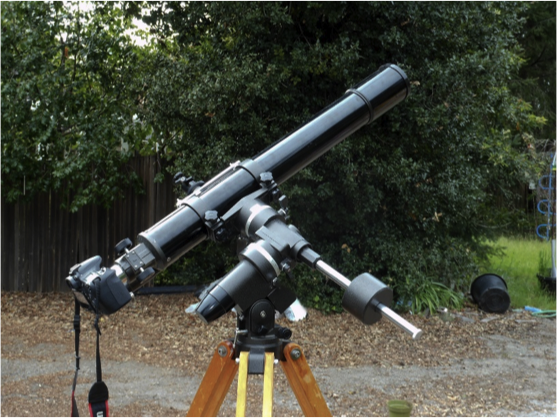
A basic Deep-sky imaging rig
You probably want to know how much money you are going to need even before we get into the details, right? Okay, as a ballpark figure, and assuming you already have a DSLR camera, you can graduate from this tutorial spending about $1,500. Recommended is a minimum of $2,000—that’s not petty cash, but in the context of photography equipment, it is not outrageous either. And this time, you’re after a galaxy or nebula thousands of light-years away, no less!
Shopping for equipment you’re not familiar with can be a great learning experience, but it can also be very frustrating. You want to make the right choice, but are unsure what that choice is, so let’s break it down.
It’s the mount!
Usually, the components most beginners tend to think about first when it comes to build their first Deep-sky rig are the camera and the telescope. That’s the first mistake.
When you take Deep-sky images, your exposure times should be as long as the brightness of your sky allow, and also as long as you are able to perfectly track the “moving” sky in order to obtain crisp images, not star trails. We are not talking seconds here, we are talking minutes. Starting with two or three and moving up to five, ten and even 30 minute exposures. Tracking, or following the sky as it moves (okay, it is the Earth which rotates) during these long exposures is done by this crucial component in an astrophotography rig called the mount.
Here is the best suggestion you will ever receive about doing Deep-sky photography: If you have a budget to purchase a camera, a telescope, and a mount, then plan on spending 70% of your budget on the mount. No kidding.
The reason is simple: An excellent camera connected to an amazing telescope, both on a cheap mount will likely result in images that did not track (or guide – we’ll get to that in Part 2 of this tutorial) correctly, and therefore are useless.
On the other hand, an inexpensive camera and a low-budget telescope on a decent mount will—at the very least—get you results. You want results, not frustration that is impossible to overcome…until you buy a better mount. So start by buying the best mount your budget can afford.
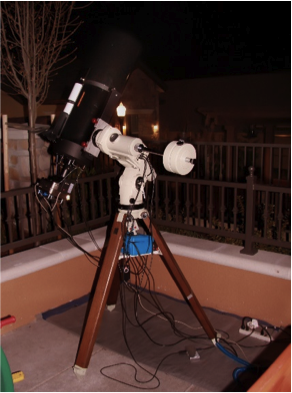
The mount is 70% responsible for your success
If your goal is artistic Deep-sky imaging, not scientific sub-disciplines, make sure the mount is a German Equatorial Mount, sometimes referred to as GEM. The other type of mount widely available is the AltAz mount—you do not want that. Now, if you happen to already have an AltAz mount and would rather put it to good use, you will need a wedge to tilt your mount. Contact your local astronomy club about that, they should be very happy to help and assist you.
Back to the GEM mounts, recommending a mount under a budget is tricky, because good mounts really start at $4,000. On the other hand, many people are obtaining very good results with mounts in the $1,000-$2,000 range, especially in the second hand market. Celestron, Orion, Losmandy and Vixen are some brands that make decent low-budget mounts. Do make sure that the mount you choose can handle the weight of your camera and telescope. Cheaper mounts have smaller load capacity than pricier mounts.
If you have money to spare ($4,000 and up), check Astro Physics, Takahashi, ASA or Paramount. In short, more money does not only buy you more load capacity, but it especially buys you precision, which is exactly what you need to take exposures that go for several minutes and have to precisely follow the “moving” sky with subpixel accuracy.
Another suggestion I’ve briefly mentioned it before: whenever possible, shop for used, secondhand items. The top destination for the sale of used astro-gear is Astromart.com, and it is usually trouble-free. The service is not free, however. There is a small annual fee, although you don’t need an account to browse the ads.
The camera
Here’s the one piece of equipment you’re likely to be familiar with, because chances are you already have a DSLR camera. Although there are some cameras more suitable for Deep-sky imaging than others, most of them are good enough for at least getting your feet wet into Deep-sky photography, without having to purchase a new camera or CCD. That means more money for your mount!
If you still need—or want—to buy a DSLR camera for Deep-sky imaging, one of the most popular “budget” models today is the Canon 6D. In general, Canon has a much stronger tradition and presence in the Deep-sky arena—literally, they regularly attend astro-imaging conferences. Many different models have been tried extensively. If you’re using a different brand—whether it’s Nikon, Panasonic, Sony—you should still try venturing into Deep-sky imaging with your camera. There’s always time to go for a different one in the future if you ever feel it’s needed.
Although we are trying to build a budget rig, let’s briefly mention where to go if you have money to burn, just as we did with the mount. If that’s the case, stop looking at DSLR cameras and start looking at cooled CCD astro cameras. You might be surprised to see that you can buy a nice KAF-8300 based CCD camera, with cooling that will put the CCD sensor 40C degrees or more below ambient temperature for $2,000 or less. Again, check the secondhand market. Some brands to keep in mind for a low to mid level CCD: Starlight Xpress, Orion, Atik or SBIG (ST/STF models). Some high-end brands are SBIG (STL/STX/STXL series), Apogee and FLI, but then you’re looking at a minimum of $5,000.
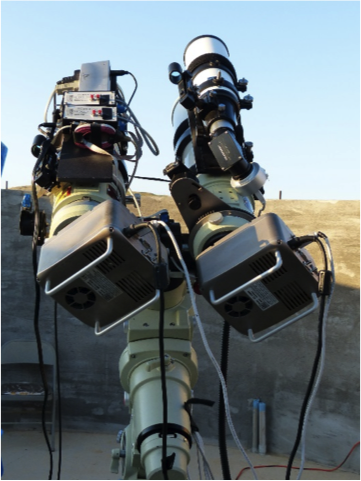
My current setup: 2 CCDs and 2 telescopes
If you go for a CCD, you will be asked the question, “Color (OSC) or monochrome?”
DSLR photographers tend to choose color, perhaps in an attempt to not being exposed to too many new things at once.
The best choice however is monochrome. With it, you register all the light that hits the telescope without being filtered by a Bayer matrix—and where ultimately all Deep-sky photographers land sooner or later. Monochrome does not mean you cannot produce color images, but you will need to add a filter wheel and RGB filters to your list of gear. I can understand why one would want to leave the filter ordeal for later. But if you do that, keep in mind it’s a decision that may cost you extra in the long run, and if you’re already doing the jump to a CCD, you might as well go all the way.
The telescope
First lesson in telescopes: a telescope is not a microscope.
Magnification is not what defines a telescope. It is aperture, that is, the dimension of the tube’s diameter. The larger the aperture, the more light the telescope is able to gather at any given time. When your goal is to capture extremely faint light that’s thousands or millions of light years away, it makes sense. That’s why when we describe a telescope model, the number in millimeters or inches always refers to the telescope’s aperture, not its focal length as it happens with camera lenses.
As expected, one of the factors defining the price of telescopes is, therefore, their aperture. The great news is that a humble 3 to 4” ED refractor telescope is often all you need to get started. For example, the Orion 80mm ED refractor can be found in the second hand market for $300 or less. That’s a bargain compared to the average price of a decent camera lens! Remember: the 80mm in “Orion 80mm ED refractor“ is not the focal length, but the aperture.
There’s another advantage of going with an 80-100mm refractor: they are very, very forgiving! What do I mean by that? 80-100mm refractors tend to have a rather short focal length. In the context of telescopes—not camera lenses—short focal length is anything between 300 and 800mm, and just as it happens with camera lenses, the longer the focal length, the more robust (precise) our tripod (mount) needs to be. Therefore, it is wise to start with a short focal length telescope, and save that 1500mm (or longer) focal length telescope for next season.
Everything else
In addition to the three main components—mount, camera, and telescope—the only things you would need for the most basic Deep-sky imaging rig are:
1. An intervalometer
2. A T-mount adapter to connect your camera to the telescope, and maybe a spacer to achieve focus.
3. A 12v battery to run your mount in the wild—assuming you need to travel to a remote site for dark skies, and any power cables or adapters to plug your mount to the battery.
4. A red-light flashlight, to preserve night vision during your imaging session, if you need some light.
You’re not taking photos through an eyepiece. You want to connect your camera to the telescope, that’s why you need the T-mount. The moment you have the T-mount, try it in daylight, take your telescope outside, and point somewhere far enough. Note: NEVER POINT AT OR NEAR THE SUN. Then, see if you can achieve focus. You do not need to be precise, just be sure you have enough focus run to achieve focus, that’s all. If you don’t, you may need some spacers. Get the specs (diameter, length and thread), and shop online.
This list of additional accessories was small—very small in fact. As you walk the learning curve, you will find yourself acquiring a plethora of accessories that might quickly fill up an entire wall in your garage.
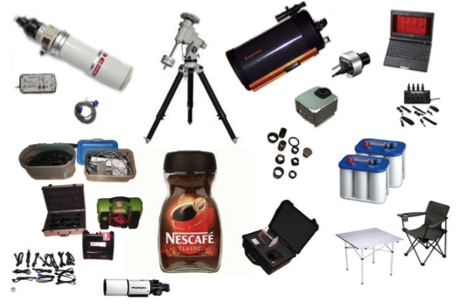
The list of accessories tends to grow fast.
This will be your own adventure, as you evolve as a Deep-sky astrophotographer.
One way to help the budget is buying secondhand whenever possible. If they don’t work out, there are many items that you should be able to re-sell for about the same amount you paid.
One item that’s not mandatory, but you may want to get (or make yourself) right now is a Bathinov mask. It will later help you immensely to achieve perfect focus. Learn more about Bathinov masks here: http://en.wikipedia.org/wiki/Bahtinov_mask
Now that you’ve got the basic gear, are you ready to go out and take some Deep-sky images? I will show you how in the second installment of this three-part guide series: Deep-Sky Photography Guide Part 2: Shooting Tips For Beginners

To see more of my work, follow me on 500px, or check out my official website. You can also connect with me on my Facebook page.
Got any questions for me about Deep-sky imaging equipment? Leave a comment for me below!


Leave a reply