Jimmy Mcintyre is a travel photographer and educator. His photos have been published in local and national magazines, including the BBC. His online courses on digital blending and post-processing can be found in his official website. In this tutorial, Jimmy shares his expert night photography tips on photographing cityscapes at night and during golden hour.
How To Create Stunning
Golden Hour and Night Cityscapes
by Jimmy McIntyre
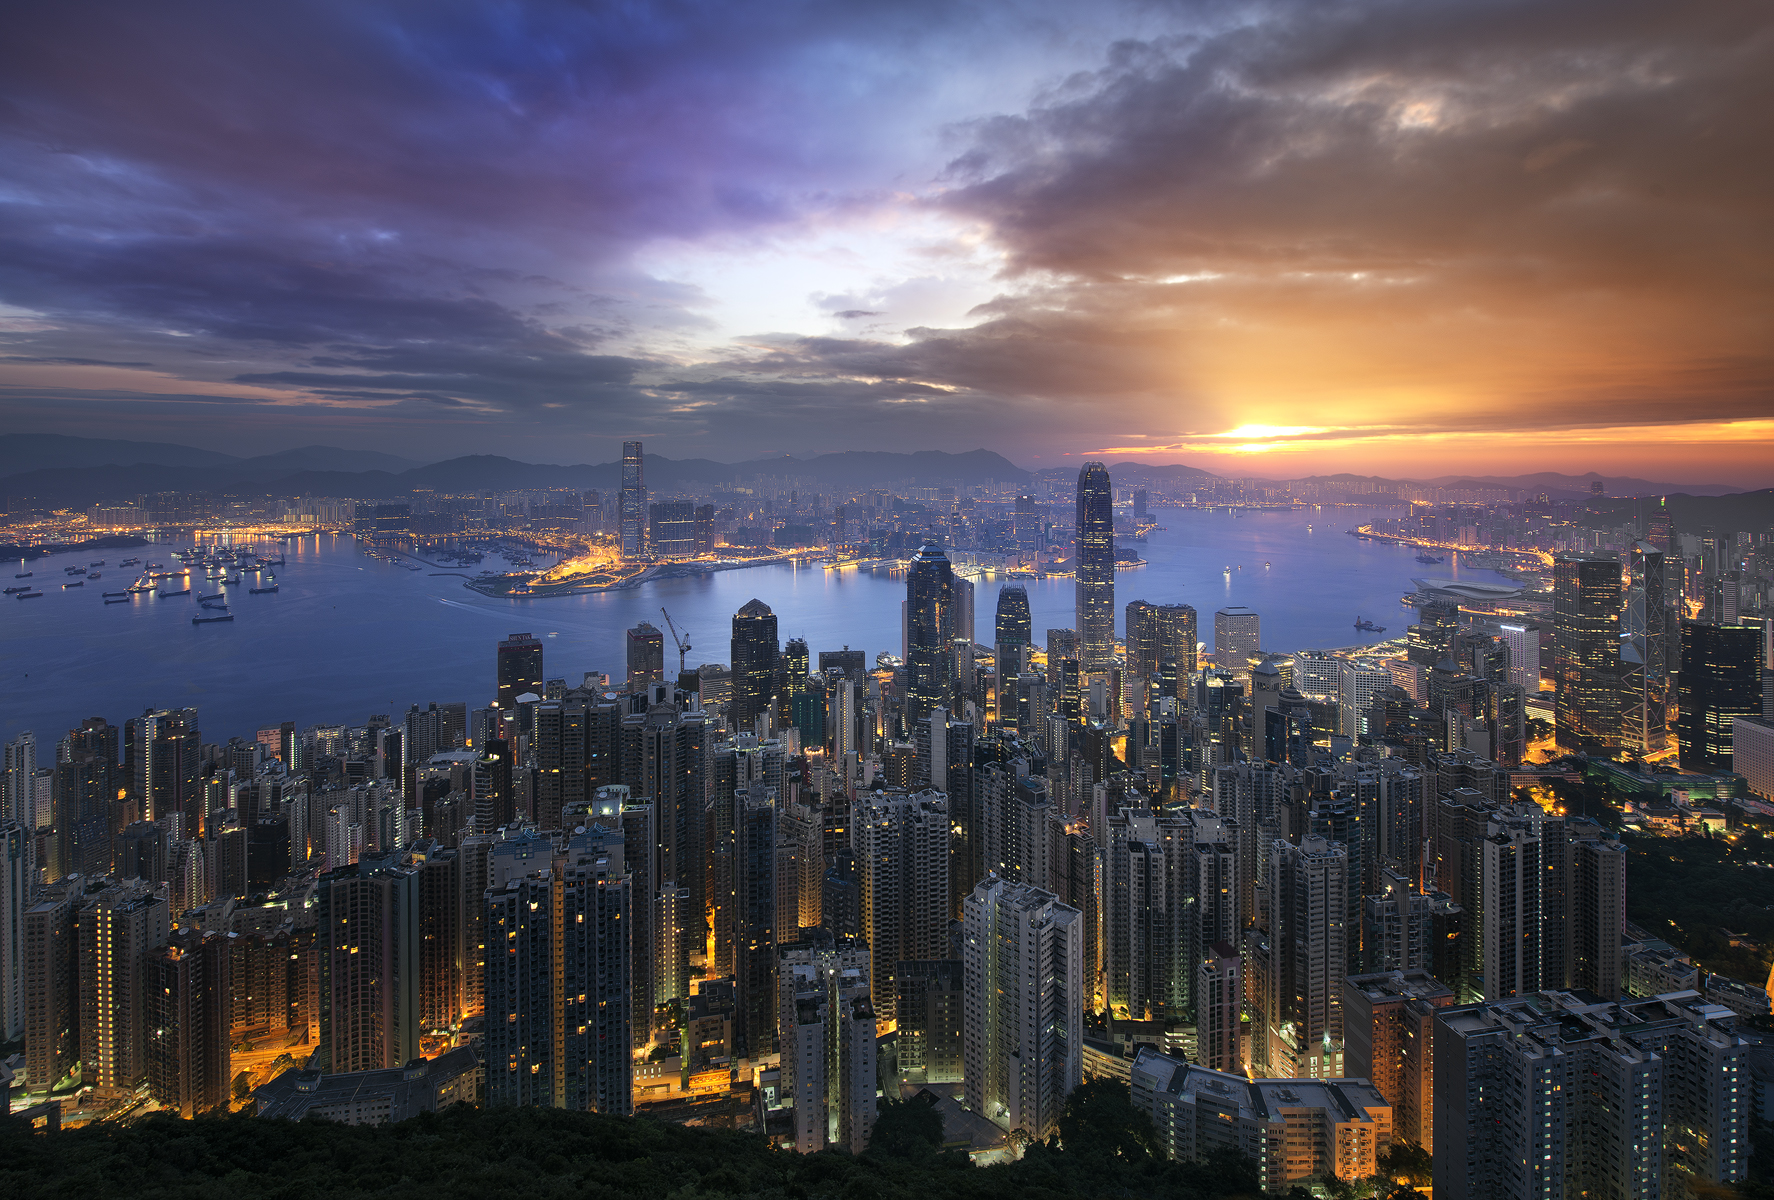
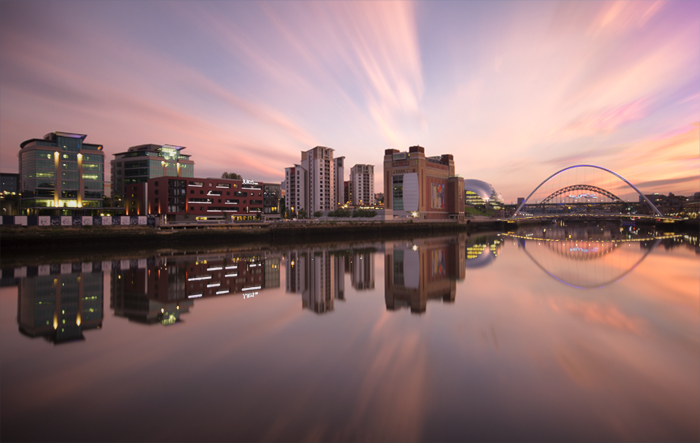
It was the fifth time that we climbed this hill at 4 a.m.—the four previous mornings had failed to present us with a decent sunrise over the Hong Kong skyline. Tired, hungry, mosquito-bitten, we sat and waited once more, hoping for a sliver of color to pierce the clouds. We doubt we’d ever catch this elusive sunrise.
Yet, our faith and persistence were rewarded as the faintest orange glow began to creep through the clouds. We acted quickly to capture it. Ten minutes later, it had disappeared. Hours and days of waiting, and it was worth every bit of it. We watched the city below us slowly wake up.
And I was reminded how much I love shooting cityscapes backgrounds. This was image I captured from that morning:
There’s nothing quite like the energy and buzz of a large city. We can capture such a diverse range of scenes and moods. Over the years, I’ve had the pleasure of shooting some of the finest cities in South America, the United States, Europe, and Asia.
Here are a few tips on shooting and processing cityscape night photography images that I’d like to share with you.
1. Shoot in Aperture Priority mode
As we advance as photographers, it is essential that we explore the various shooting modes our cameras offer. The two main modes for any photographer are Aperture Priority (AP) and Manual. Aperture Priority offers the easiest solution to your cityscape needs. Basically, we can control everything in-camera, apart from the shutter speed. The advantages of this over shooting in Auto are huge. For example, in lower light situations Auto mode will boost ISO significantly, while keeping the shutter speed low, leaving our images with masses of noise. But in AP, we can manually keep ISO low, maintain an optimum aperture, and extend our shutter speeds to compensate for the low light. All of this will equal a sharper, cleaner image.
2. Bracket exposures to overcome scenes of strong contrast
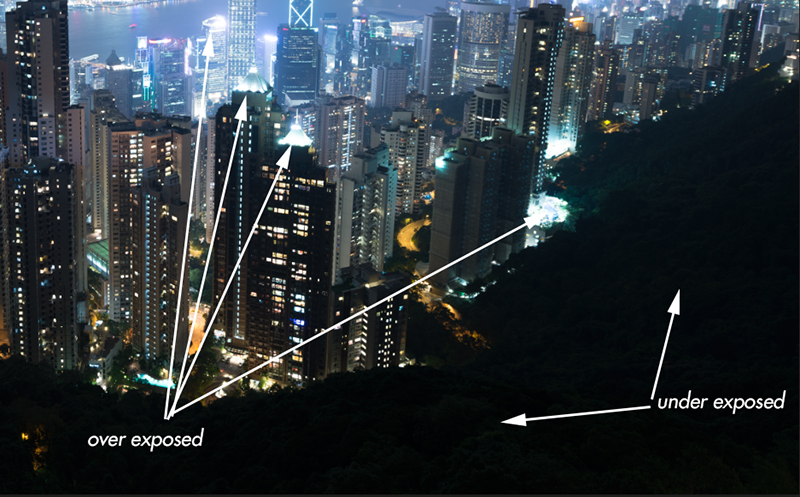
Cityscapes can have an extremely wide dynamic range of light due to artificial lighting, more so than landscapes. There’s often a large difference between the brightest and darkest areas of our images. Our cameras aren’t capable of capturing scenes of such high contrast.
In order to create a balanced image, it is sometimes necessary to take multiple exposures of the same scene. Otherwise, with a single exposure, you may end up with heavily under/over exposed areas. Taking multiple exposures is known as bracketing. If you’re new to bracketing, type the name of your camera and ‘Auto-Bracketing’ in Google to check if your camera has an auto-bracketing capability (where the camera does it for you).
Close up of base exposure
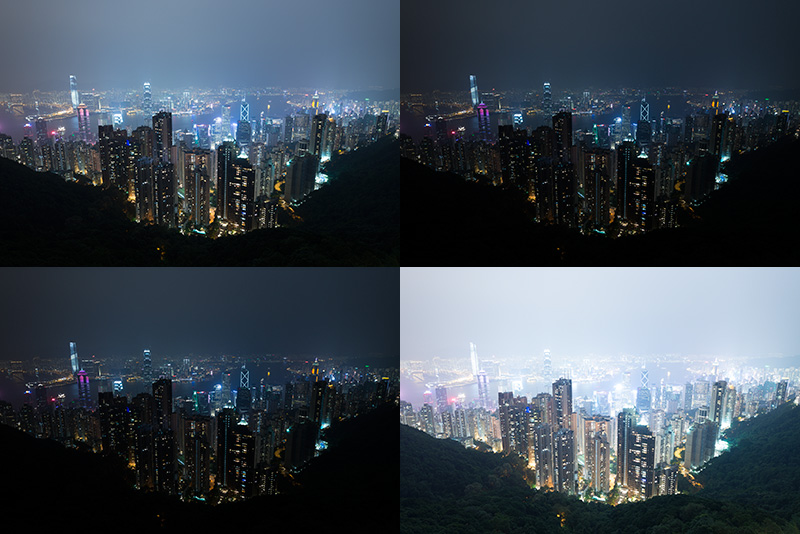
4 bracketed exposures
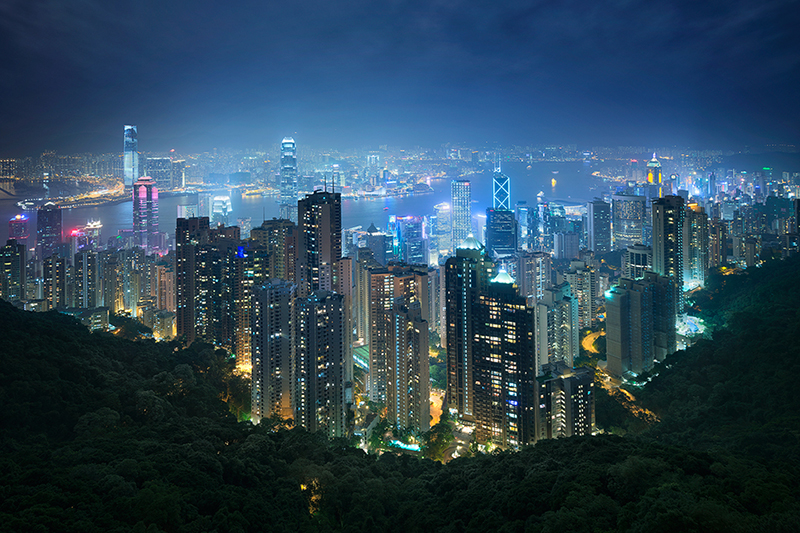
Final image after blending exposures with luminosity masks
For this image, I took 7 different exposures, but I only chose to use 4. To create the sharpest, cleanest image, I highly recommend you blend the exposures using luminosity masks. See this link for a luminosity mask tutorial on exposure blending. You can also download my free luminosity mask actions.
The city lights in the base exposure were mostly over exposed, while the trees in the foreground were far too dark. I used two lower exposures to control the blown out lights. Note that the lights are still bright in the final image. It’s important not to darken them too much, as they are an important element in any night cityscape that can add beautiful energy to your scene. Finally, I used the brighter exposure to bring some gentle details back into the foreground.
3. Manual focus is a must!
The improvement in speed and sharpness of auto-focus in most modern lenses is incredible. But, for those of us who can take our time and don’t need to worry about capturing fast moving objects, manual focus is king. Manual focus will always produce consistently sharper images than auto-focus. And, when light begins to fade, auto-focus becomes significantly less effective.
Beginners to photography often think that manual focus relies on looking through the viewfinder while focusing. While this is possible, it’s extremely difficult if your point of focus is far away. Instead, switch to Live View and use the magnifying glass buttons to zoom into your area of focus. Then simply rotate the focus ring until you’re happy. Here’s a quick tutorial to show you how to fine tune image sharpness using Live View.
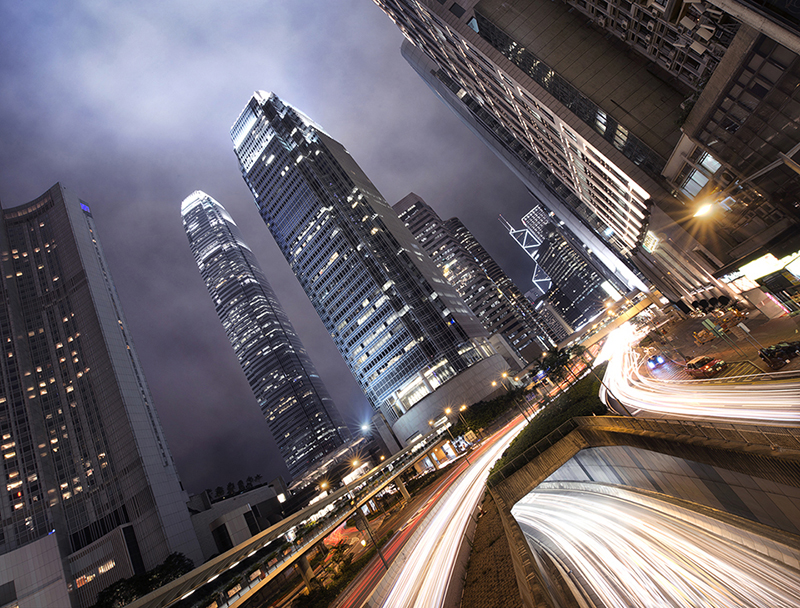
4. Capture and layer stunning Light Trails
Light trails add a wonderful dimension to your images. They’re also very easy to capture and process.
First, shoot the scene as you would normally, trying to capture a sharp image, but without thinking about the car trails.
Next, we need to extend our shutter speed. This will allow us to capture long, sweeping light trails. We can do this by using a smaller aperture (creating a larger F value). Try to create a shutter speed of around 25-30 seconds.
Now take as many shots as you wish, but time the shots well so that you capture as many light trails as possible. In the end, you may end up with a handful of ideal exposures.
The 6 light trail exposures used to create the above image
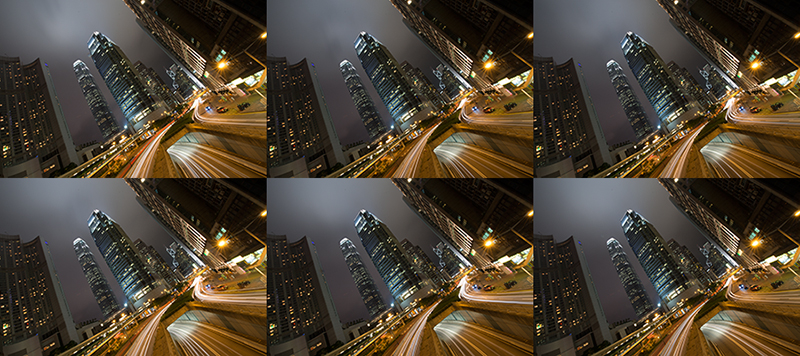
Now we can layer the light trail exposures into our base exposure very easily in Photoshop. I created this video below to show you how—press play and watch:
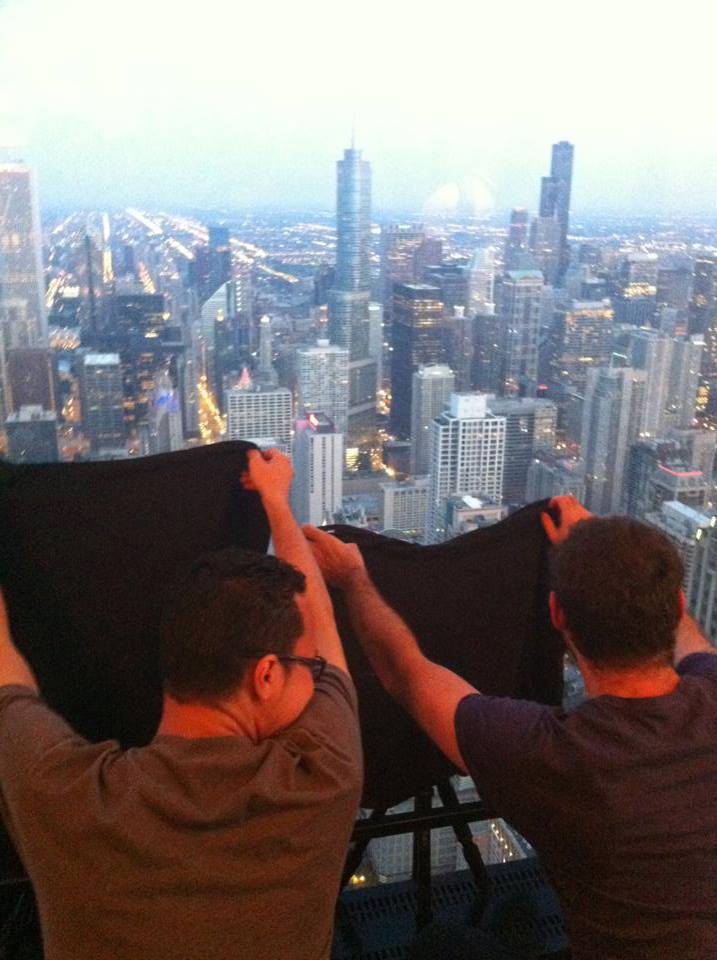
Photo by Begirl all over the world
5. Shoot through glass
At some point, every cityscape photographer is going to be faced with the challenge of shooting through glass. Some of the best views come from tall buildings that have observatories surrounded by glass. Unfortunately, this glass is often dirty and also reflects interior light into our lens, causing flare and softening our images.
There are ways to overcome these challenges! First, to combat the interior light, you have to place the lens as close as possible to the glass, and then encase it in a dark fabric. You can buy specialist equipment for this, but on the image to the right I simply used a scarf. This should be enough protection from the interior lights.
To shoot without capturing the dirt on the glass, we need to employ one simple technique – use a larger aperture (smaller F number). You’ll notice that if you have dirt on your lens, or sensor dust, a small aperture will often make this visible in your images. But with a large aperture (small F number), the lens dirt will not be visible. This same principal applies to shooting through dirty glass. Try shooting at varying apertures until your image is free from dirt and sufficiently sharp.
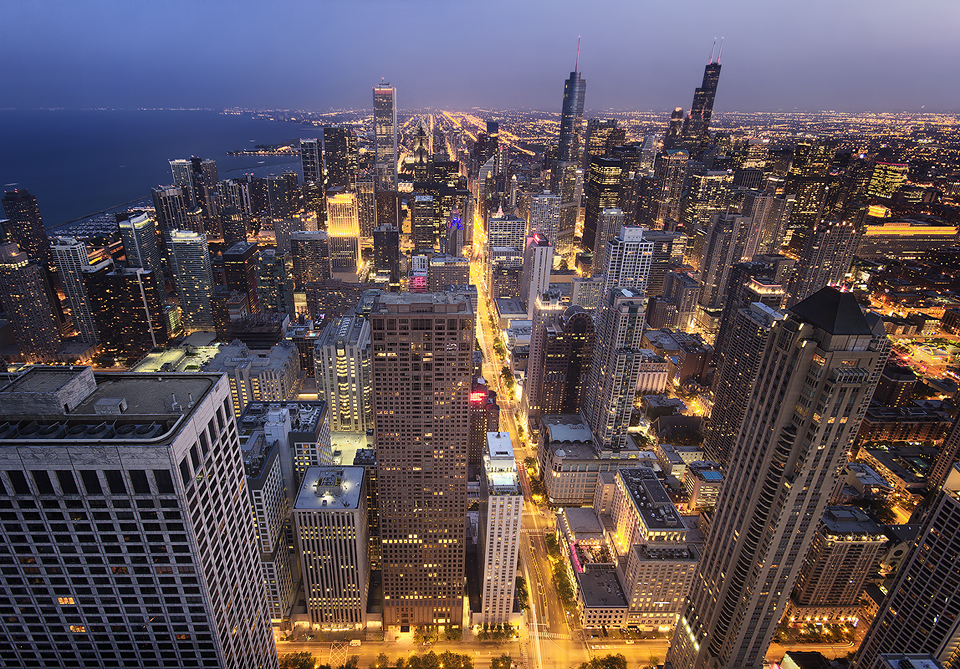
For the image below, the glass had small spots of dirt that became invisible at f/8
Shot through glass at the John Hancock Observatory in Chicago
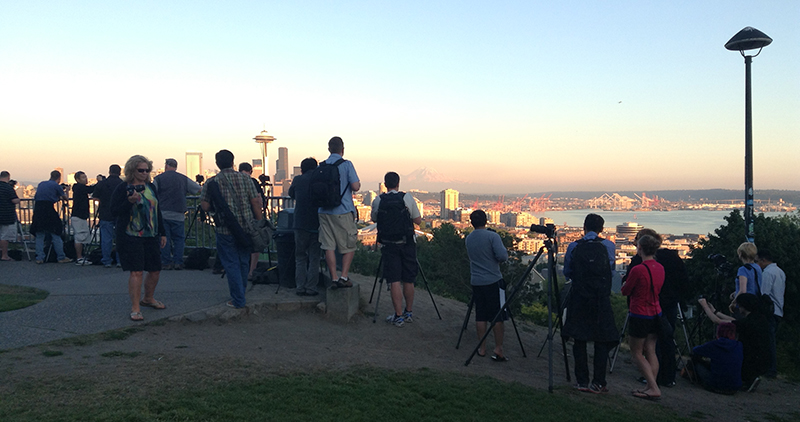
6. Get to your shooting locations early
This should go without saying. Hoards of photographers jostle for the best spots so it’s best to get there early. Arriving two hours early usually gets me the spot I was hoping for.
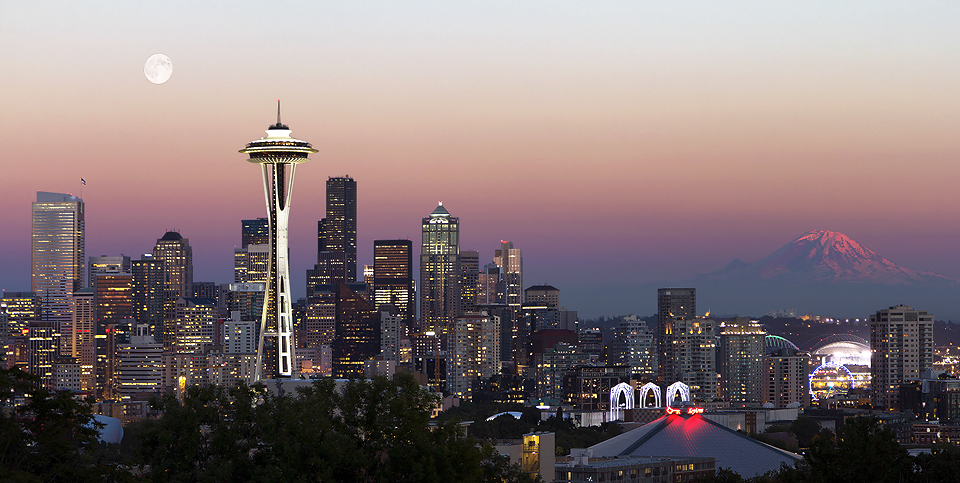
Photographers gather early for some Seattle cityscape shooting:
The shot without tourists:
7. Keep the air-con off
This may seem like a strange tip. If you’re in a hot country, you may be inclined to ignore it. For the most part, you’ll be fine. However, on occasion, if you’ve spent time in a nicely air-conditioned room and go out shooting, you may find your lens has fogged up. This happens when the cool lens comes into contact with hot, often humid, air. It can take a long time to finally rid the lens of the moisture.
POST-PROCESSING TIPS
We’ve already seen some post-processing tips, but let’s look at a few more that could help to give your cityscapes something extra. Naturally, this is down to personal taste. Some may like to keep their images fairly natural, while others may push their post-processing a bit more.
1. Perspective correction & barrel distortion in Adobe Camera Raw
More than most styles of photography, cityscapes are littered with horizontal and vertical lines. How we choose to treat those lines can result in a very different feel. Sometimes perspective and barrel distortion can enhance the mood of an image, and sometimes they can negatively affect the scene. How you choose to render an image is entirely your preference, but knowing how to quickly and easily correct distortion is an essential skill.
We are going to look at Adobe Camera Raw for a quick, easy and effective way to correct our images. This process could also be done in Lightroom.
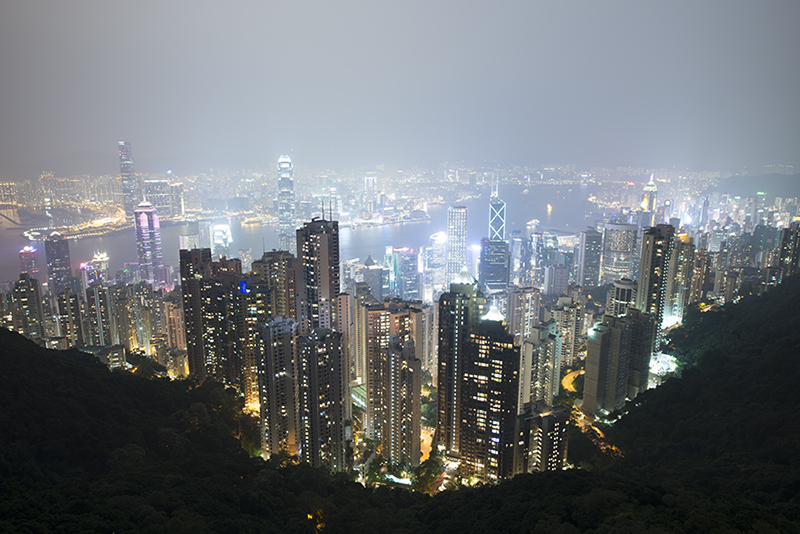
Here’s the ‘Before’ image, with noticeable perspective distortion and some barrel distortion:
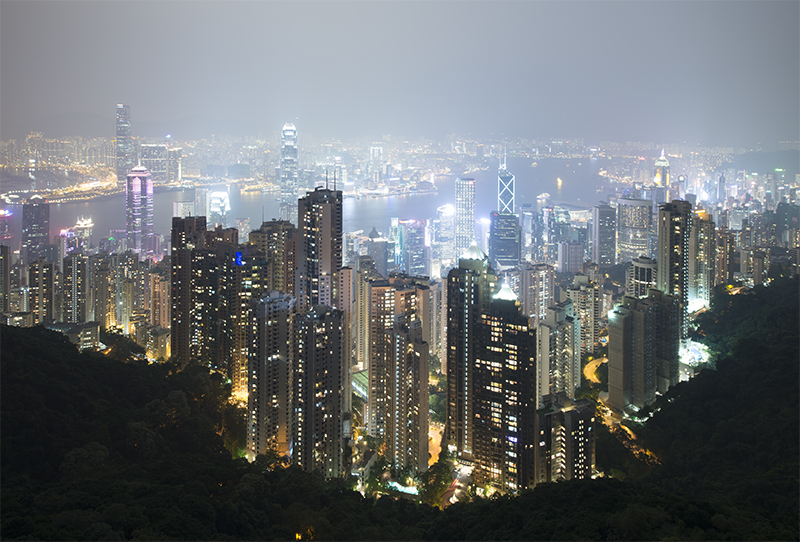
Here’s the same image with the distortions corrected:
Here’s how to do it in ACR:
First, drag your RAW files into Photoshop. ACR should open automatically. The great thing about ACR is that if you have multiple exposures you can choose the Select All button in the top left, and any change you make will be equally applied to all exposures.
This is a visual demonstration of the steps needed. See the numbered text below to follow the steps.
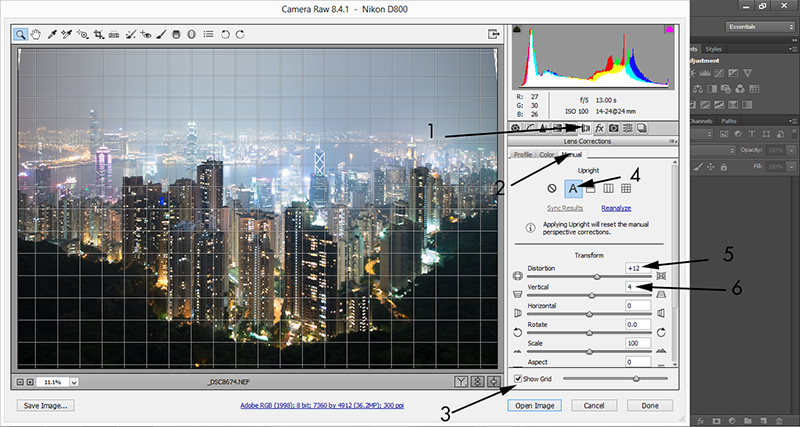
Steps to correct distortion:
1. Select the Lens Corrections tab.
2. Go to Manual
3. Select Show Grid so that you have a way of measuring the straightness of your buildings.
4. Try each of the options to see which gets the best result. On this image I used A, which stands for Auto.
5. This will do a great job correcting most of the perspective distortion, but you may need to change a couple of sliders to complete the job. Next, I increased the Distortion slider to 12 to remove much of the barrel distortion.
6. Then I changed Vertical to 4 which made the buildings nicely straight.
And that’s it! Remember to press Sync Results to make sure the change is applied to all exposures.
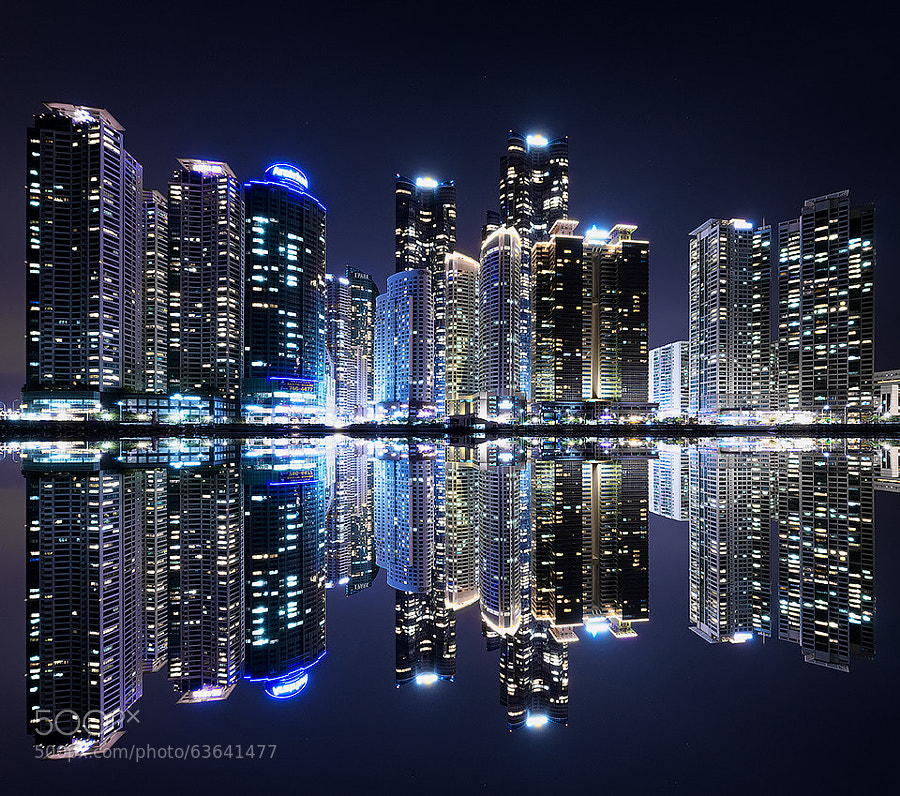
2. Desaturate and add a blue tone to create a futuristic mood
Most photographers are aware that certain color combinations complement each other. There are even charts on the internet 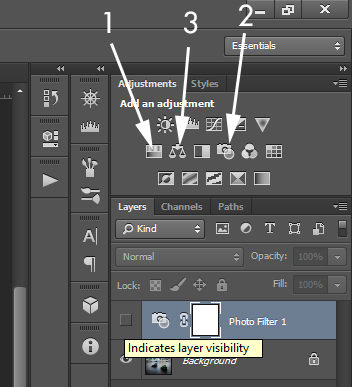 that can show you which colors play well with other colors. One thing I enjoy is creating a futuristic feel when I capture modern-looking cities.
I almost entirely desaturate an image with a standard Hue/Saturation layer (1 in image), and then add a blue Photo Filter (2), or enhance blues through a Color Balance layer (3).
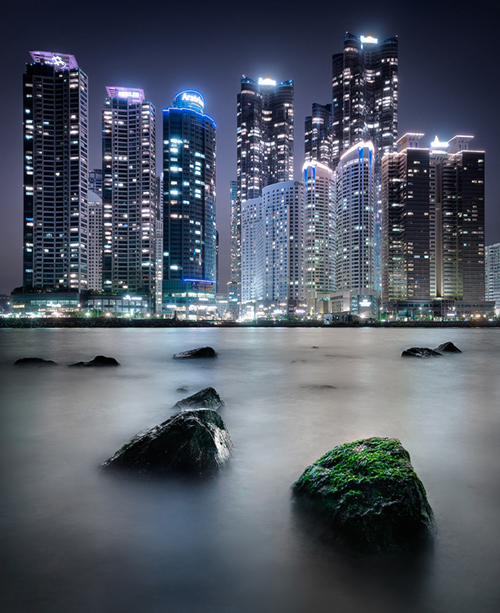
Futuristic City of Busan, South Korea:
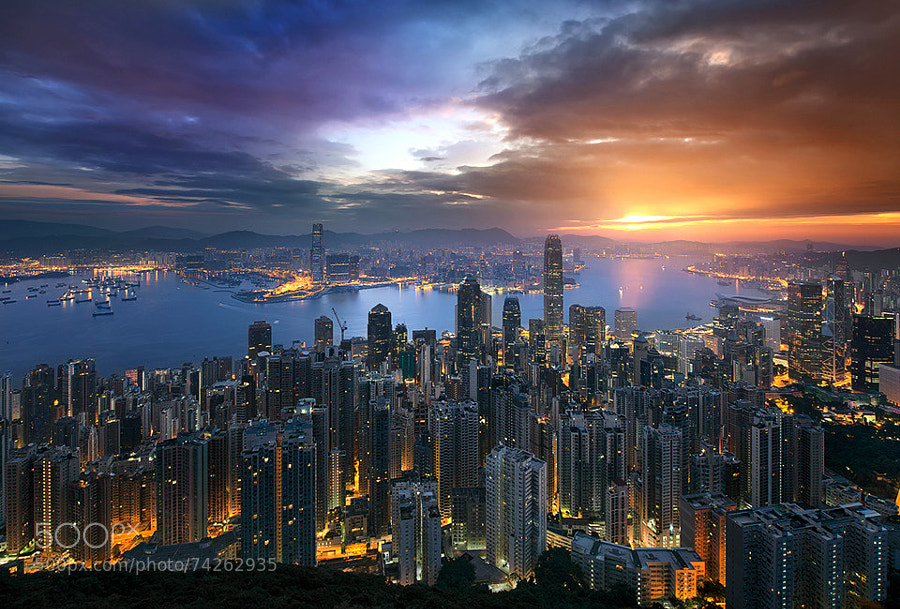
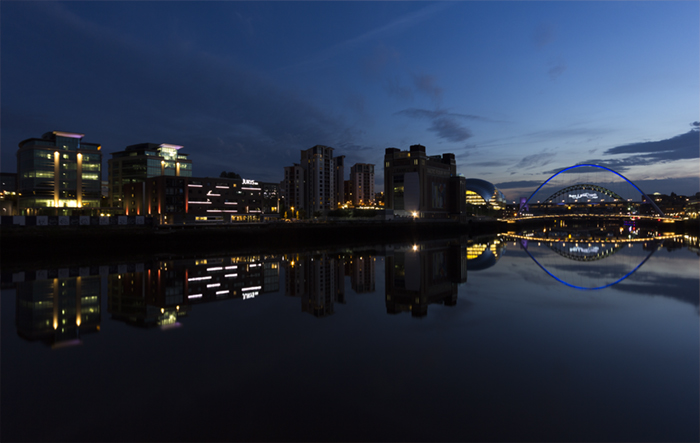
3. Combine golden hour with city lights
This is a technique I personally love. We can very easily blend the city lights from a night scene into a golden hour scene, giving the image more depth. Below, you can see the 2 images we’ll be blending. The night time exposure was shot 45 minutes after the golden hour image. The golden hour image is a combination of two long exposures blended using luminosity masks. Below the images, you’ll see a video showing you how to do this. Hint: We’ve already seen this blending process!
City lights
Golden Hour Scene
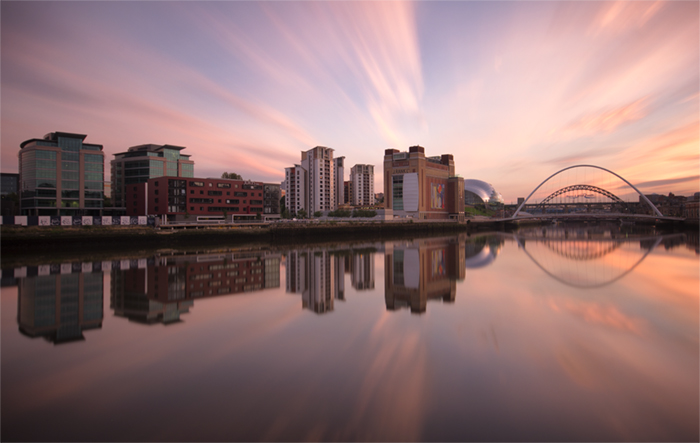
The final blended result
Digital Blending Video tutorial:
Note: These final 3 points are moving further away from pure digital photography.
4. Blend like crazy!
Depending on how creative you want to be, you can take the blending process to a whole new level, like in the stunning image below from Beboy Photographies. With a base exposure, he then blended in the long exposure sky, a separate exposure for the sun, another exposure for the city lights, and many exposures for the light trials. All of these exposures are from the same scene shot in the space of about an hour.

5. Create a reflection
Fake reflections are much like Justin Bieber, you either love them or you hate them.
Creating a reflection is a fairly easy process. You need an image with a cityscape in the background that has a flat border underneath it. You don’t need water in the foreground. Here is an easy tutorial for creating fake reflections in Photoshop.
This list barely touches the surface of night time and golden hour cityscape night photography. The shooting and processing possibilities are huge, limited only by our imaginations and knowledge. Hopefully, you’ve learned something useful here that you can apply out in the field or in post-processing.

Please feel free to upload and share a link to your Cityscape shots on 500px in the comments box below for us to check out.
You Might Also Like These Articles:
- 50 Surreal Night Sky Images Of Every State In The USA
- Learn To Shoot And Edit Intense Black & White Cityscapes Like Serge Ramelli
- How To Create A Dynamic Cityscape with 5 Exposures And Digital Blending In Photoshop
- 500px NEXT: Moody & Dramatic Cityscapes by Michael Salisbury


Leave a reply