Erez Marom is a professional nature photographer, photography guide, and traveler-adventurer based in Israel. Visit his official website to see more of his work. In this tutorial, Erez shares the story behind his image, “Night Ride”. Read on to learn how he captured and processed this dark and moody shot of an abandoned train track in the Bolivian plains, step by step. Scroll down and get inspired!
by Erez Marom
When 500px asked me to write a story about “Night Ride”, I was skeptical at first. I wanted to do an article about one of my popular shots from Iceland, or an interesting shot from Norway or Namibia. This shot, from Bolivia, seemed a bit too simple to be analyzed. Because it’s summer right now, 500px also wanted a shot which wasn’t set in a cold-weather landscape, but I’ll tell you a little secret: even though Bolivia is very close to the Equator, and even though the shot has warm colors, the Salar De Uyuni Salt Plains—where I took the shot—is very cold, especially at night. With this in mind, I went into writing the article, and I was pleasantly surprised. The story of the actual trip is nice and a bit funny, which makes for more than just a technical article. The fact that the shot is simple makes it easier to both understand its appealing factors, and convey the message that a shot doesn’t have to be complex compositionally to be the subject of interesting analysis.
THE STORY
I took the shot while on a trip to South America in late October of 2012. People assume that because I’m a professional nature photographer, I only travel to shoot, but this is far from true. In Israel where I’m from, if you don’t travel, you’re weird, and so I’ve been traveling since I was 24 years old—way before becoming a photographer, not to mention a professional one. The South America trip was by no means a photo trip, although I did shoot on occasion. After traveling and partying in Colombia and Peru for three months, Bolivia was the destination that has most photographic potential, and so I prepared to travel and trek there as much as I could. During my one month stay in the country, I trekked for about two to three weeks, much more than in the previous two.
This particular trek was a so-called “expedition”, an experimental trek to test the plan before including it into the trek-list of a well-known tour operator. I was in a group of about 13 people. Together, we headed out to Southern Bolivia’s Altiplano region. The trek was interesting and difficult at times, but the area held a lot of photographic appeal. As expected of an Israeli operator, we were very opportunistic. We slept in the funniest places you could imagine—a school in the middle of nowhere, a theater hall, an abandoned village. It was most bizarre indeed!
But on the last night before driving back to Uyuni, we slept in an active army base! It seems that in Bolivia, if you’re willing to offer a bit of cash, there’s nothing you can’t do…
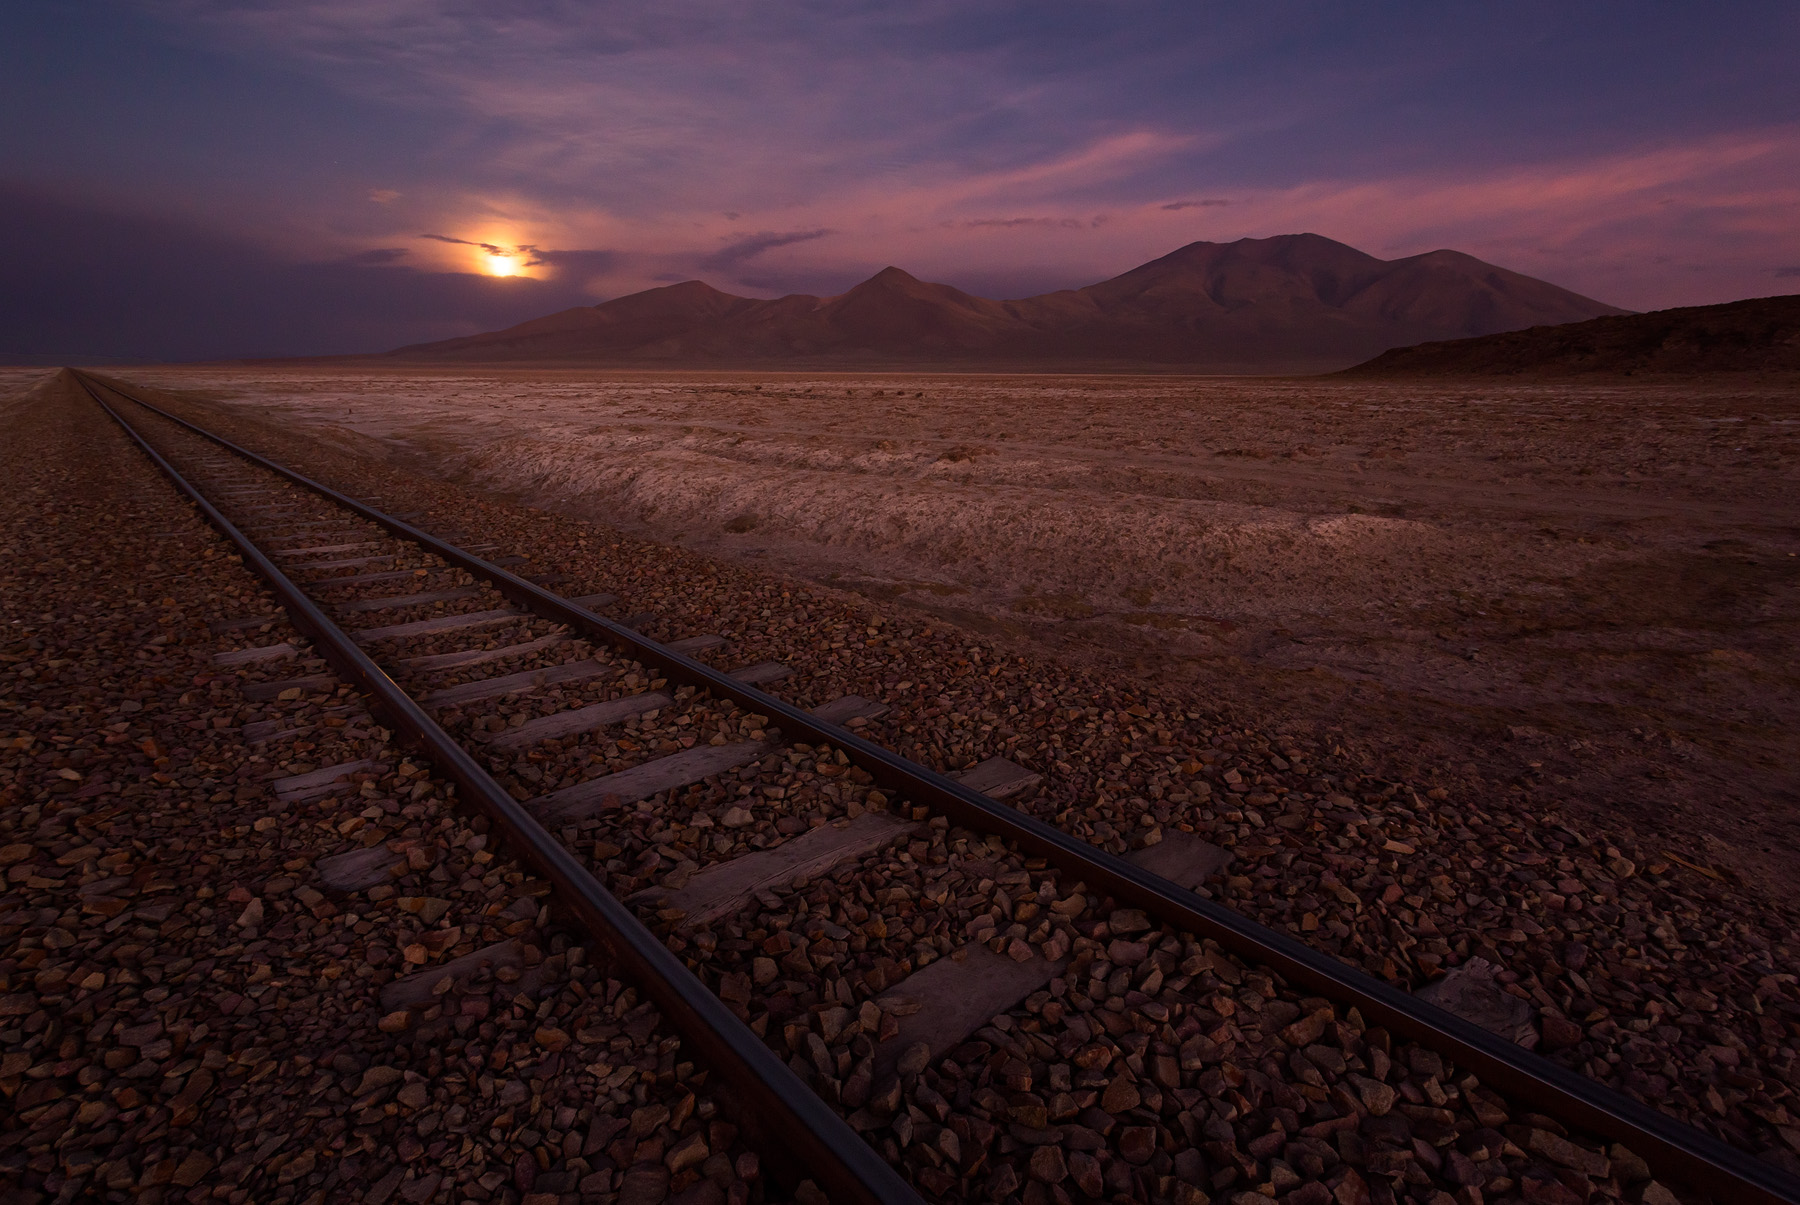
Close to the army base is a train track, going straight into infinity on the flat Bolivian plains. The moment I saw the track with the mountains behind it, I started getting the feeling of a photographic opportunity. I waited for the sun to set, and for the moon to rise. I knew it would be a full moon, and when I understood where it was going to rise, I knew I could get a good shot.
THE SETUP
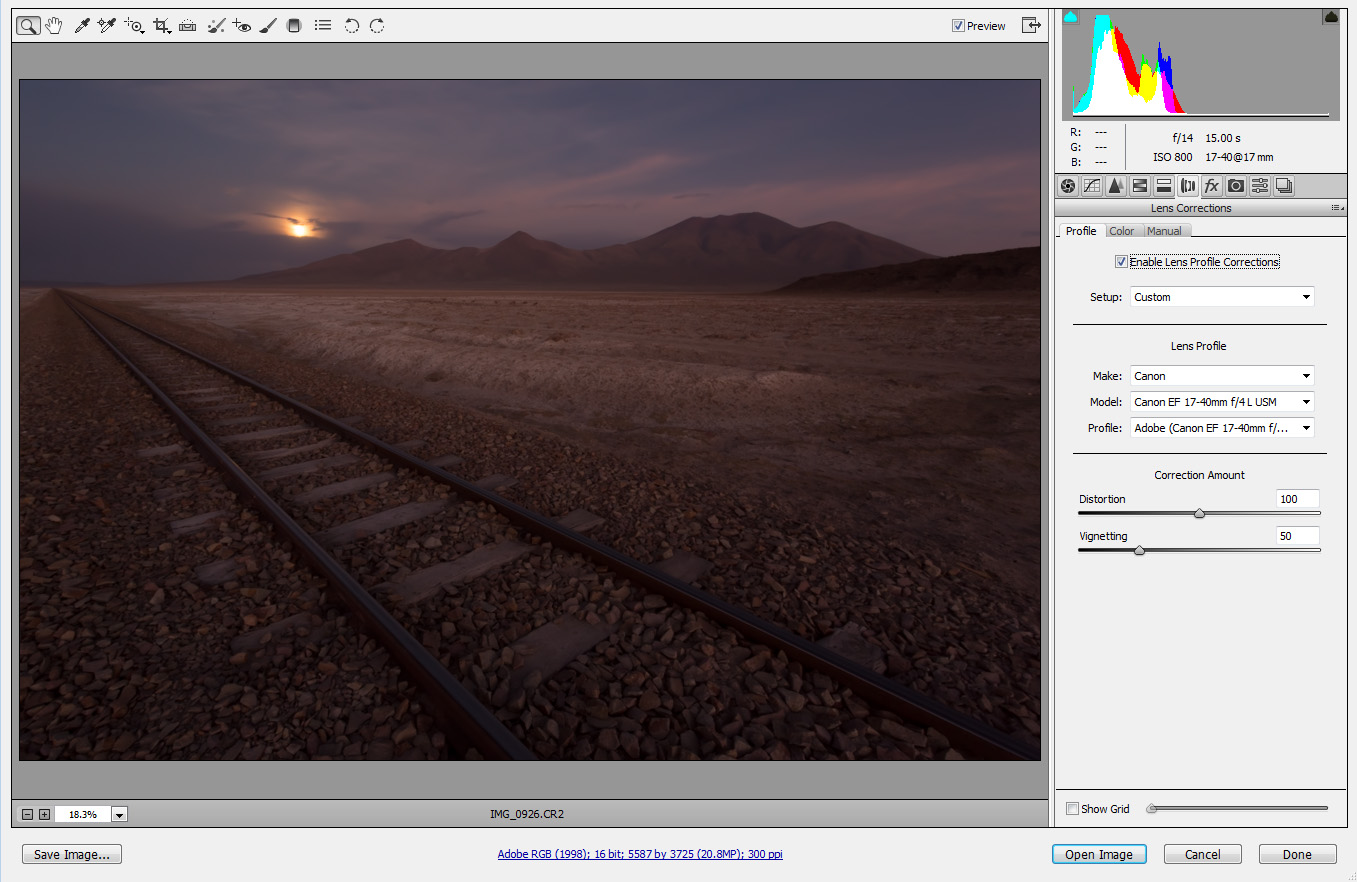
I used my Canon EOS 5D Mark III, with a Canon EF 17-40mm f/4 at 17mm.
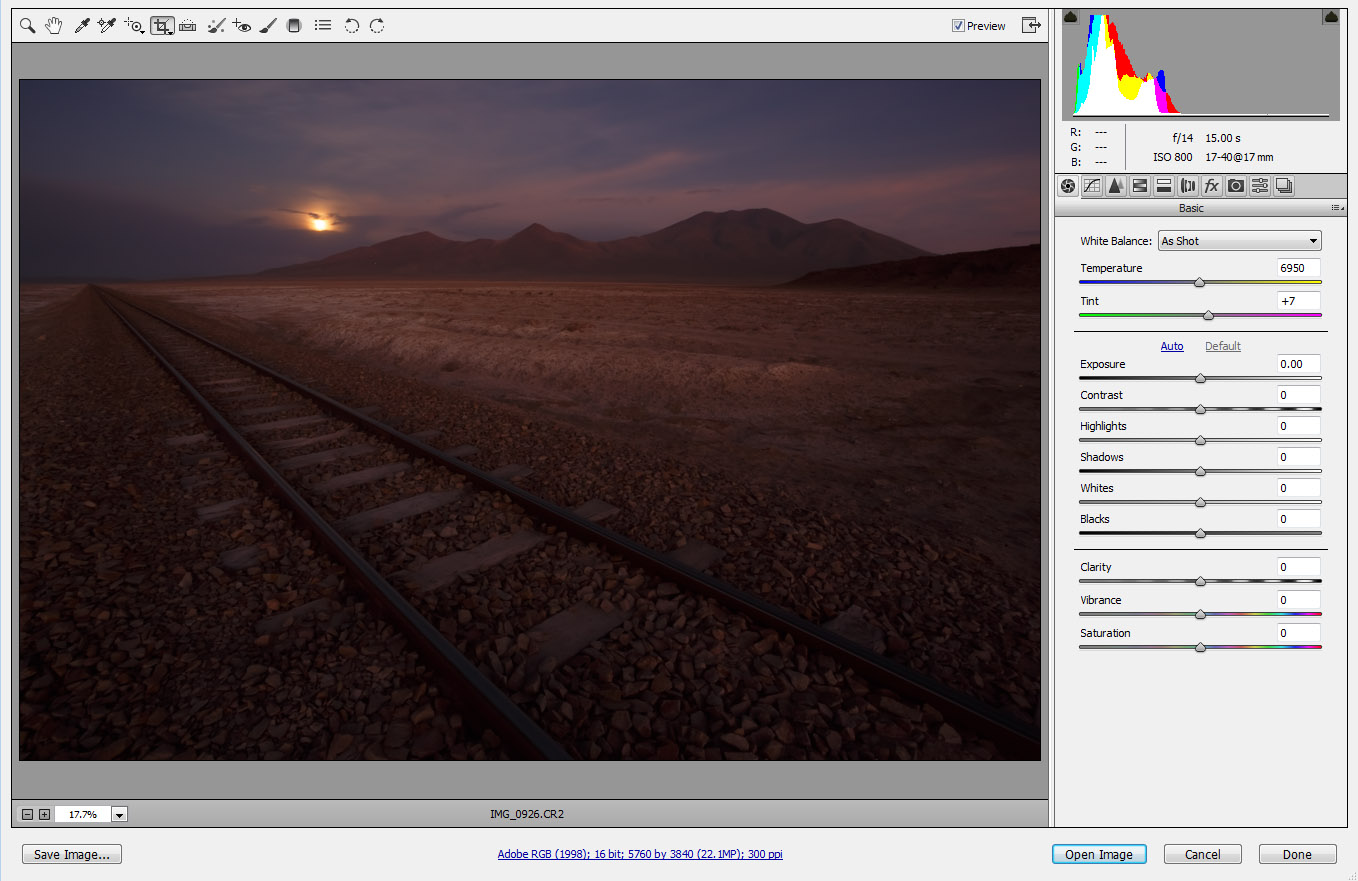
To get the entire scene in focus, I used f/14. I exposed for 15 seconds at ISO 800. I probably should have used ISO 400 and exposed for 30 seconds, but the quality is still good, so no harm done there.
To keep the moon area from washing out too much, and to maintain the realistic darkness, the shot is exposed ‘to the left’, i.e. the histogram is dark. Let’s see the untouched RAW file (opened in Adobe Camera Raw):
THE COMPOSITION
As I’ve mentioned earlier, even though the composition here is simple, it doesn’t mean we can’t learn anything from it. On the contrary, I think it’s harder to nail simple compositions. Let’s break down the composition here, and understand what makes it work.
It’s quite clear that the image uses a very well known motif: the track or road to infinity. However, to simply sum up with this would totally miss my aim. A much more important factor here is the compositional balance, achieved through maintaining compositional “mass” of different kinds in the two sides of the image.
To better understand what I’m talking about, let’s take a look at the following scheme below:

Upon first glance, it’s clear that there is a convergence of lines. The track, the layers of earth, and the triangular mountains all converge in a single spot to the left—marked with a dotted circle. This convergence gives a high compositional mass in the left of the frame, one which needs to be balanced. The balance comes from the fact that the mountain is much taller and larger to the right side, and so is the track. If that weren’t the case, the image would be left-heavy, and have a sense of imbalance that usually harms images, in my opinion.
If we look further, we can see that the rising moon creates another center of compositional mass. Together with the point of convergence, the rising moon balances the two large points of mass to the right. It also serves to balance the upper part of the image, countering the relative emptiness stemming from the mountain, being smaller to the left. The moon definitely contributes a lot to the shot in terms of balance—not only in compositional mass, but also in brightness, as a light point balancing the dark image. These different types of balance are the point in this image; I hope you agree.
POST-PROCESSING
The post-processing work here wasn’t out of the ordinary. Let’s quickly survey what I did to perfect the image.
First, cropping. Since it was very dark and I wanted to play it safe, I left way too much space to the left of the point of convergence. I cropped it out together with the lower portion of the image.
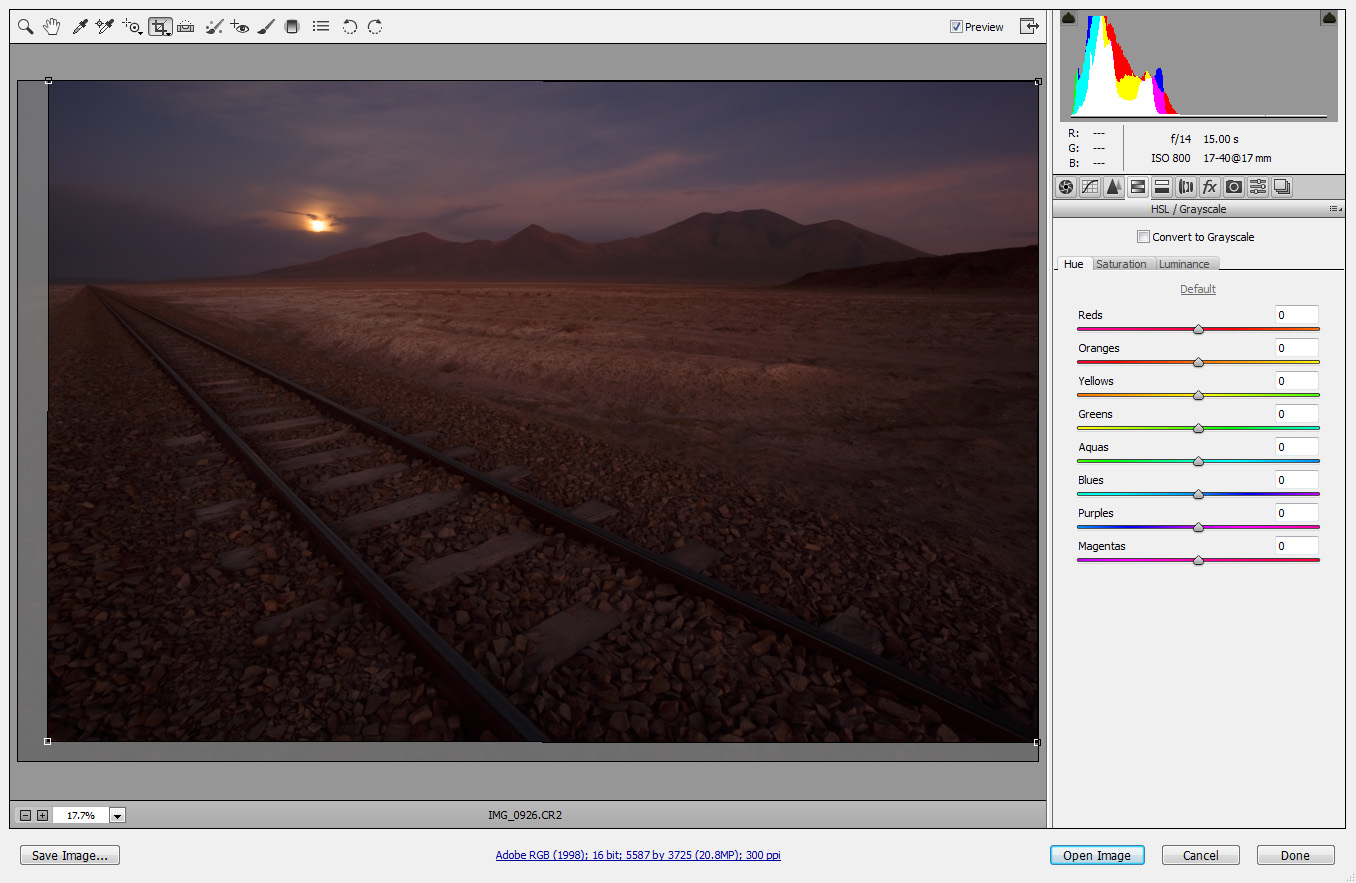
Next, lens correction. The 17-40mm unfortunately produced curved lines, where they were supposed to be straight. So I used the lens’ profile in ACR to correct it. Note that I didn’t correct all of the vignetting, since some of it adds to the dark mood of the image.
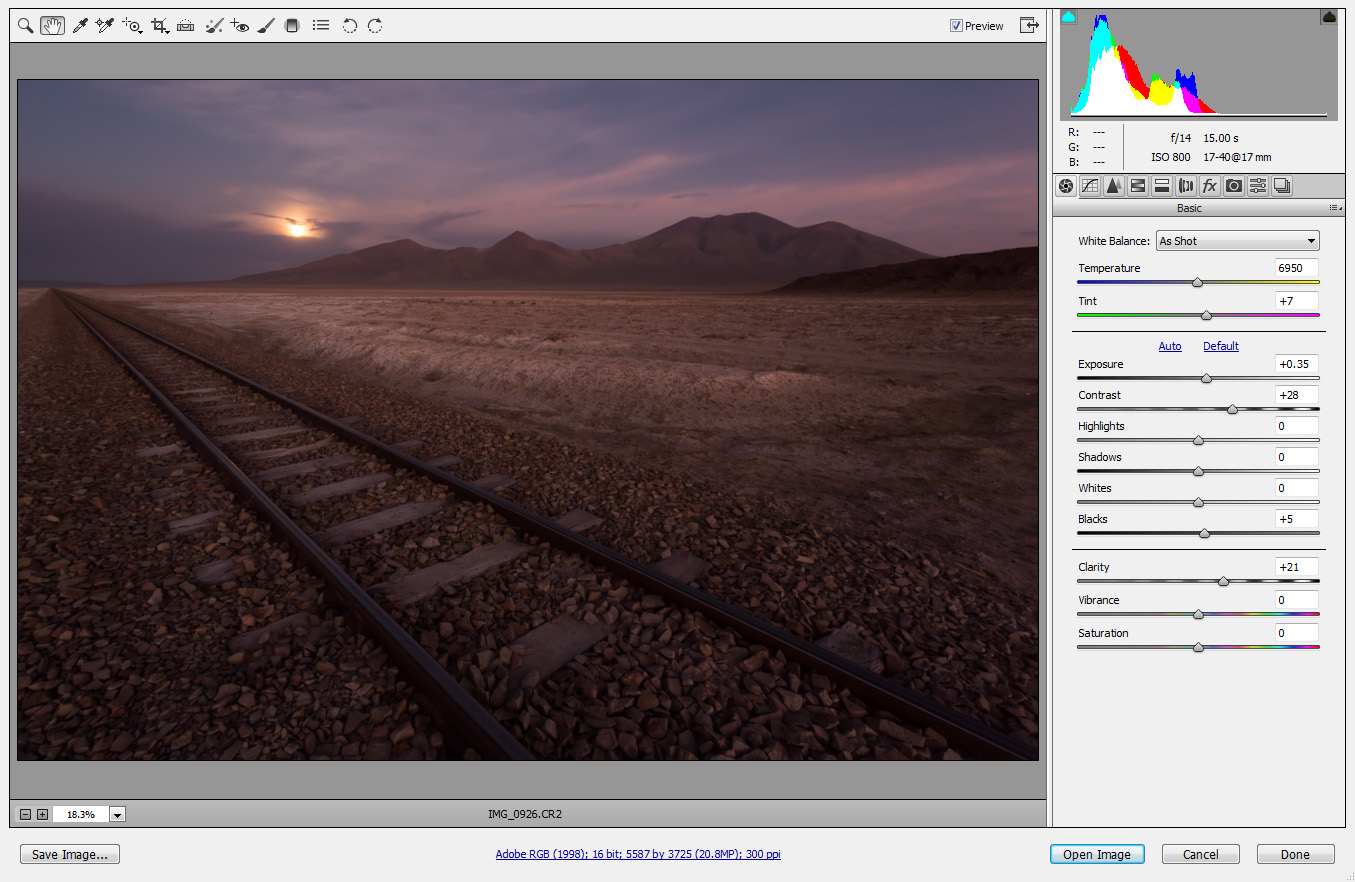
After lens correction, I applied a little bit of other corrections in ACR, as well as some noise reduction and sharpening (not shown).
I then saved the file as a TIFF image and opened it in Photoshop.
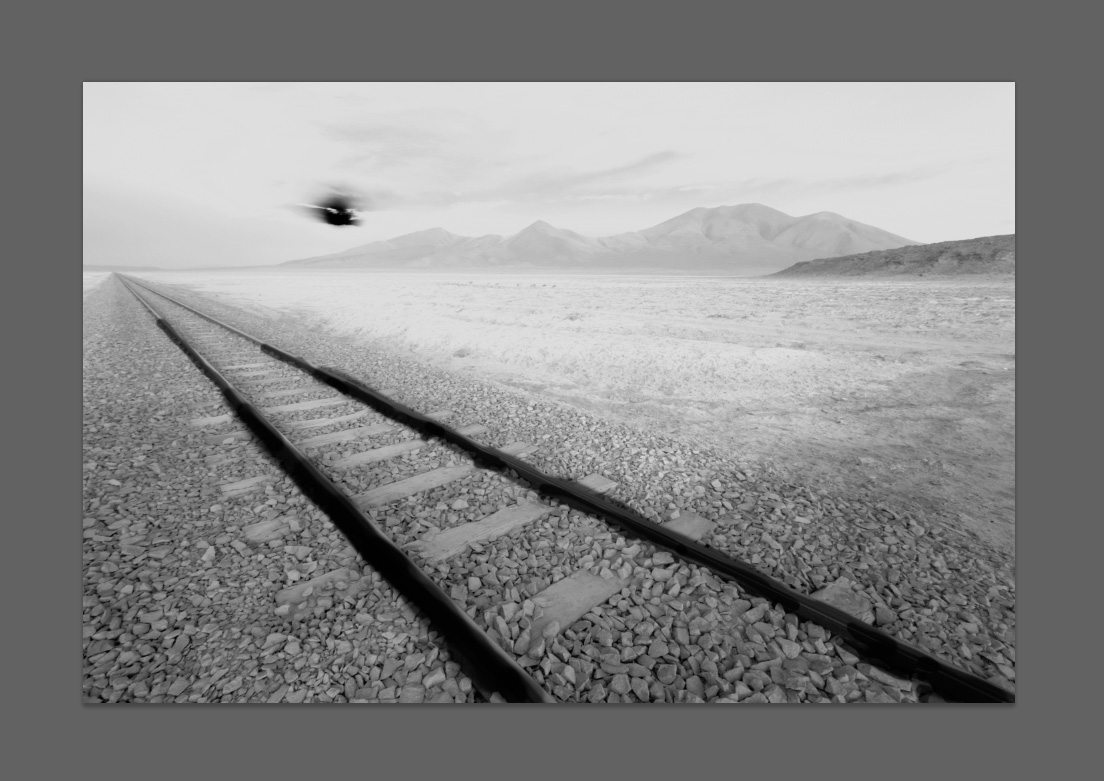
My first goal was to increase contrast to give the image an even darker look that will match reality. To do this, I used luminosity selections to create a selection which covers the mid-range of luminosity. (See this article by Jimmy McIntyre) This was achieved by selecting the whole image and subtracting the selections of the very brightest and very darkest pixels.
I also used a soft eraser to partially remove the selection from the track. Here is the mask I was left with:
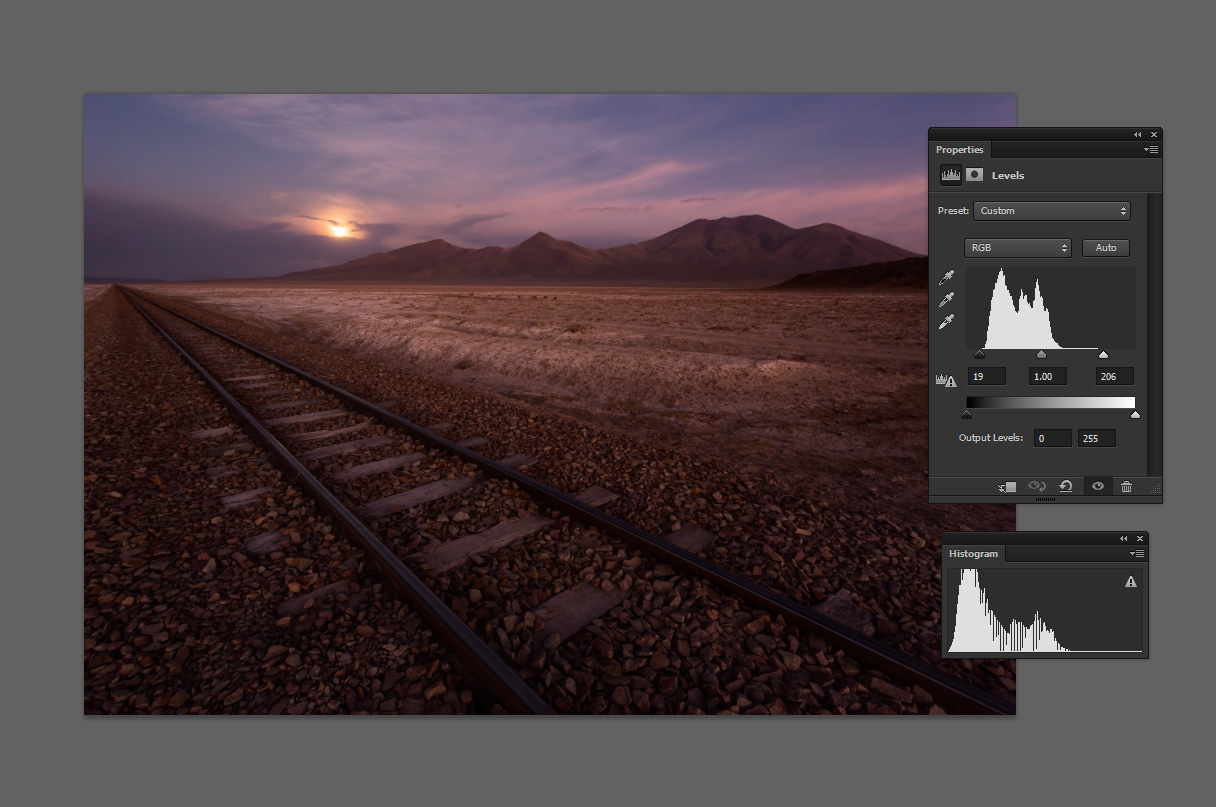
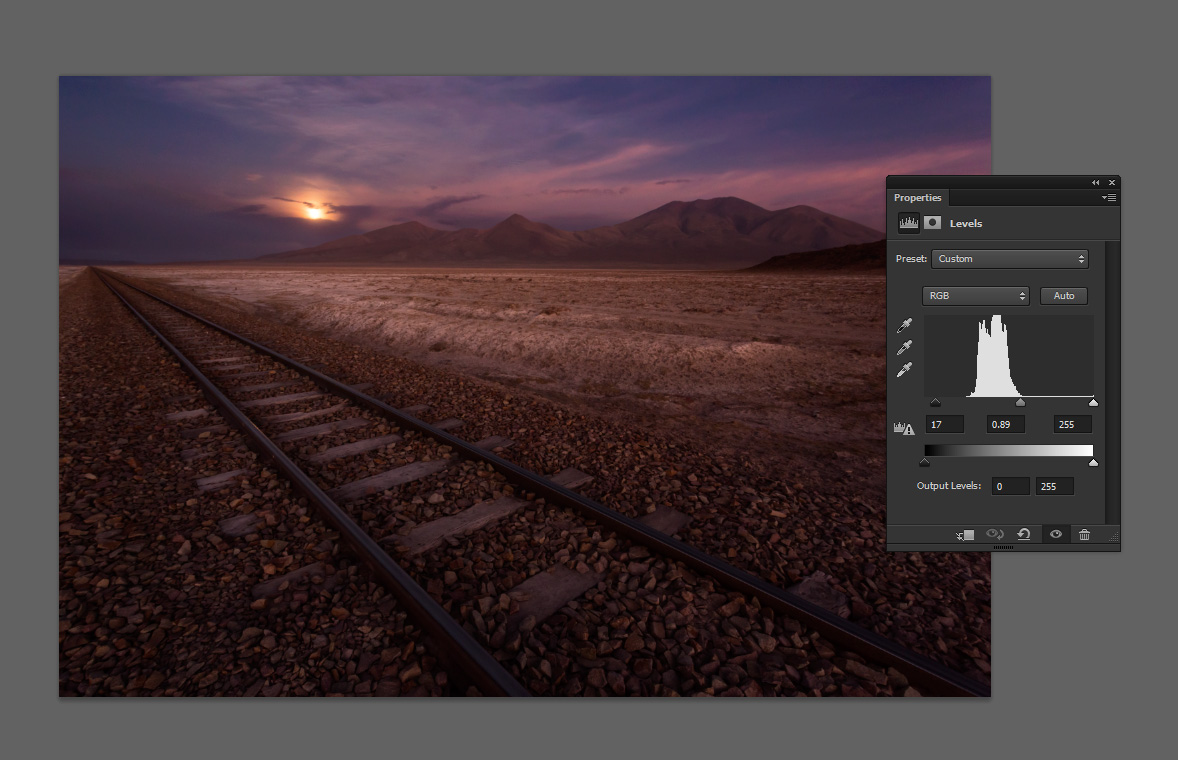
I used this mask for a levels adjustment layer. I basically “pulled out” the mid-range using the input levels sliders, thus increasing the overall contrast without losing detail in very light or very dark areas.
The next thing requiring attention was the sky. It looks too bright, and it needs a bit more contrast. I selected the sky area using the quick selection tool and then refined the edge using select->refine edge, just to keep the selection feathered. I then added another levels adjustment layer and darkened the sky.
The last thing I needed to do was accentuate the textures in the image, mainly of the stones beside the track. There are many ways to do this. I opted to apply a high-pass filter. It’s very easy to do: first, duplicate the layer. Then, go to filters->other->high pass. I selected a radius of 20 pixels, and applied the filter onto the duplicated layer.
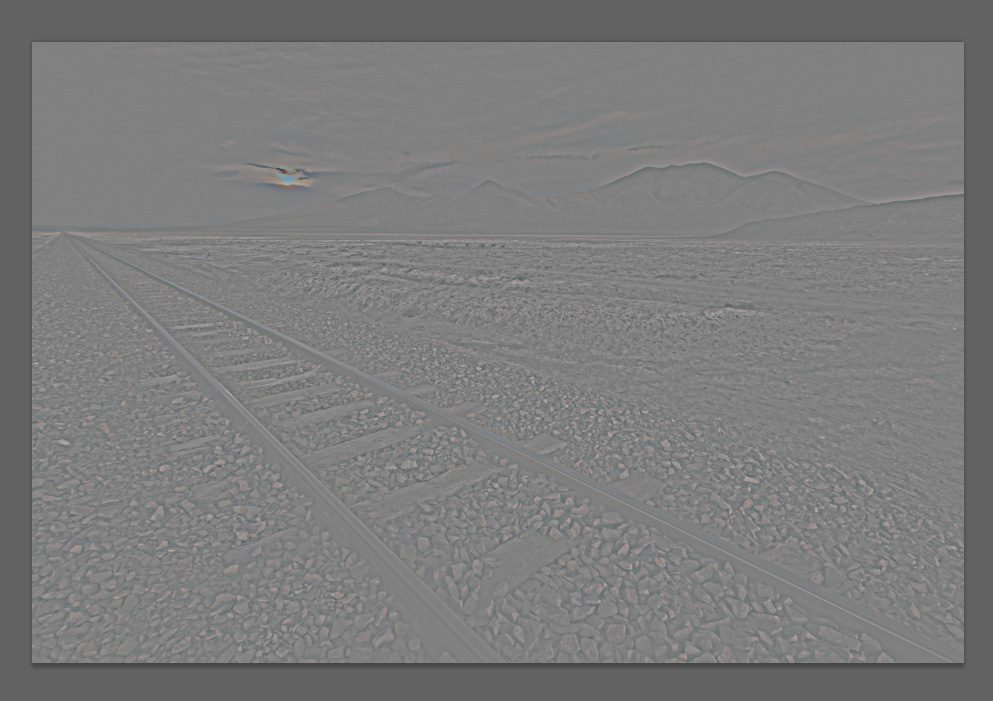
The high pass filter essentially deviates from 50% grey only in areas of strong contrast. If you then use a ‘soft light’ blending mode, the image underneath will only be affected in those areas, strengthening the passage between light and dark areas, and so increasing local contrast. To avoid overusing it, I lowered the opacity of the layer to just 25%. This gave me all the added texture I needed.
To finish off, I merged the layers, added a tiny bit of saturation, resized the image, converted it to the sRGB color space for Internet viewing, and applied some sharpening. I was done!
If you’d like to experience and shoot some of the most fascinating landscapes and wildlife on Earth with Erez Marom as your guide, take a look at his unique photography workshops:
Land of Ice – South Iceland (December / January) – view trailer
Winter Paradise – North Iceland (December / January) – view trailer
Northern Spirits – Lofoten Islands (January / February)
Desert Storm – Namibia (March)
Follow Erez on Facebook, Google+ and 500px. You can also subscribe to his mailing list for updates.
Got a question or comment for Erez about his photo, technique, and process? Leave a comment below!


Leave a reply