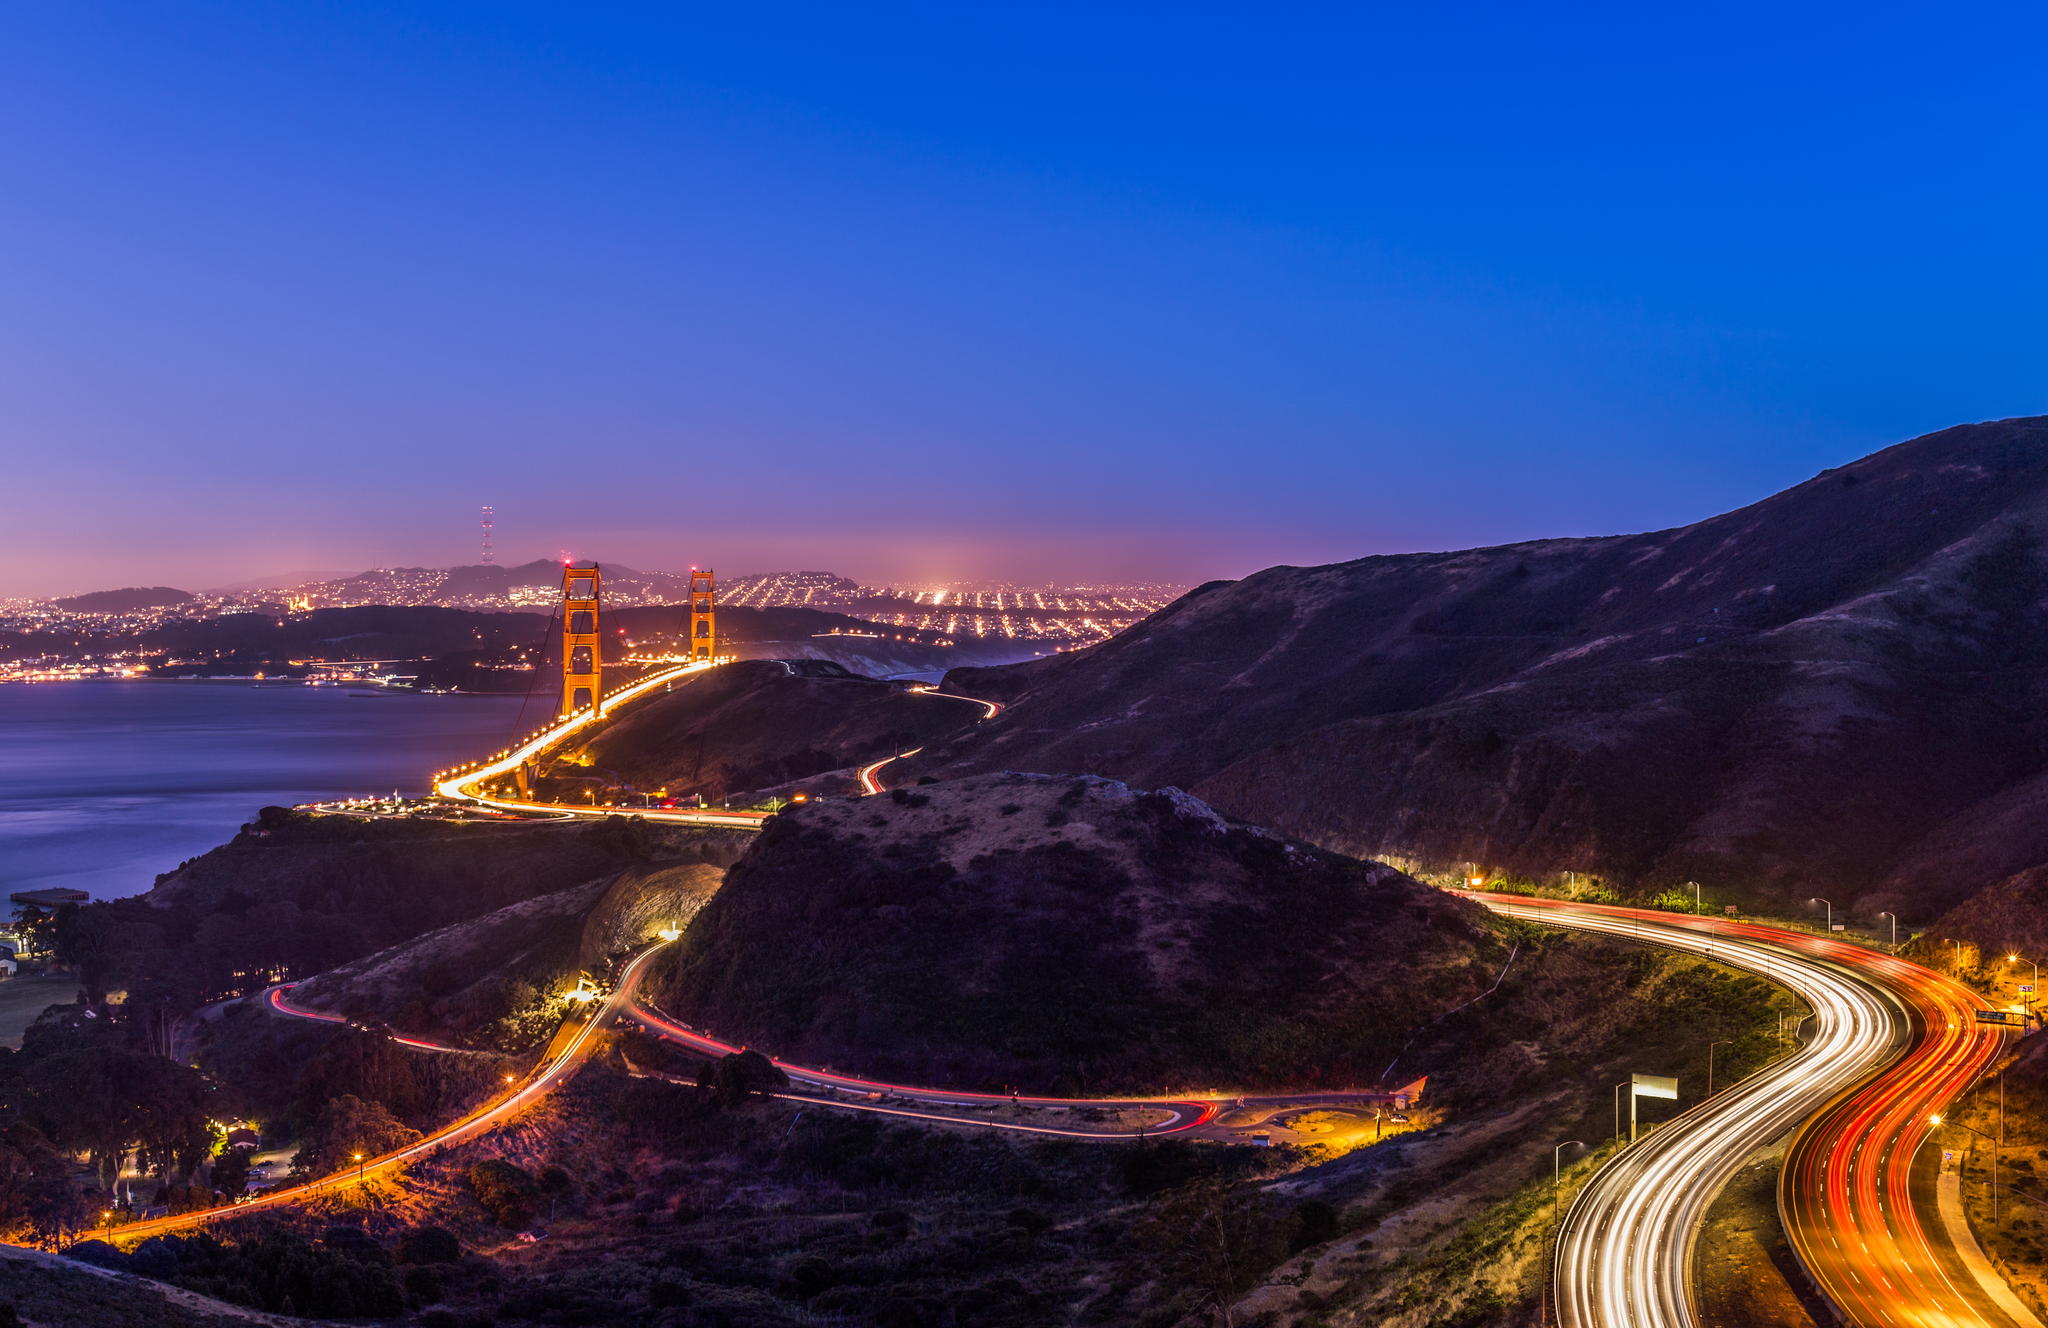
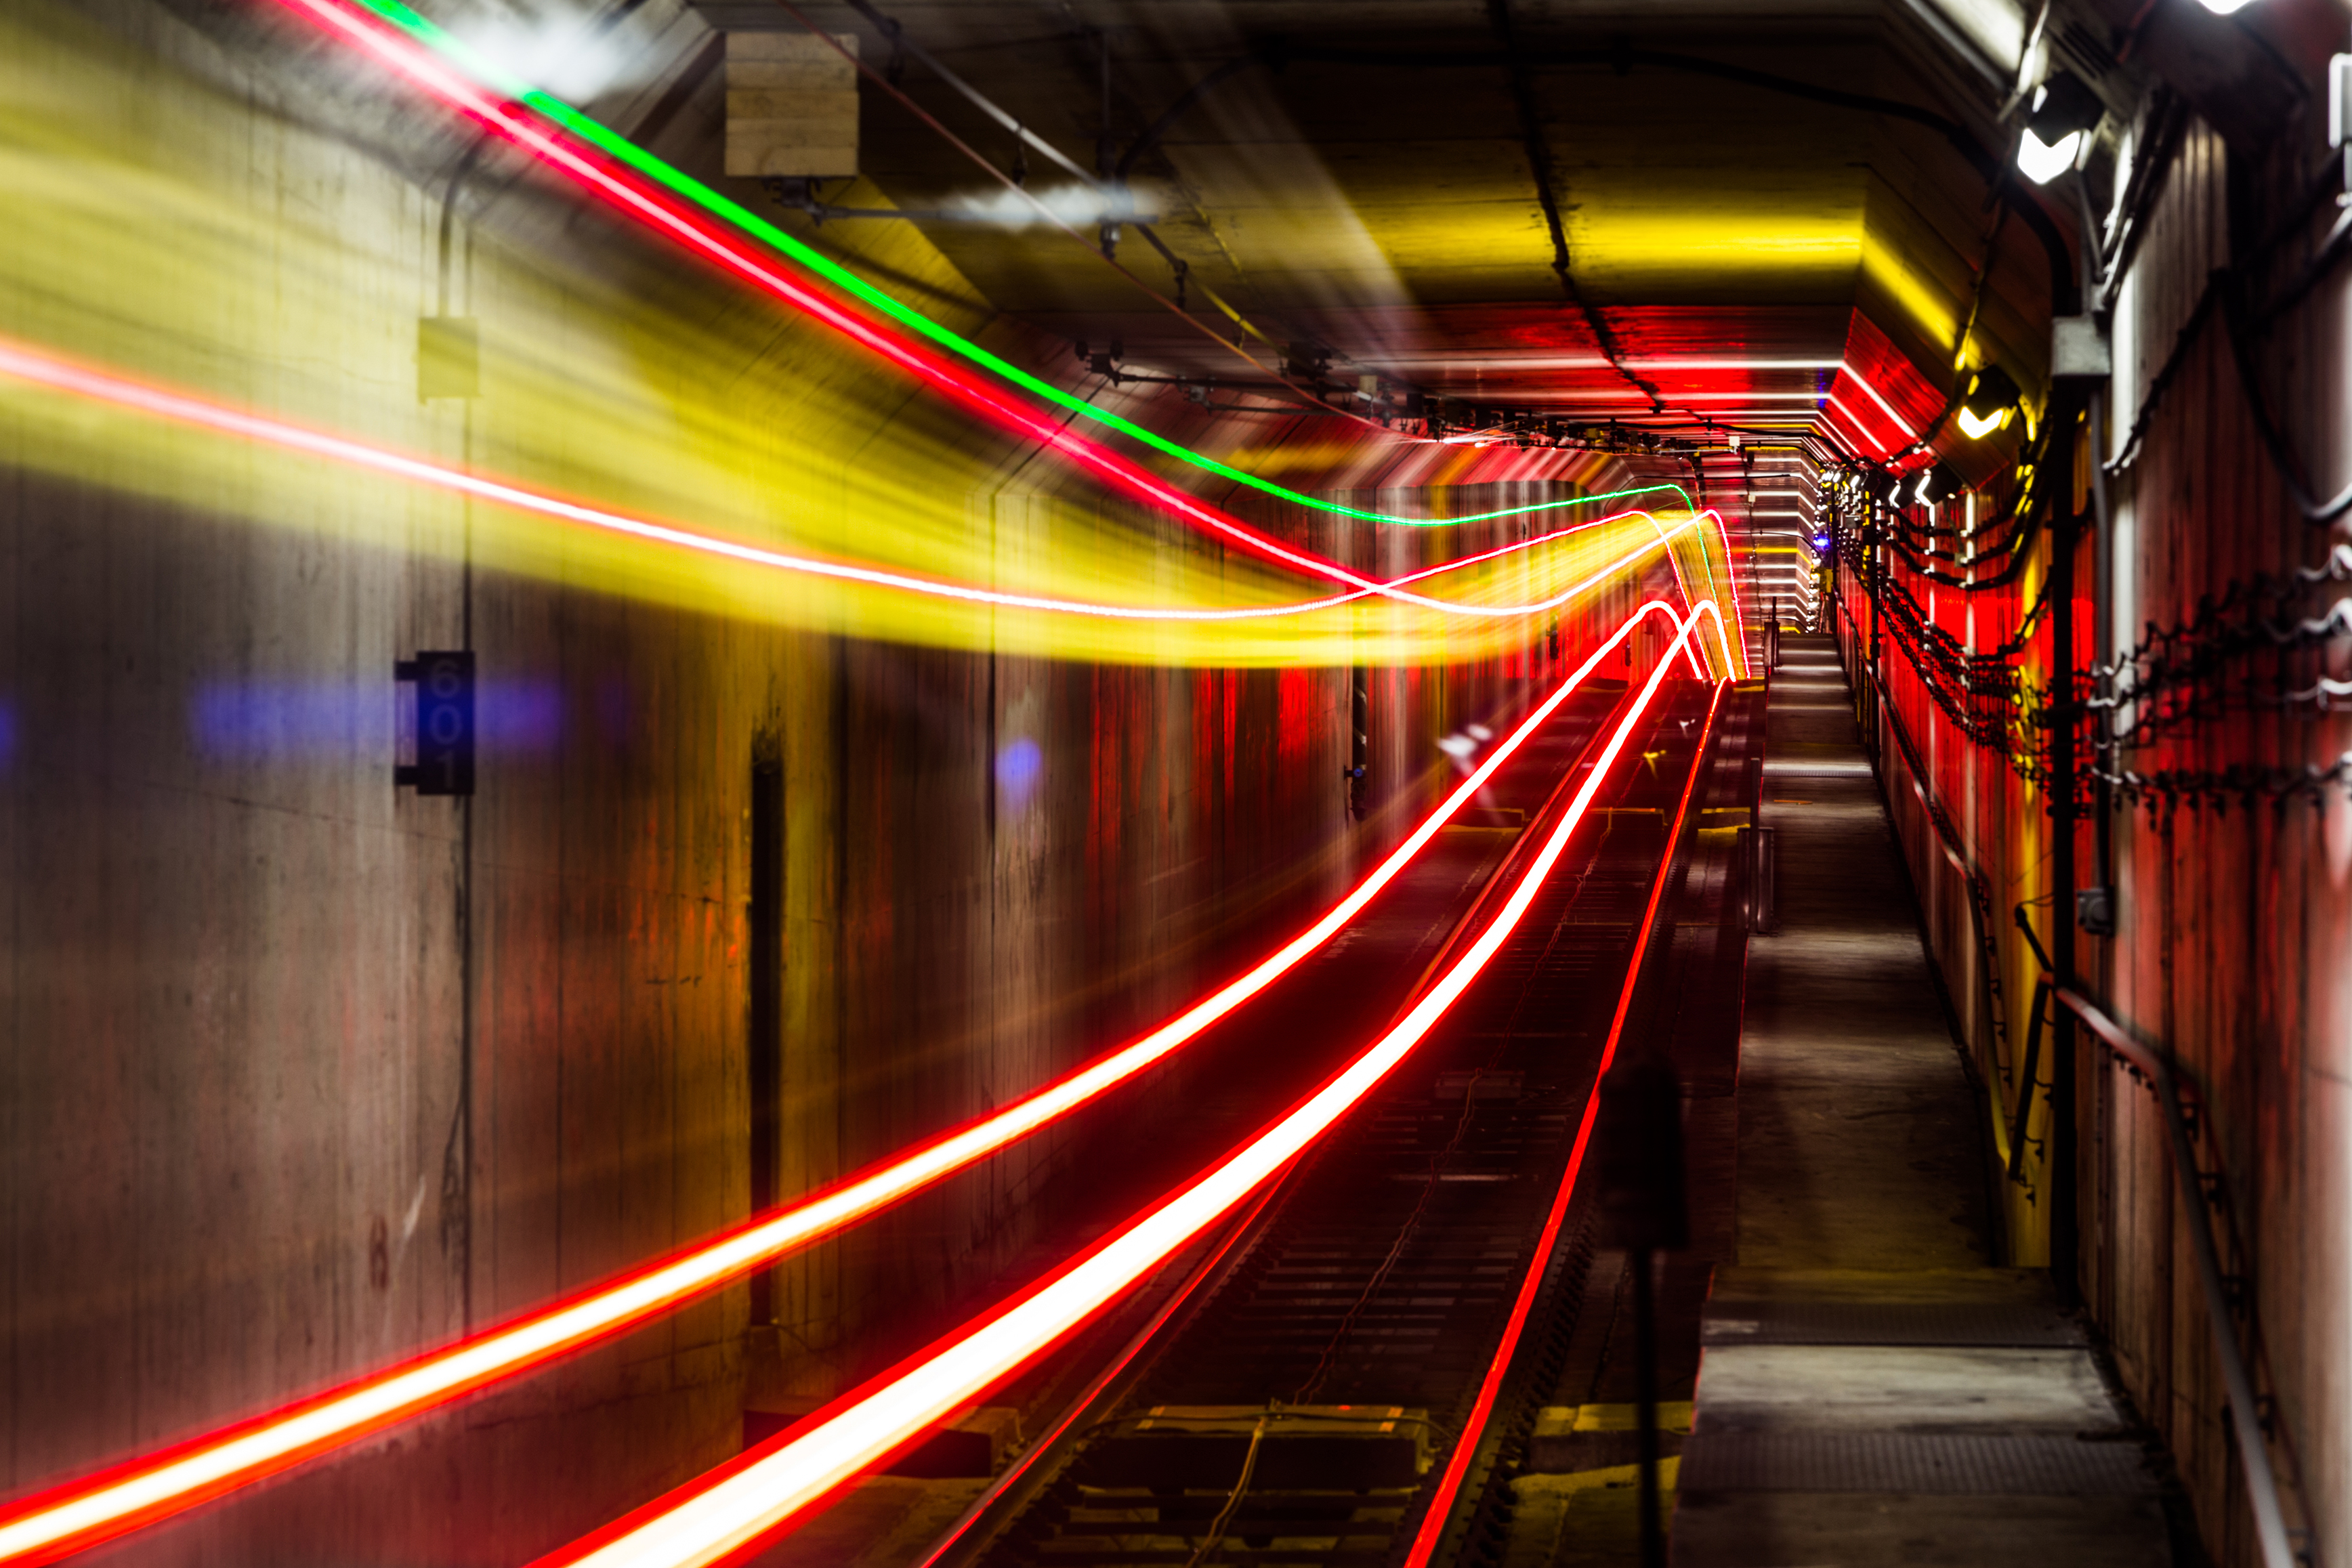
Tristan O’Tierney is a self-taught San Francisco-based photographer who has mastered the technique of crafting with light. Also an iOS engineer, he is known as the co-founder of Square app. In this tutorial, you’ll learn how to shoot light trails in low light and long exposures. So you can create spectacular shots like this:
How To Shoot Light Trails
Introduction
Long exposure photography is a wonderful emerging niche. While many apply it towards things like skies, water, and stars, there’s another really fun subject matter to play with – moving lights! As I’ve gotten more and more into shooting car trails around San Francisco, I’ve perfected some techniques to bring out the energy and vibrancy in these scenes. Ideally, the scene should look as evenly-lit and sharp as possible. The car trails should be bright (but not too bright) and fill every inch of road in the scene to give the photo a nice pulse.
The heart of good light trail photography is balancing the ambient light of the scene with the brightness of the moving light source. When making moving lights span the full range of the photo’s frame, it’s common to run into problems when balancing these two elements. In the example photo we’ll go through, I’ll describe the problems and solutions I encountered to pull off the shot.
Gear
Before we get into the nuts and bolts of getting the shots, let’s talk about the gear necessary to work the magic of good light trails. Here are 3 critical pieces of gear that any budding long exposure photographer should have:
1. A Very Sturdy Tripod – Sturdy is a key word here. Since the exposure time will range from 1 second to as long as several minutes, it’s critical to reduce camera vibrate as much as possible and that the camera moves as little as possible when adjusting settings between various captures. I’ll get into why it’s necessary to adjust the settings a bit further into this tutorial. Here’s a basic tip on picking a good tripod: the heavier the tripod, the sturdier. A small travel tripod is not going to be as stable as a big metal one. A good compromise is a sturdy carbon fiber tripod, but we’re not all made of money. Try to avoid using the tripod’s raisable center column if it has one. While it can gain up to an extra foot of height, this will dramatically increase camera vibration.
2. A Programmable Remote – Exposure times can often exceed 30 seconds. Even if it doesn’t, one big advantage with using a remote is it’s possible to trigger the shutter without having to touch the camera. This is a big plus to reduce movement between shots, and it makes integrating a separate light trails exposure with a background scene smoother.
3. A variable ND filter – Most people think of ND filters as having a set number of stops, such as 3, 6, or 9 stops of light reducing power. While these filters can work in place of a variable ND filter for light trails, a variable ND filter can dial in the exact shutter speed needed for a scene. More on this under the Shooting Trails section of the tutorial.
Sharp Background Scene
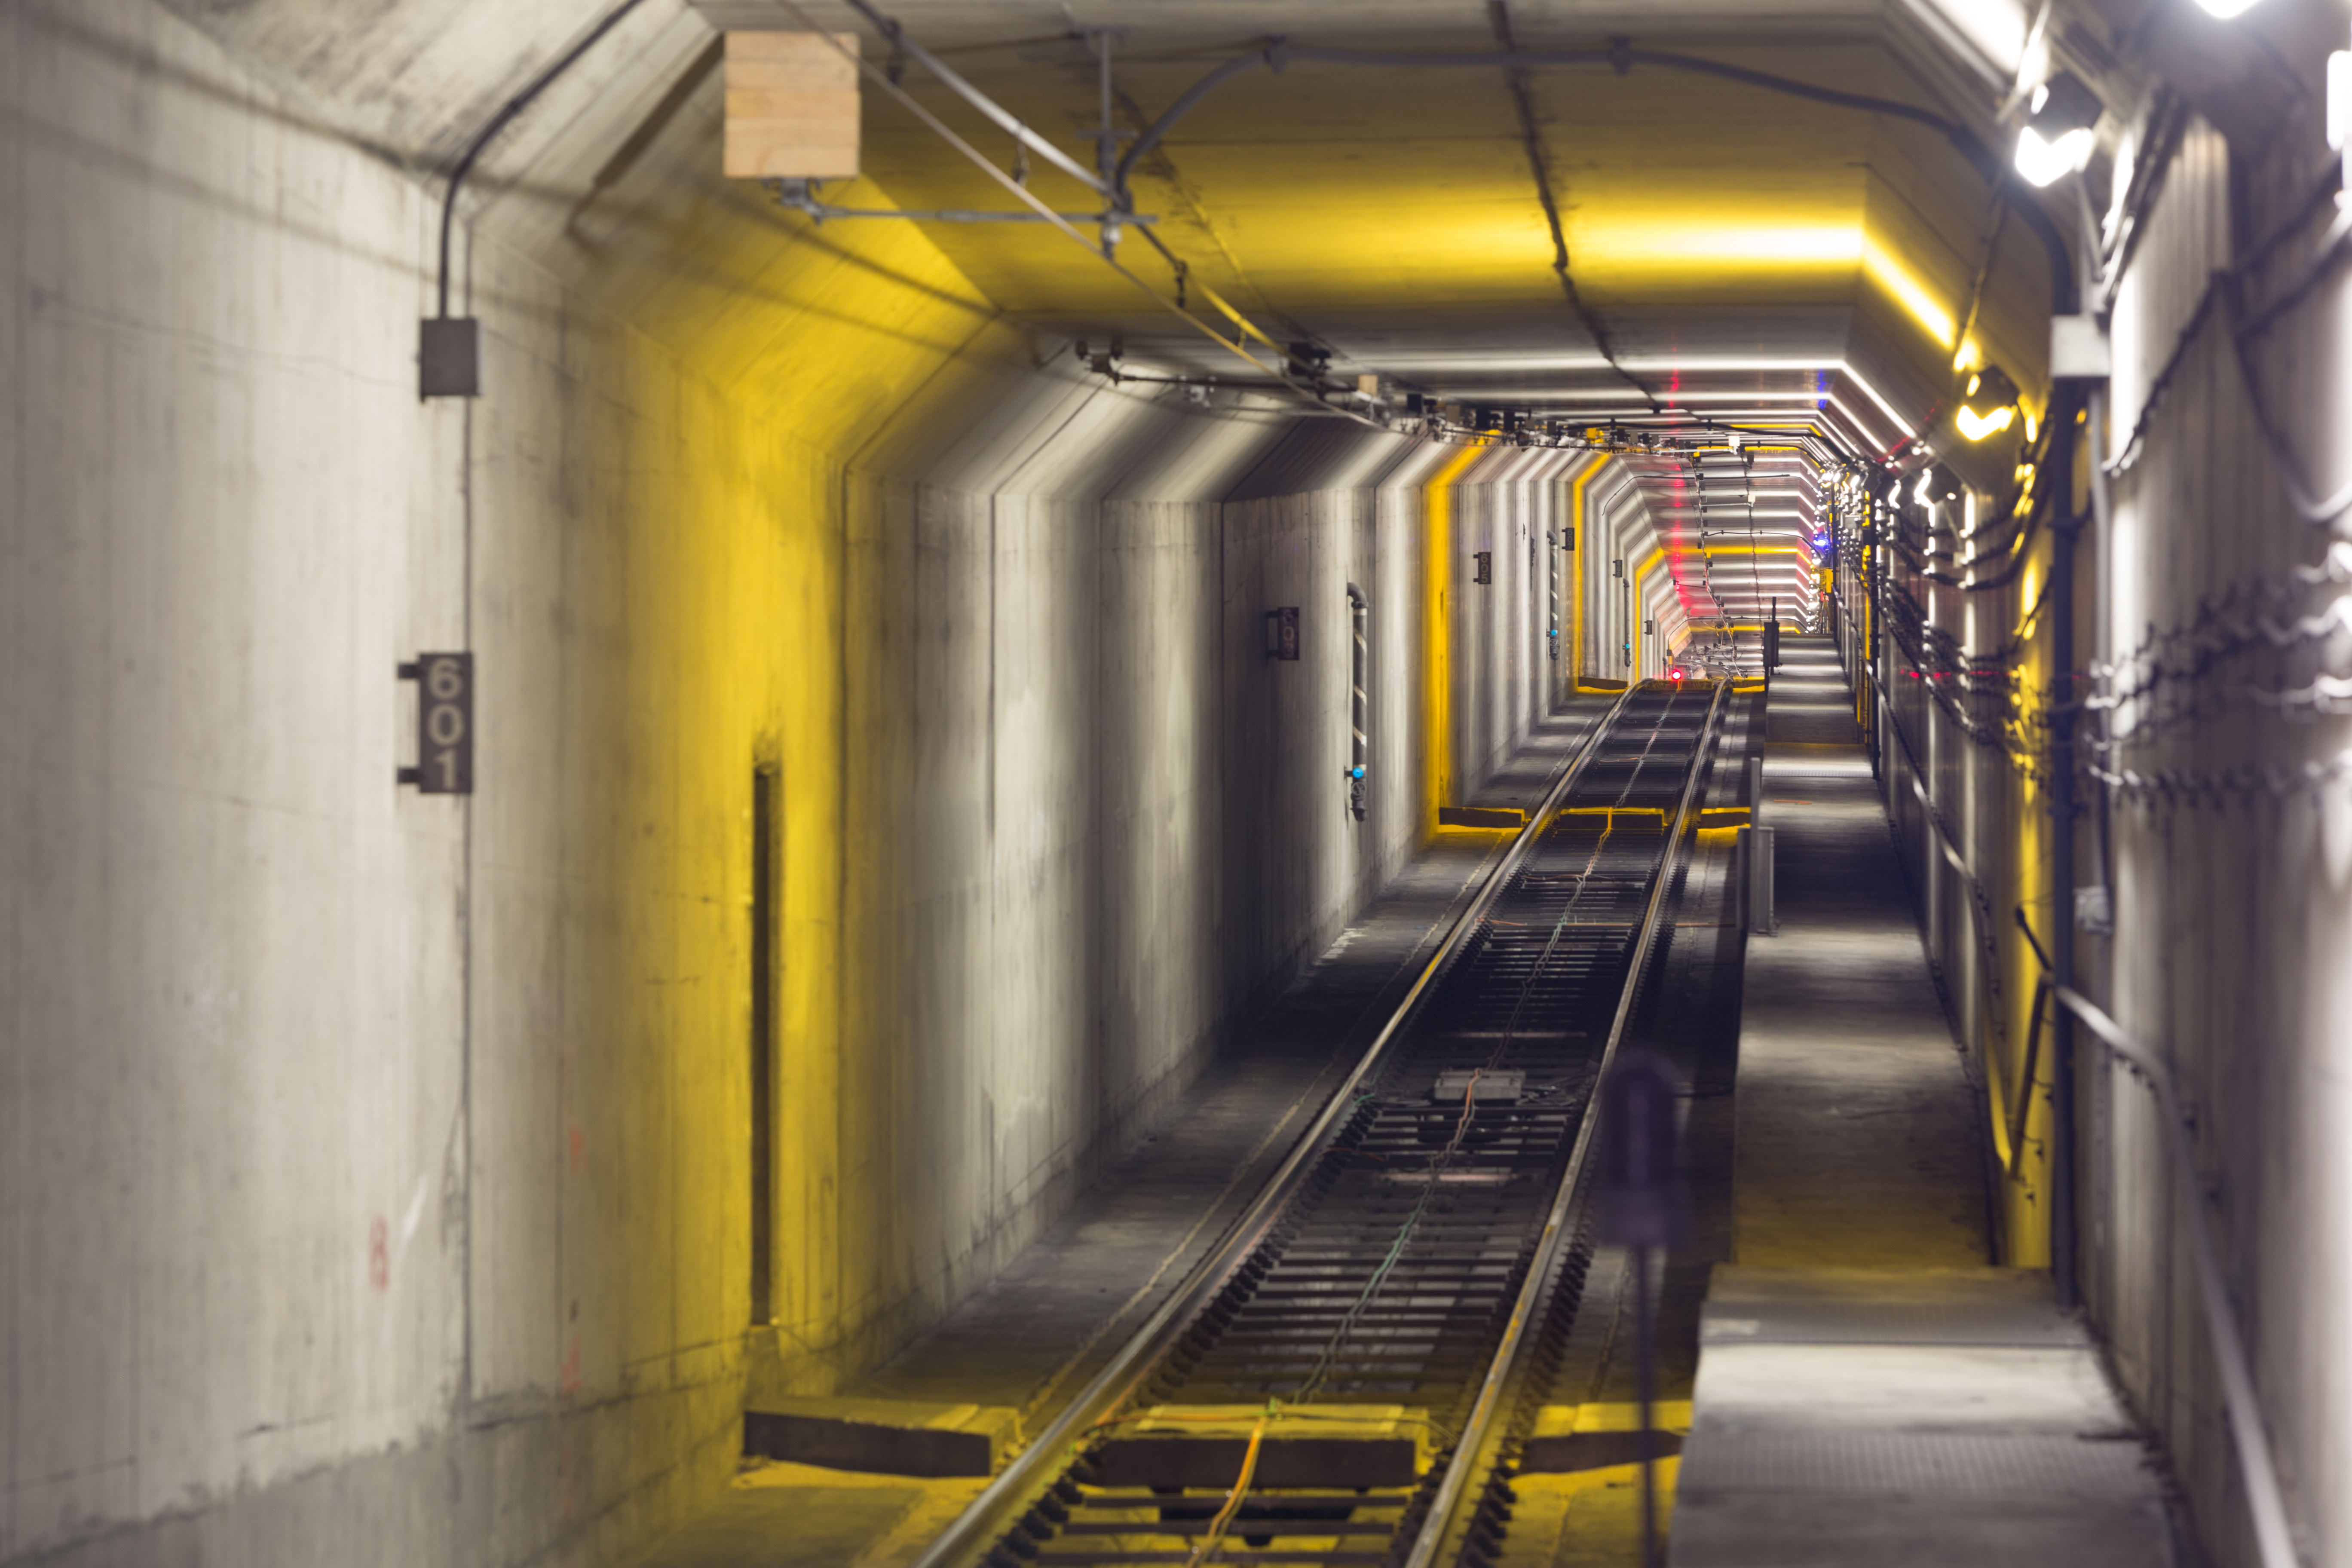
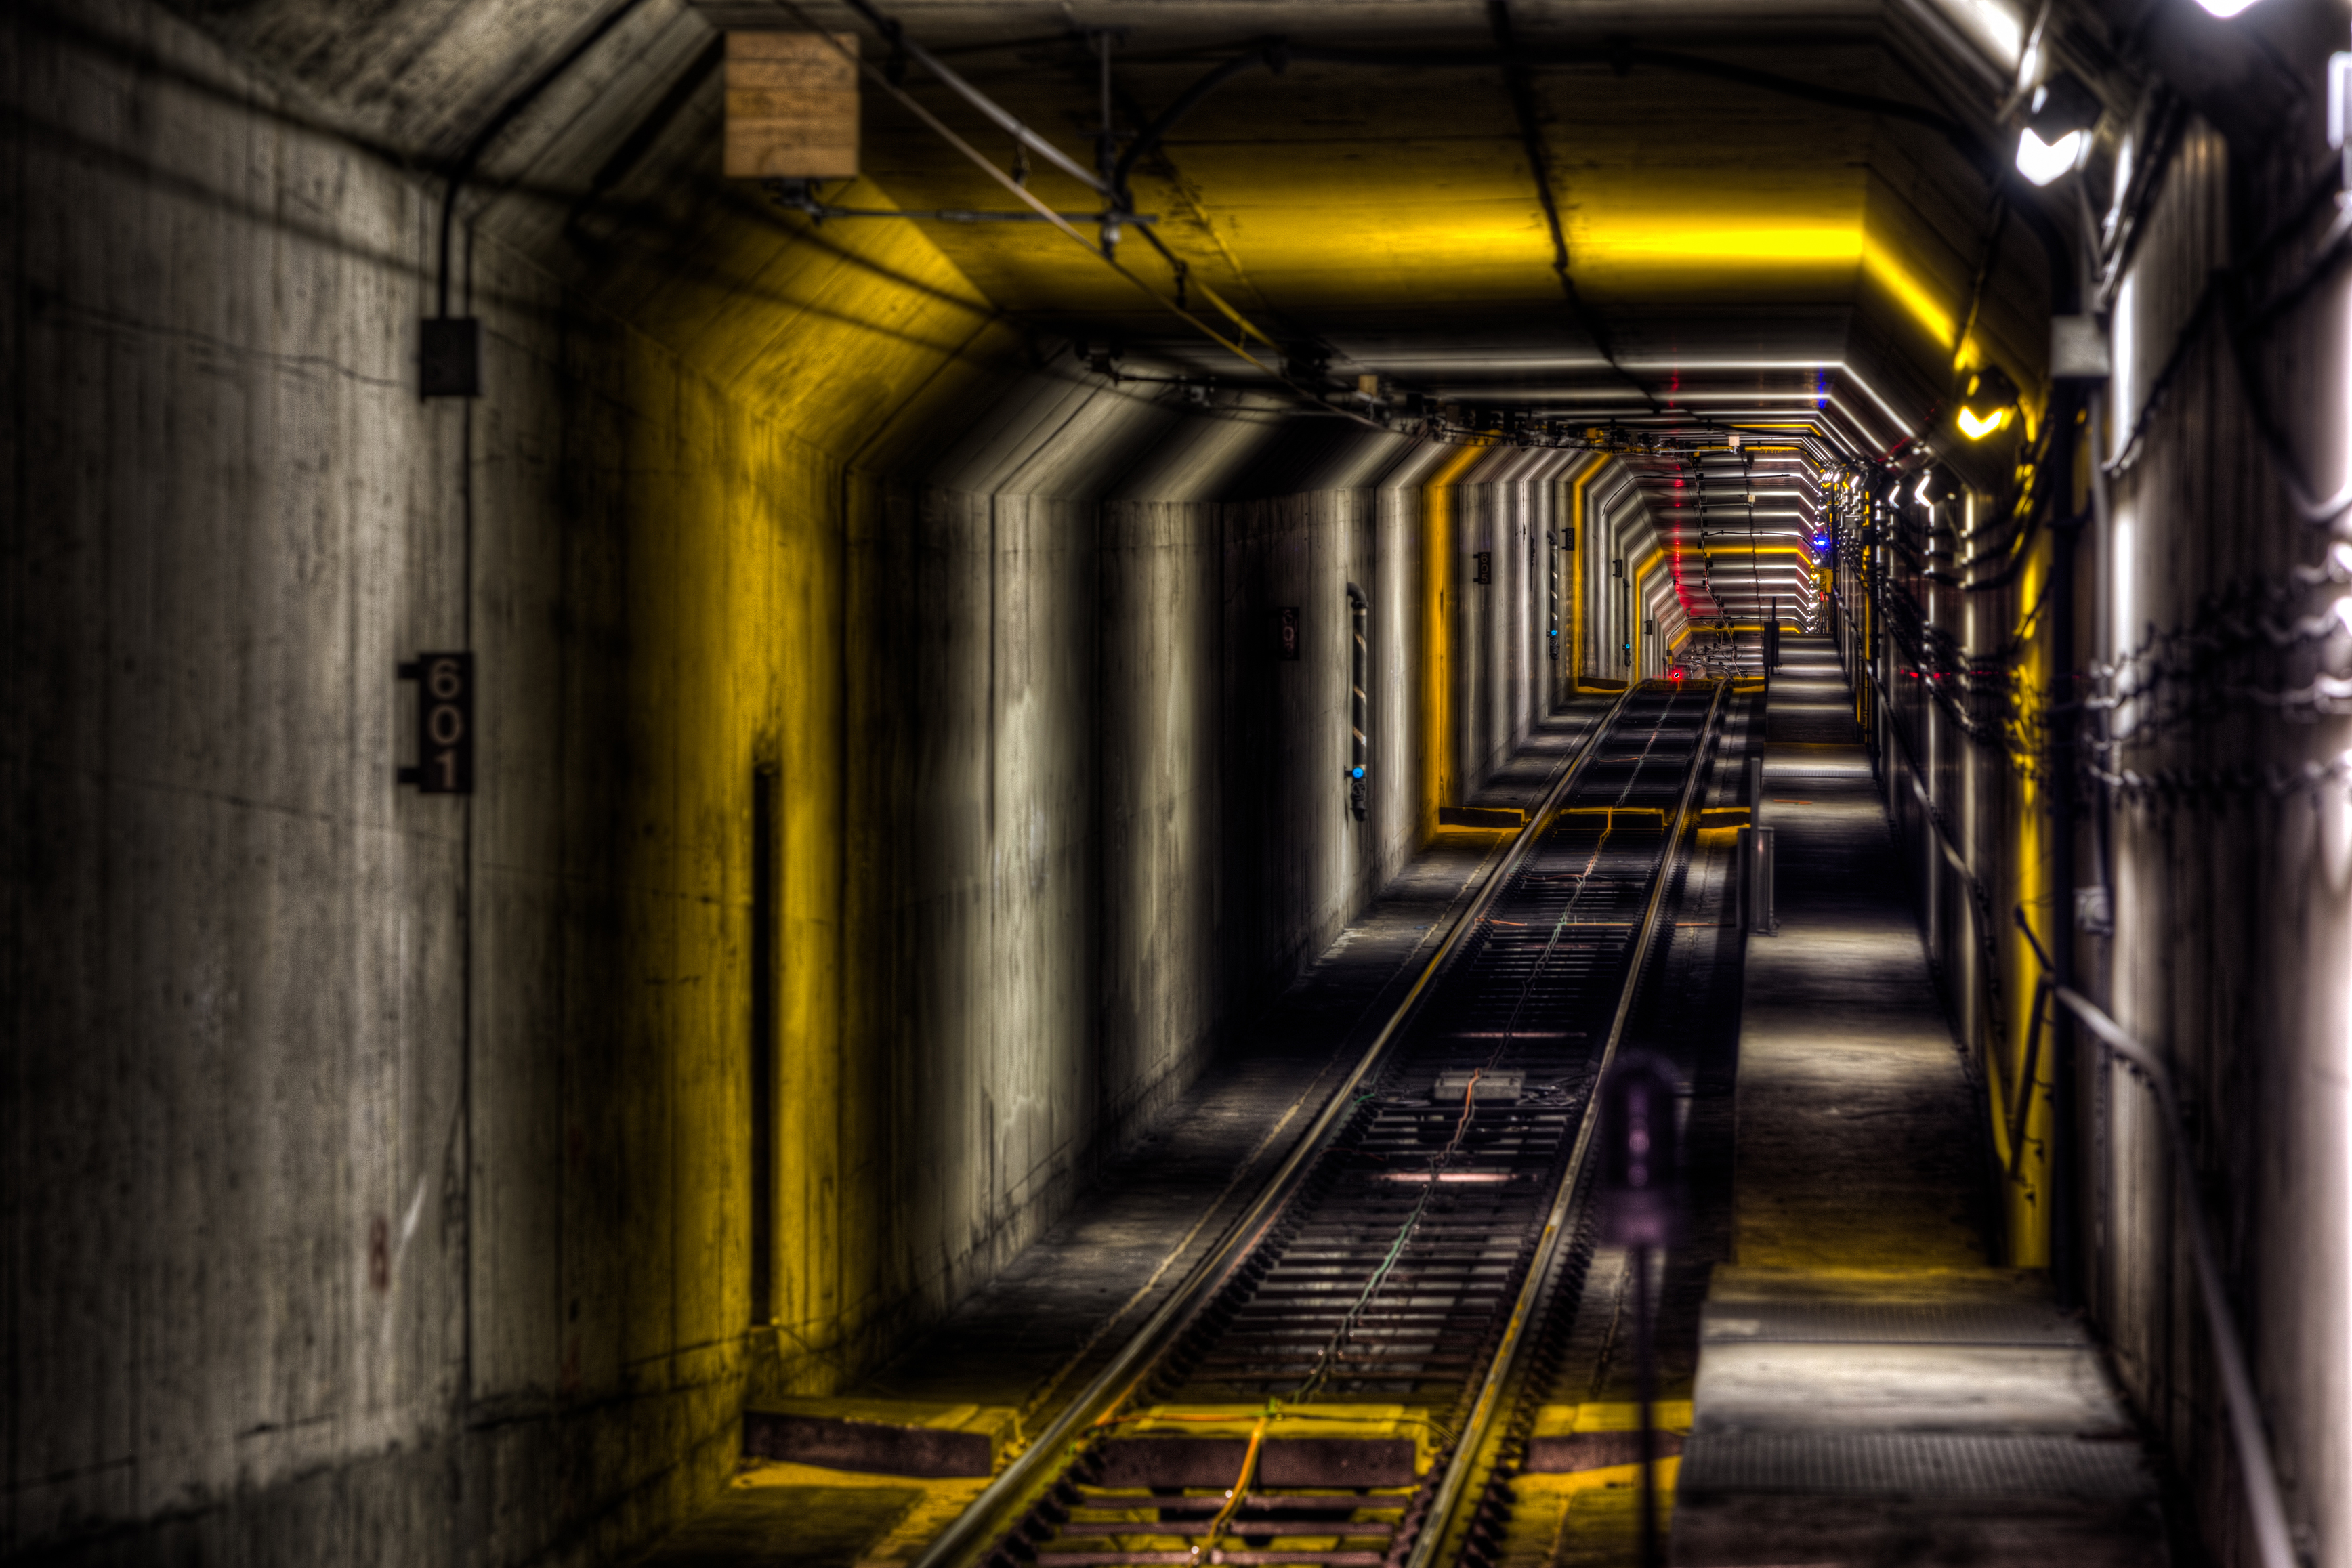
The first thing to focus on is capturing the overall scene as a separate exposure, if possible. Depending on how trafficked the scene is, getting a shot without the moving light source can sometimes be difficult. Ideally, start with a clean, fresh canvas like the one below. Choose the best settings for the given lens and camera. For most cameras, this would be ISO 100 or whatever the lowest native ISO is. Avoid using ‘PULL’ or fake ISOs that go below the native ISO – this will, surprisingly, generate twice as much noise as the native ISO. The sharpest aperture with the least distortion is usually going to be f/8 on most lenses, but adjust this as needed if the scene has a nearby foreground element that needs to remain sharp.
Pre-Process Background Scene
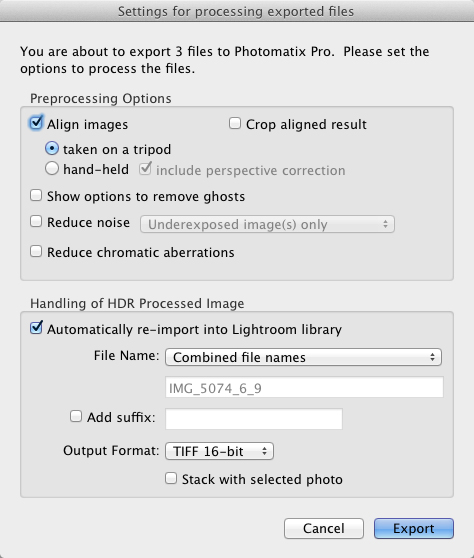
The background scene photo above doesn’t quite look like the final result, and there’s a good reason for that. In this example, I’ve used HDR processing to liven up the shadows and texture in the photo. I took three separate exposures at -2 EV, 0 EV, +2 EV then imported them with the following settings into Photomatix (the gold standard of HDR editing apps). The important settings are to enable Align images + taken on a tripod, and disable Crop aligned result. If Photomatix crops the result image, the light trails exposures will misalign with the background scene.
Below are the settings to process this photo:
After finishing the HDR processing in Photomatix, here is the result:

I did one last round of processing after bringing the photo back into Lightroom to give it a bit more edginess with the settings below:
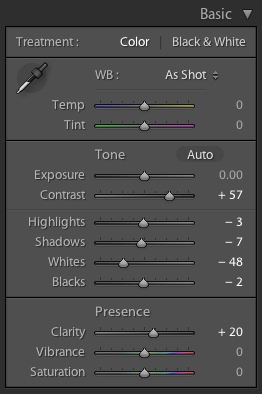
The fully processed scene looks like this:
Shooting Trails
The exciting part begins! After watching a couple of trains go by, I timed in my head how long it took a train to go past me and up the tunnel until it was out of view. The exposure time of the light trails shot should be as short as necessary, so the camera has less chance to vibrate. Every little bit counts.
One important piece of advice for shooting trails I’ve learned through experience is to not shoot the trails scene so long that the ambient light (street lights, building lights, etc) overpowers the moving light source. Remember, it’s all about striking that fine balance. When a situation occurs such that ideal length of the exposure needs to be longer than the ambient light of the scene will allow for, I’ve discovered a solid workaround. Find this maximum shutter speed length, then put the camera in continuous capture mode. When a moving light source passes by, lock the camera’s remote trigger and leave it closed for the entire movement across the frame of the scene. Once the moving light source is out of the frame, unlock your cable release to stop firing continuous shots. It’s critical to use the camera’s continuous capture mode, as this will rapidly start the next exposure the moment one completes. If the camera being used has a long exposure noise reduction feature, make sure to turn this off to prevent any possible delay from occurring between captures.
Later in the tutorial, when processing the light trails photo, just process all light trail photos with the same settings instead of just the one capture. Presto! If done properly, there should be little-to-no gap between successive shots of your moving light source.
Once the ideal exposure time has been determined, get ready to use the variable ND filter if necessary. The real power of a variable ND filter is it allows one to maintain the sharpest aperture for a given lens and dial in the length of the exposure needed to fill the scene with the moving light source, rather than having to compromise on aperture by stopping down from f/8 to say f/11 or f/16 to increase exposure time.
In the example photo below, I left my lens at f/11, ISO 100, and put the camera in Av (aperture priority) mode:
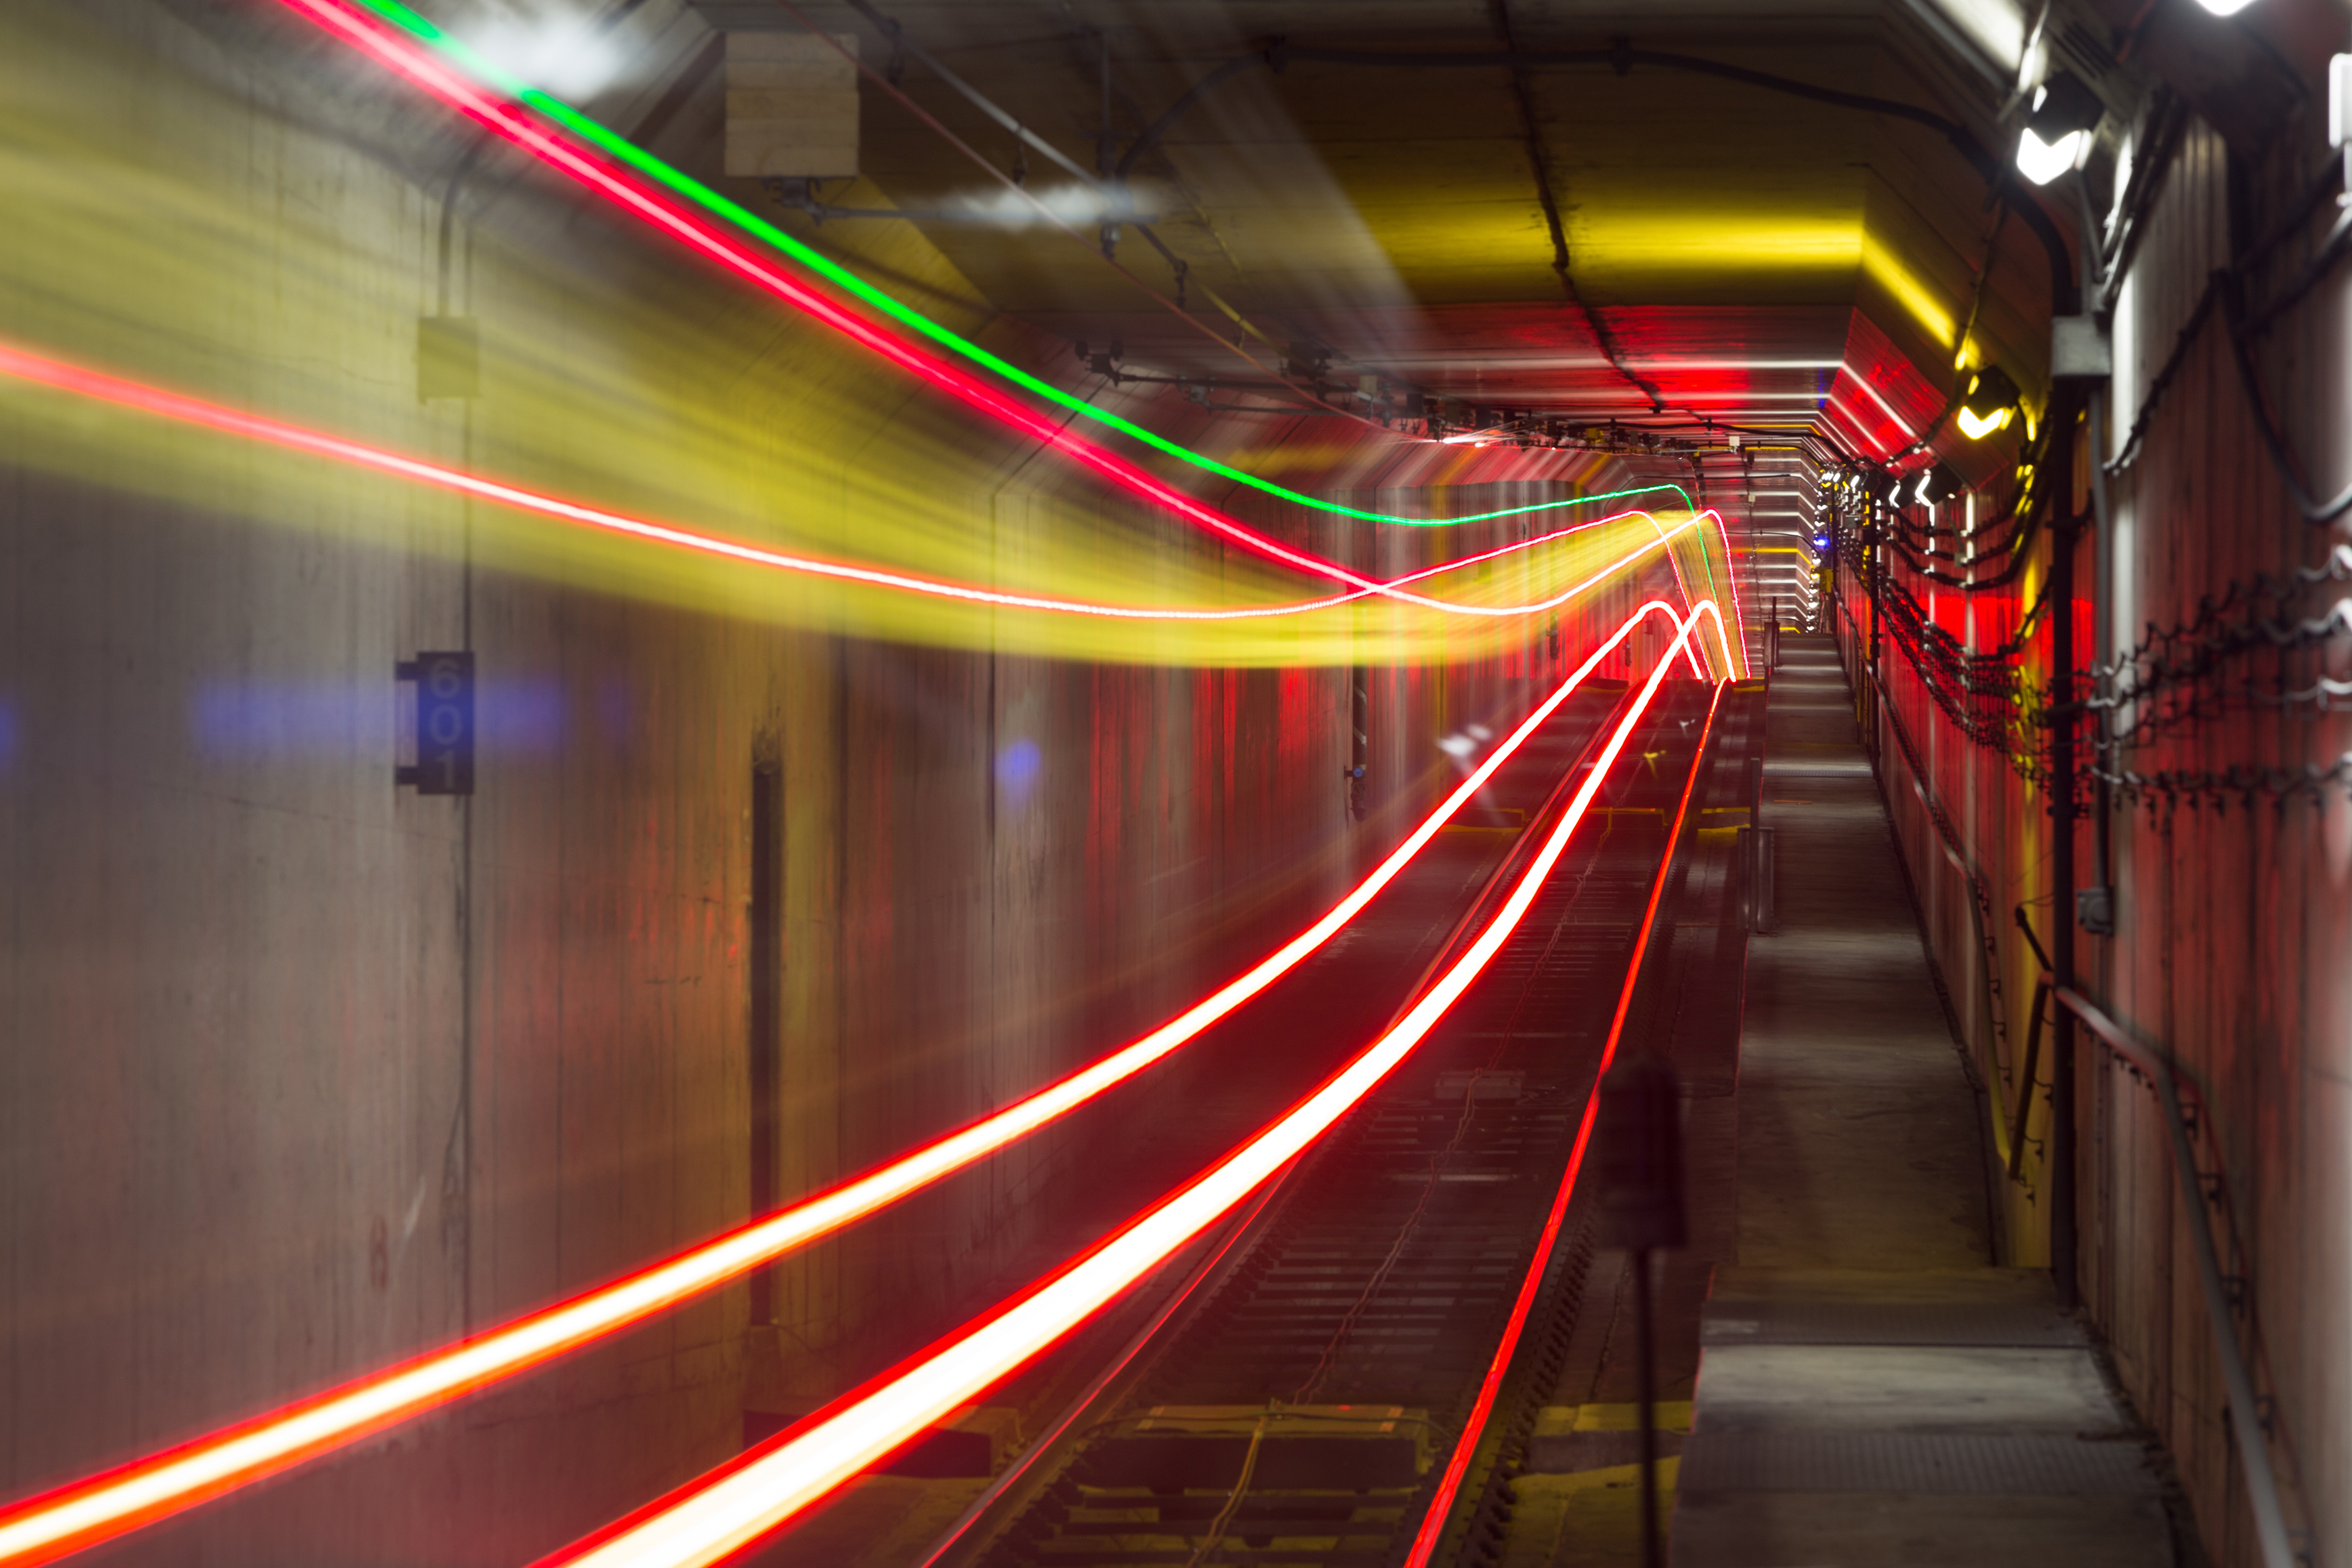
As I begin dialing the variable ND, I half-press my shutter button off and on and watch the estimated exposure time go up. Once it hits the desired length, in this case 30 seconds, I stop turning the variable ND and get ready to make the shot.
Pre-Process Light Trails
Photoshop has an incredibly useful layer blending mode called Lighten that makes compositing light trails exposures on top of the final background scene a snap. What the Lighten blend mode does is compare every pixel of the layer with the layer directly underneath. Whichever pixel turns out to be the brightest wins and shows up in the final image. In order to make the process smoother we’re going to give Photoshop a little help first.
-
Try adjusting settings such as:
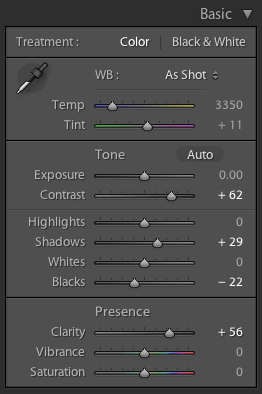
- Increase Contrast
- Increase Highlights
- Increase Whites
- Increase Clarity
- Reduce Blacks
- Reduce Shadows
By boosting contrast and highlights—while reducing blacks and shadows—we’re going to separate out the bright parts of the photo (the light trails) from the dark parts of the photo (the overall scene).
Each circumstance, and photo, is different. Play around with the settings for your own light trails to change the final result. Below are the exact settings I used:
Afterwards, I did a few adjustment brush edits around the photo to reduce unwanted highlights that will end up getting blended into the composite shot:

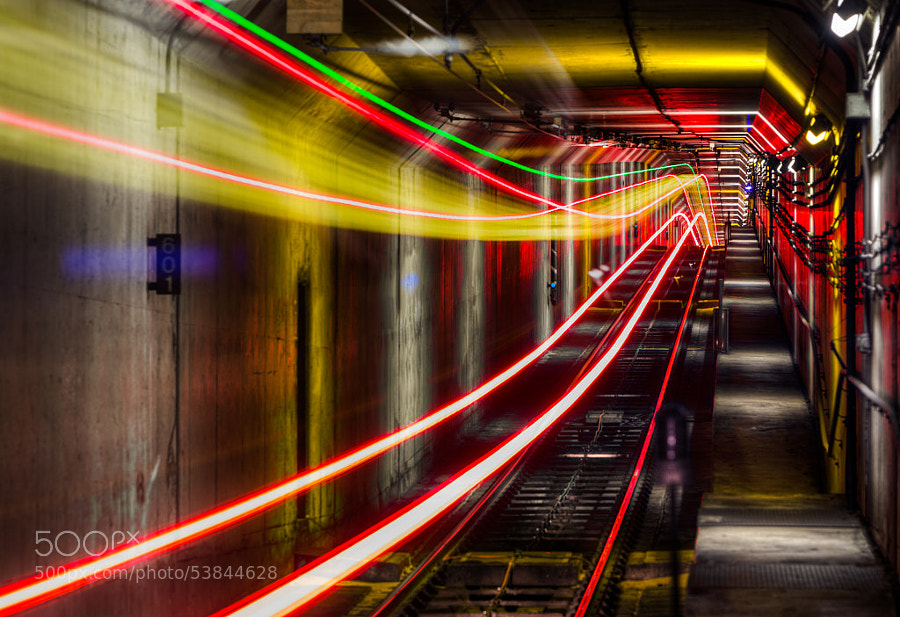
The final processed light trails exposure ends up looking like this:
Compositing Photos Together
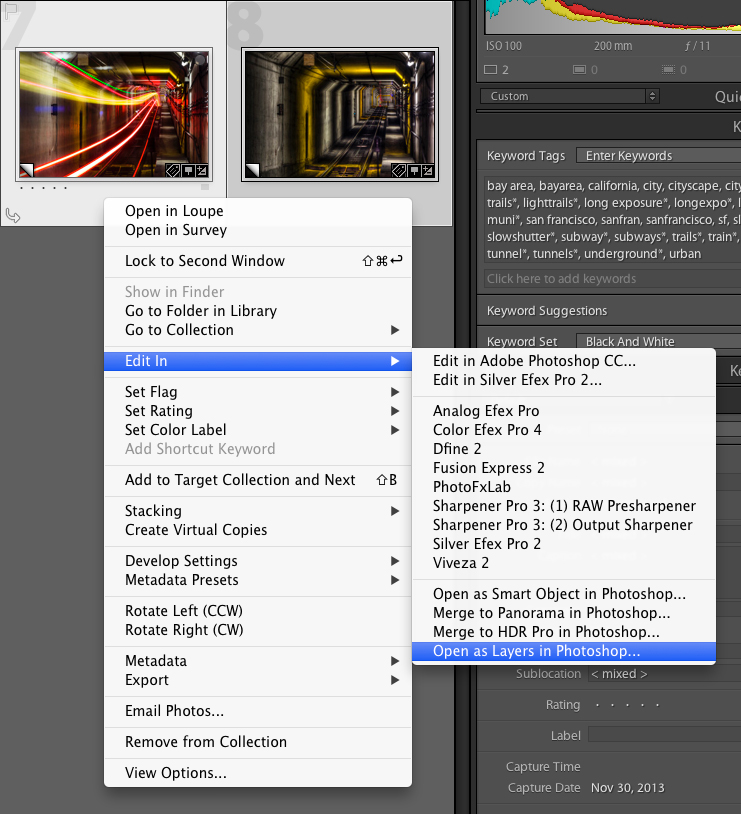
Now that we have the pre-processed background scene and light trails exposures, it’s time to open them up in Photoshop. Lightroom makes this a simple task. Select the two (or more) pre-processed images, right click on them, choose “Edit In”, then pick “Open as layers in Photoshop…” as follows.
The next step is to make sure the order of the layers is correct. The top-most layers should be the light trails exposures, and the bottom-most layer should be the background scene. Once the layers are ordered correctly, switch the layer blending mode to Lighten for all of the light trails exposures.
As a side note, play with the layer blending modes to your hearts content here. In my experience, Lighten and Pin Light tend to yield the best results for blending just the moving lights on top of a background scene.

Switching the layer blending mode to Lighten will get you 90% done. From here, a really good thing to bring out that much more detail and control in your final composited image is to add a layer mask to the light trails layers. Layer masks allow you to selectively control which part of a layer will get blended on to the layers underneath it. Select a light trails layer in the Layers tab on the right of Photoshop, then click the small rectangular icon with a circle inside at the bottom of the Layers tab it to create a layer mask for a layer.

By default, a layer mask will start off as entirely white. White means 100% of the pixels will pass through and get combined into the final photo. Anything drawn into the layer mask between the shades of white and black will not get blended into the scene layer underneath. For example, if you were to draw a 100% black square, the pixels within that square will not get combined with the scene photo underneath. If you were to draw a gray square, the pixels on top will blend with the lower layers at 50% opacity.
The best technique for blending things naturally is to switch to the brush tool (hotkey B), make the foreground color black, switch the Flow of the brush to something low like 10% and give it 0% hardness so that the brush is very soft and delicate. This allows a graceful transition between the parts of the light trails layers you wish to exclude and the parts you wish to include.
You can download the final PSD for inspection to see which parts I decided to blend out of the scene.
Final Product
When all’s said and done, the last part is to just save the changes in Photoshop. A command/ctrl-S will automatically import the composited photo back into Lightroom alongside the other pre-processed photos. I’ve saved any final operations like cropping until this very last point, so that everything lined up correctly throughout all of the processing steps above.
Here’s the end product!
We hope Tristan O’Tierney’s tutorial will inspire you to experiment with long exposure light trails. Trying out this technique any time soon? Upload and share your photos in our Transportation or Landscape categories. And don’t forget to tag them too!
Want to see more of Tristan’s terrific work? Follow him on 500px and check out his website.


Leave a reply