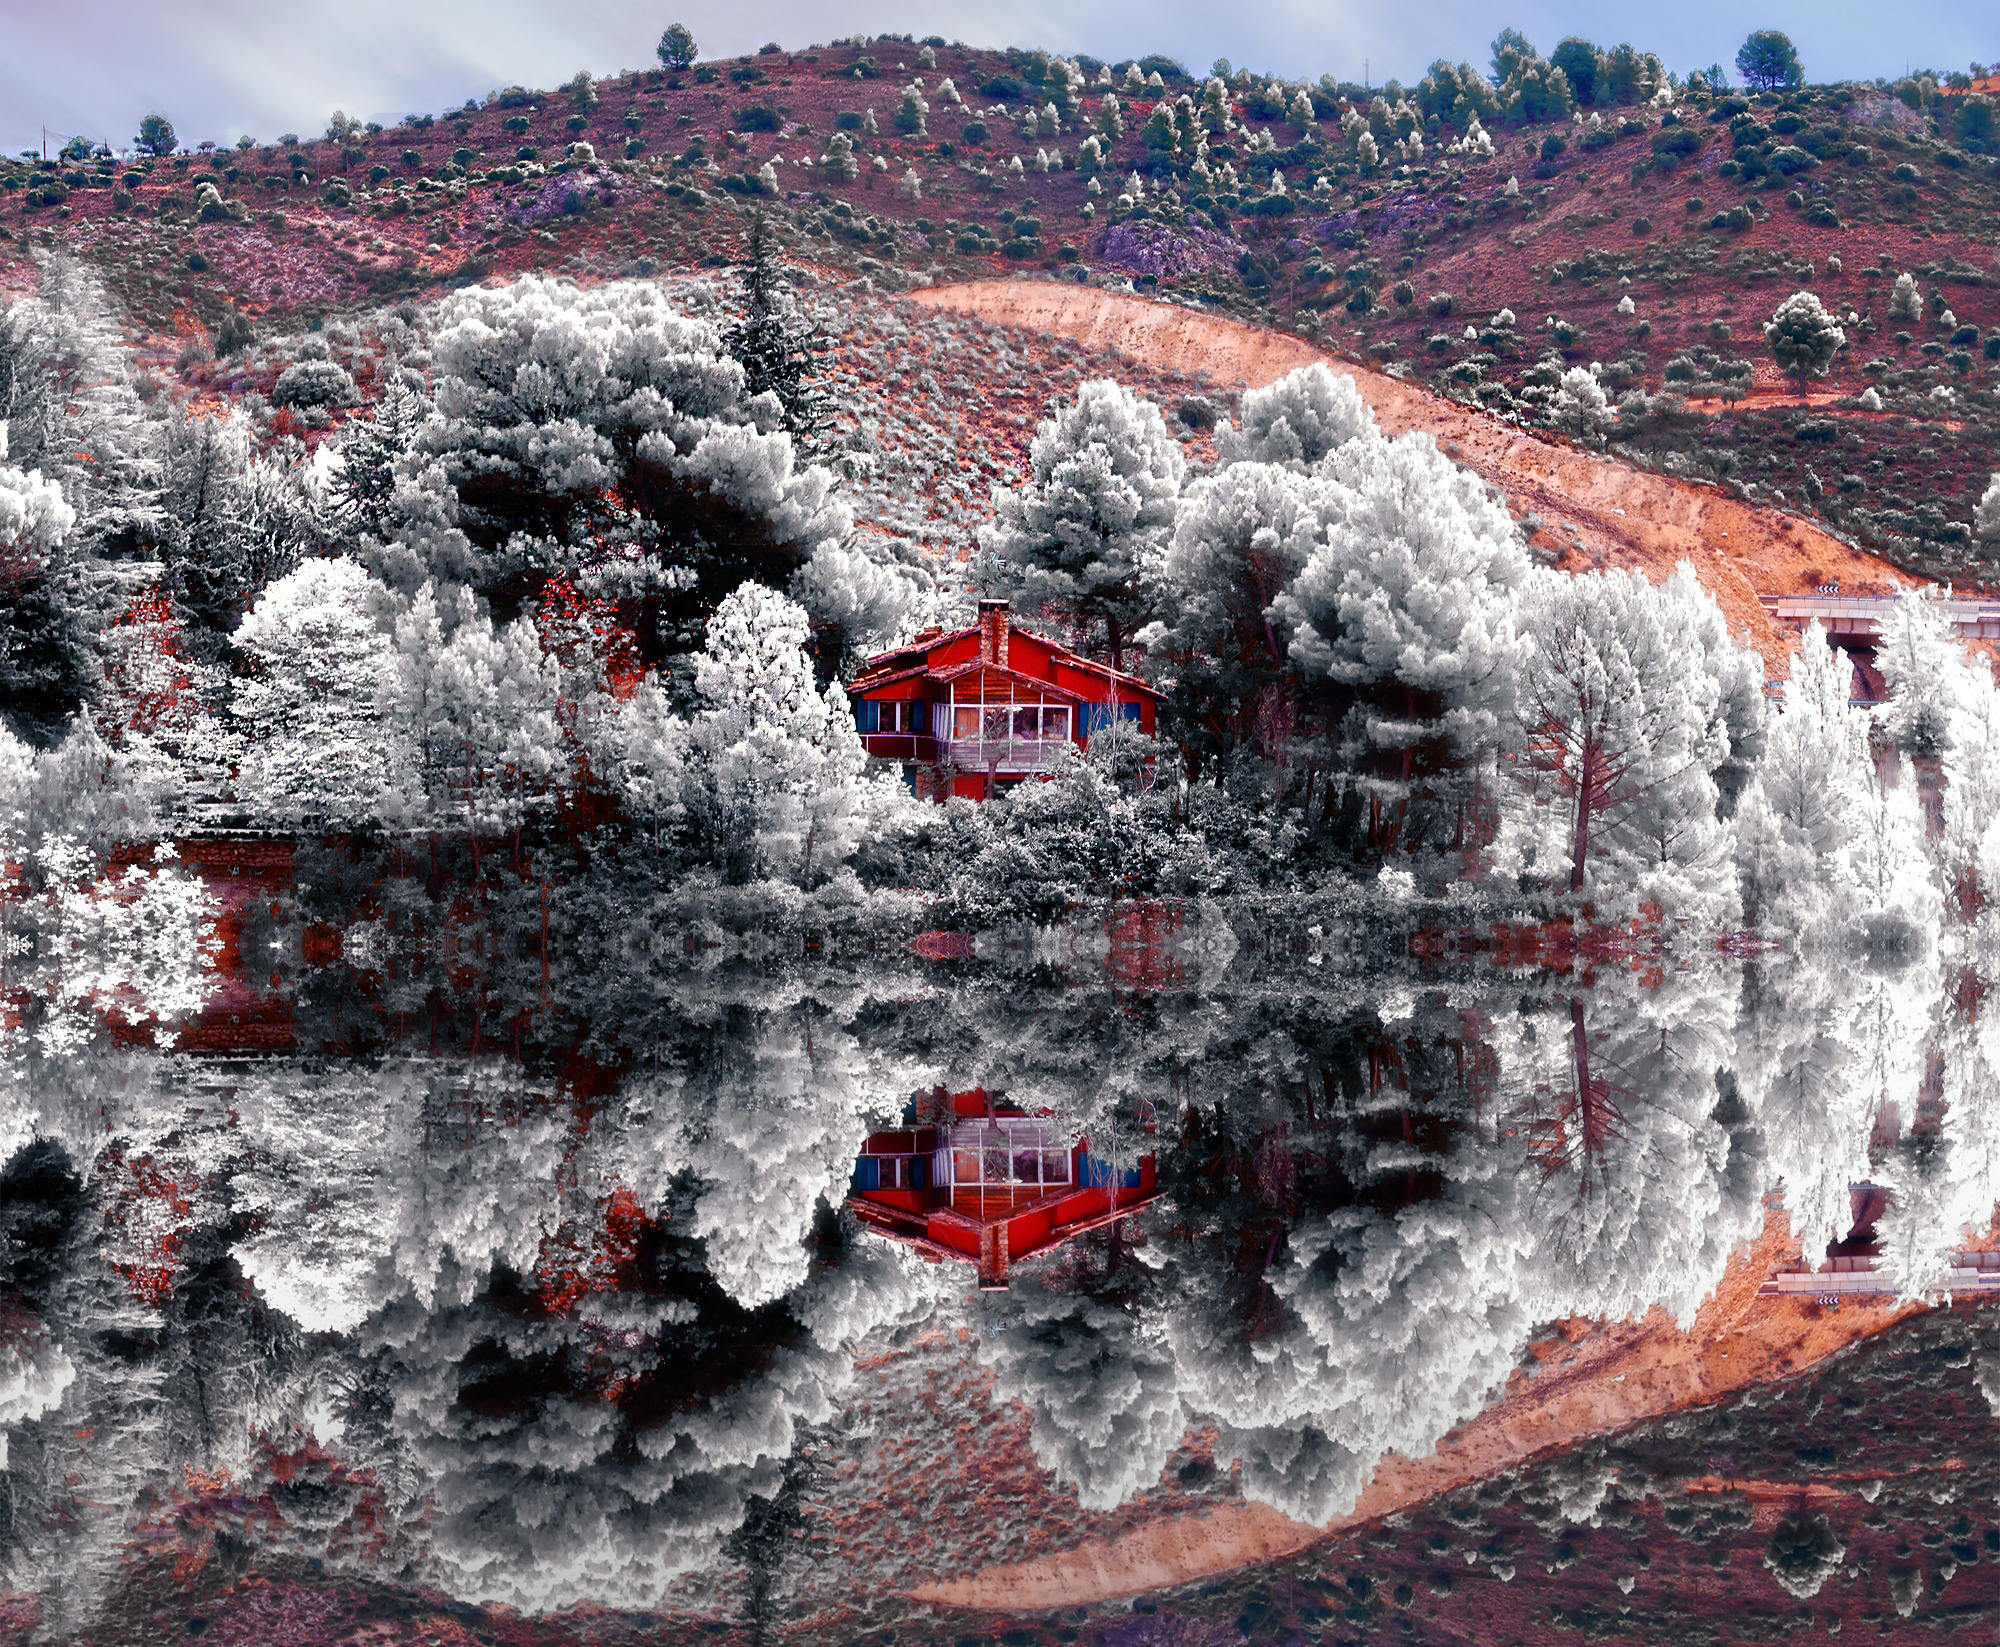
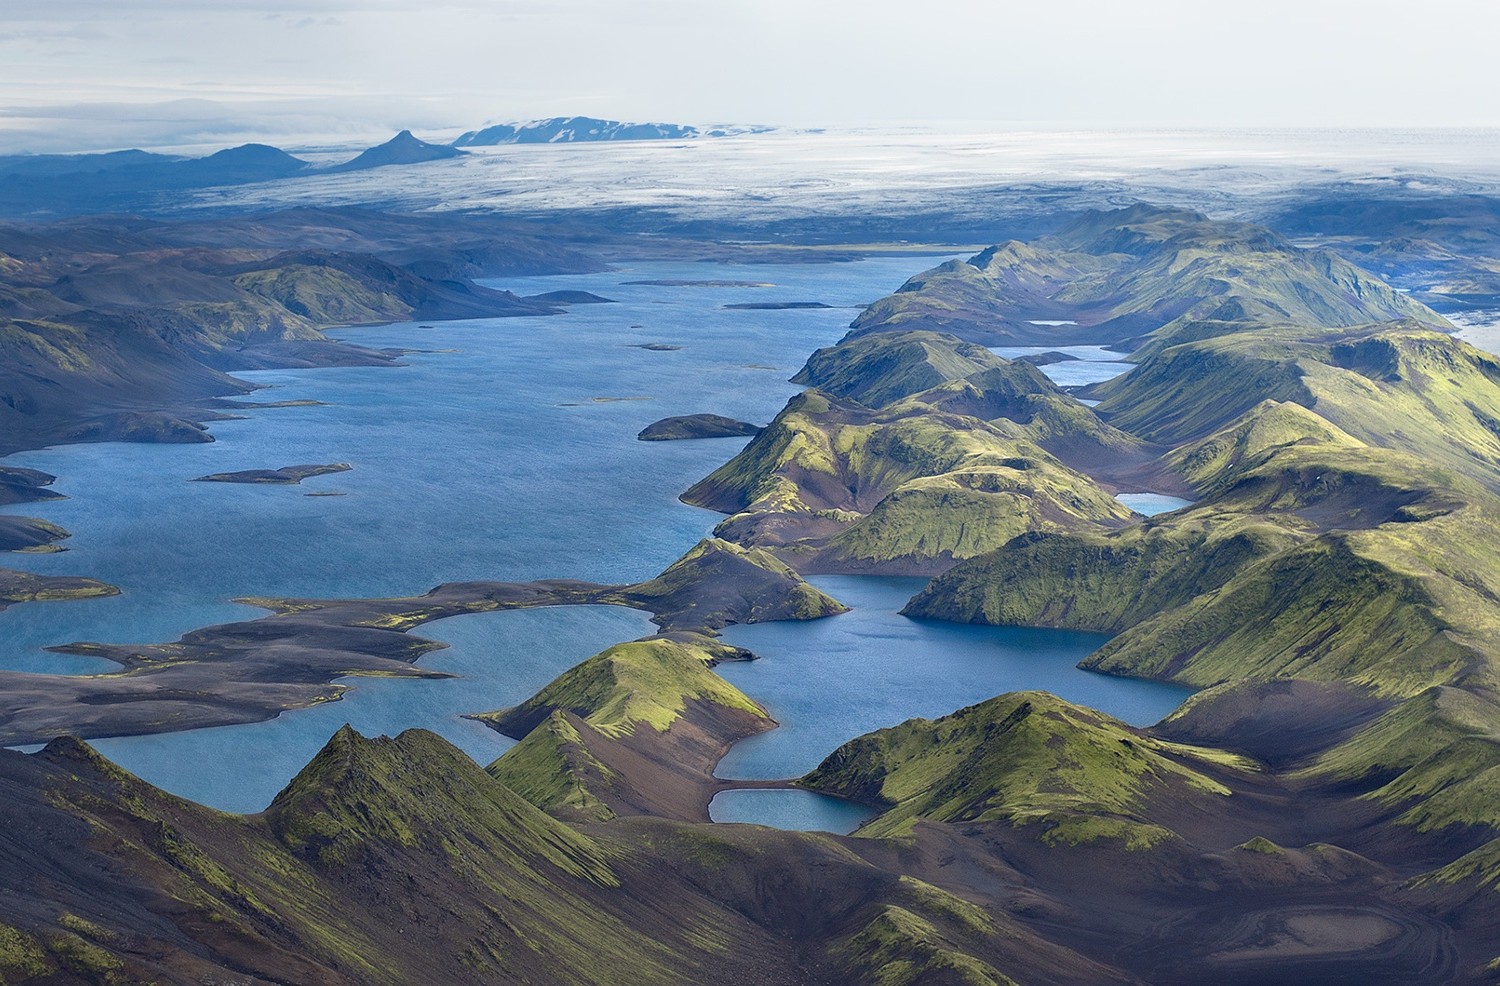
Infrared photography can turn an otherwise normal, even boring, landscape into something truly exceptional — a photograph of an alien world dominated by whites, pinks, purples, and blues so dark they’re almost black.
So if you’ve been getting bored with your landscape photography and want to switch it up — or even if you’re just looking for a fun experiment to try this coming weekend — listen up, because infrared maestro Alfonso Novillo is here to show you the ropes.


Alfonso (as you can see from the images above) is a talented photographer who is particularly fond of the architecture, nighttime urban, and infrared styles of photography.
In the tutorial below, he’ll show you how to transform your standard landscape shots into surreal infrared images. Hope you’re ready to take some notes!
Intro and Gear
Welcome to my infrared photography tutorial. The first thing we need is a camera that can capture infrared light (in my case the Nikon D7000), an infrared filter (I have a HOYA R72), a suitable lens for this type of photography (mine is a 17-105mm), a tripod, and of course a sunny day — although if it’s somewhat cloudy, it can also be interesting.
Capturing the Photo
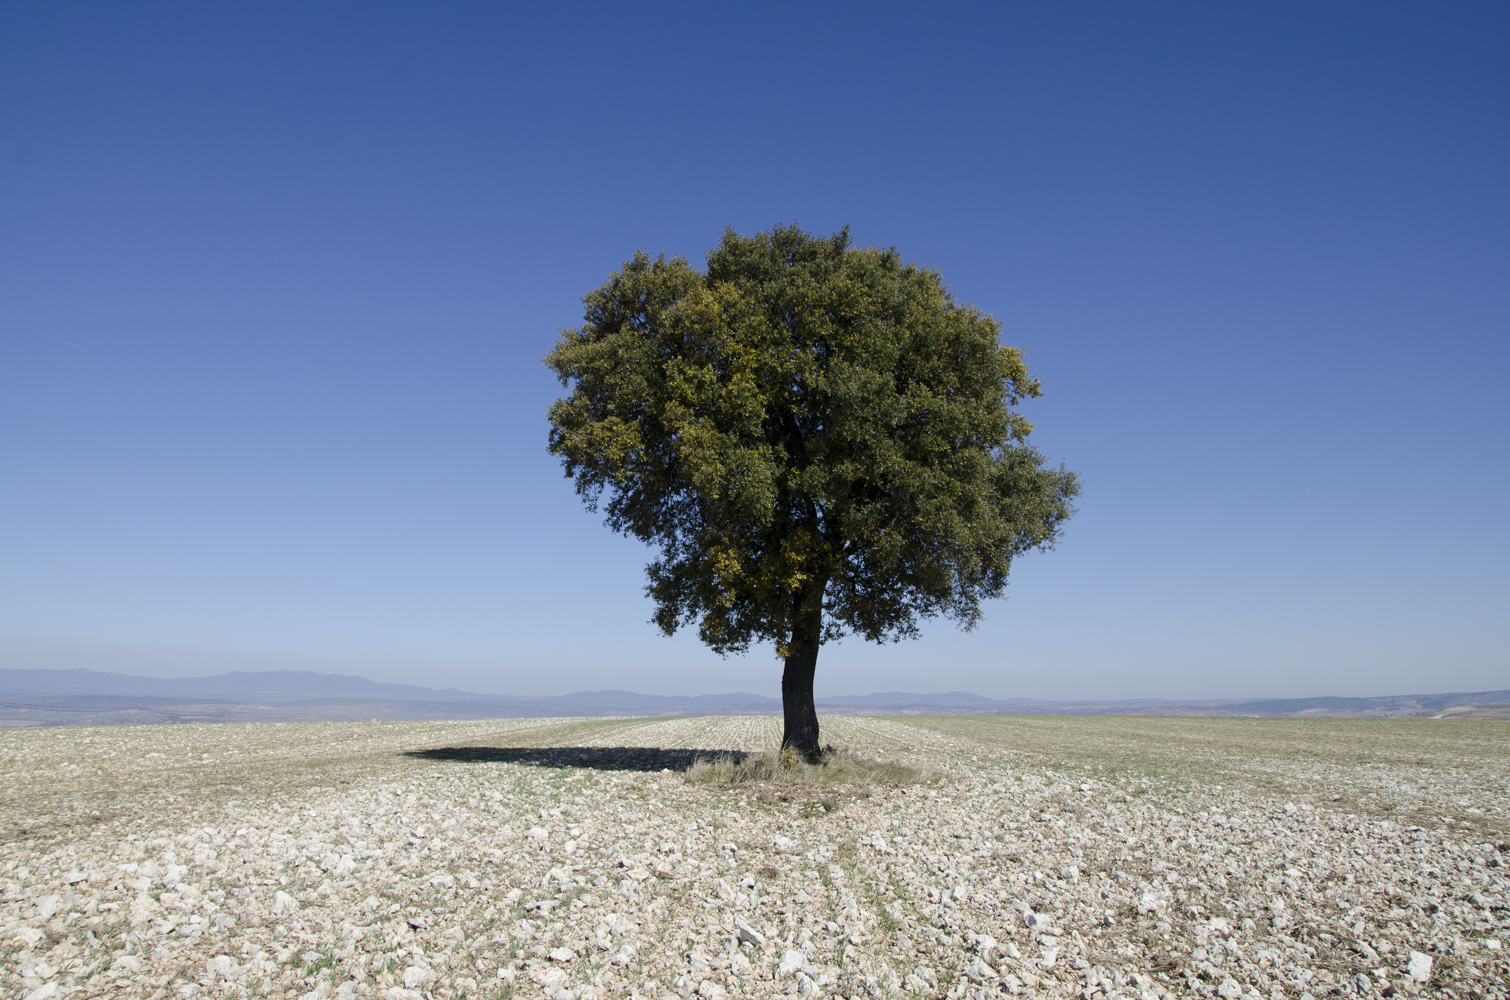
My main advice for taking the photograph will be to find something green (trees, bushes, vegetation) accompanied by a nice sky, and if the occasion allows it, any space with water or architecture.
Focus manually, with ISO 100 to ISO 200. and an aperture between f/4 and f/8 to capture more light without burning the image, and an exposure time between 8 and 20 seconds. It is also essential to take the picture without the filter first, and then the same image with the filter.

Post-Processing
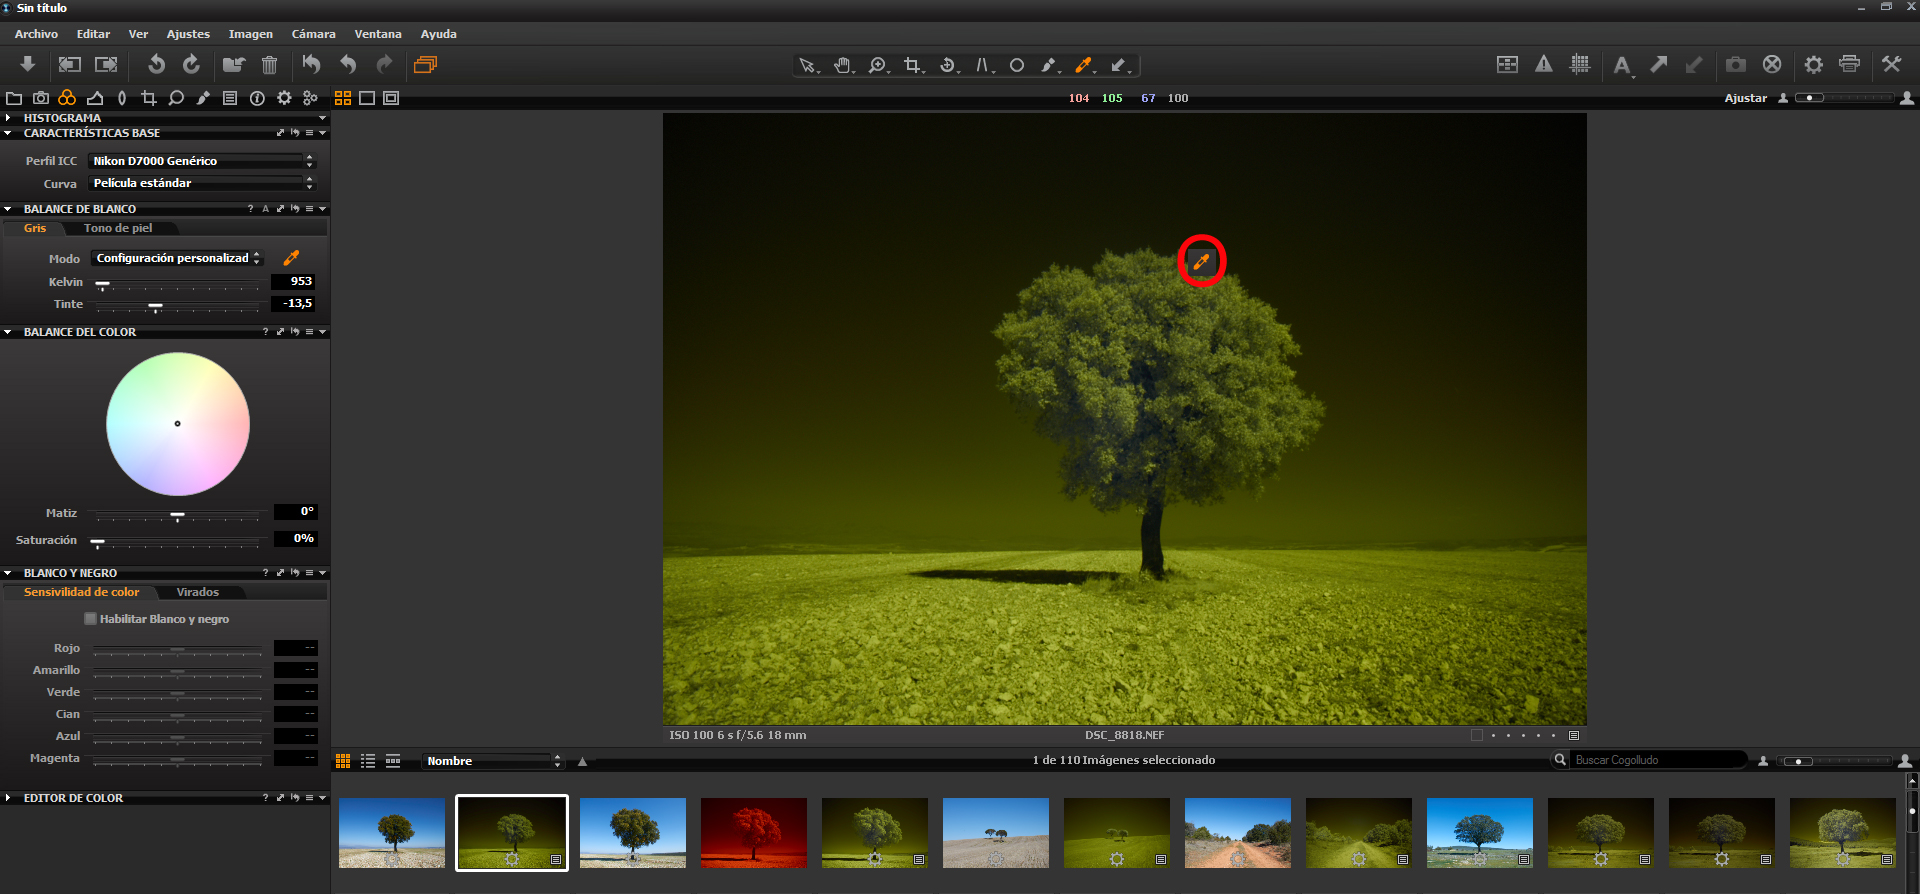
The most intensive step will be to properly process the image. There are many ways to set a photo’s white balance; many cameras allow you to do it before taking the photo (especially the oldest or manipulated cameras), but in my case I do it after because, with my camera, I find it almost impossible to properly set the white balance before taking the photo.
So I use Capture One Pro and set the WB in one simple step: I simply select a green part of the image (the clearer the better).
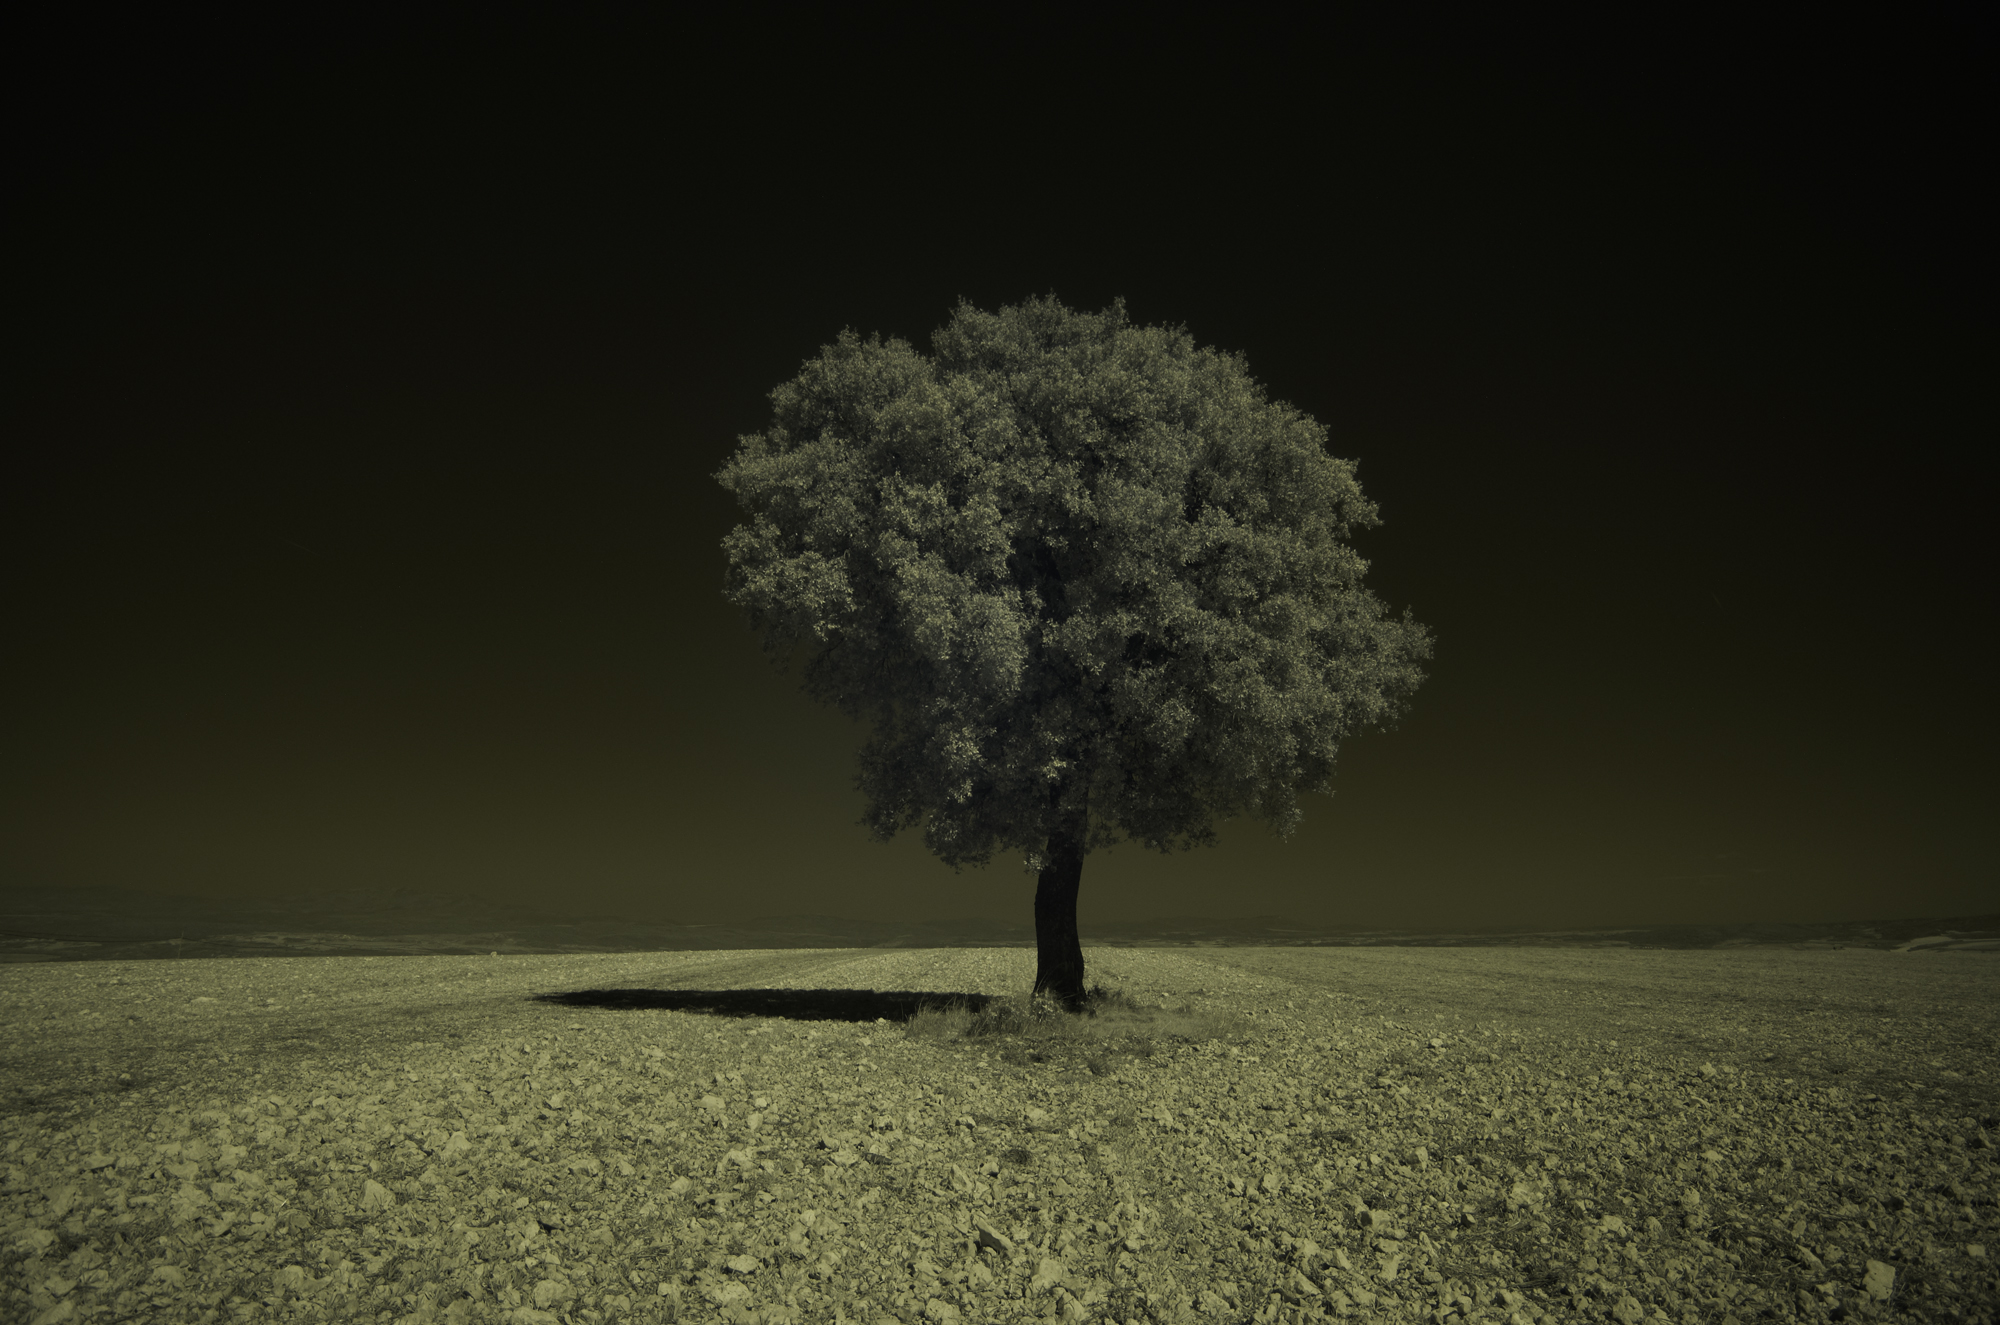
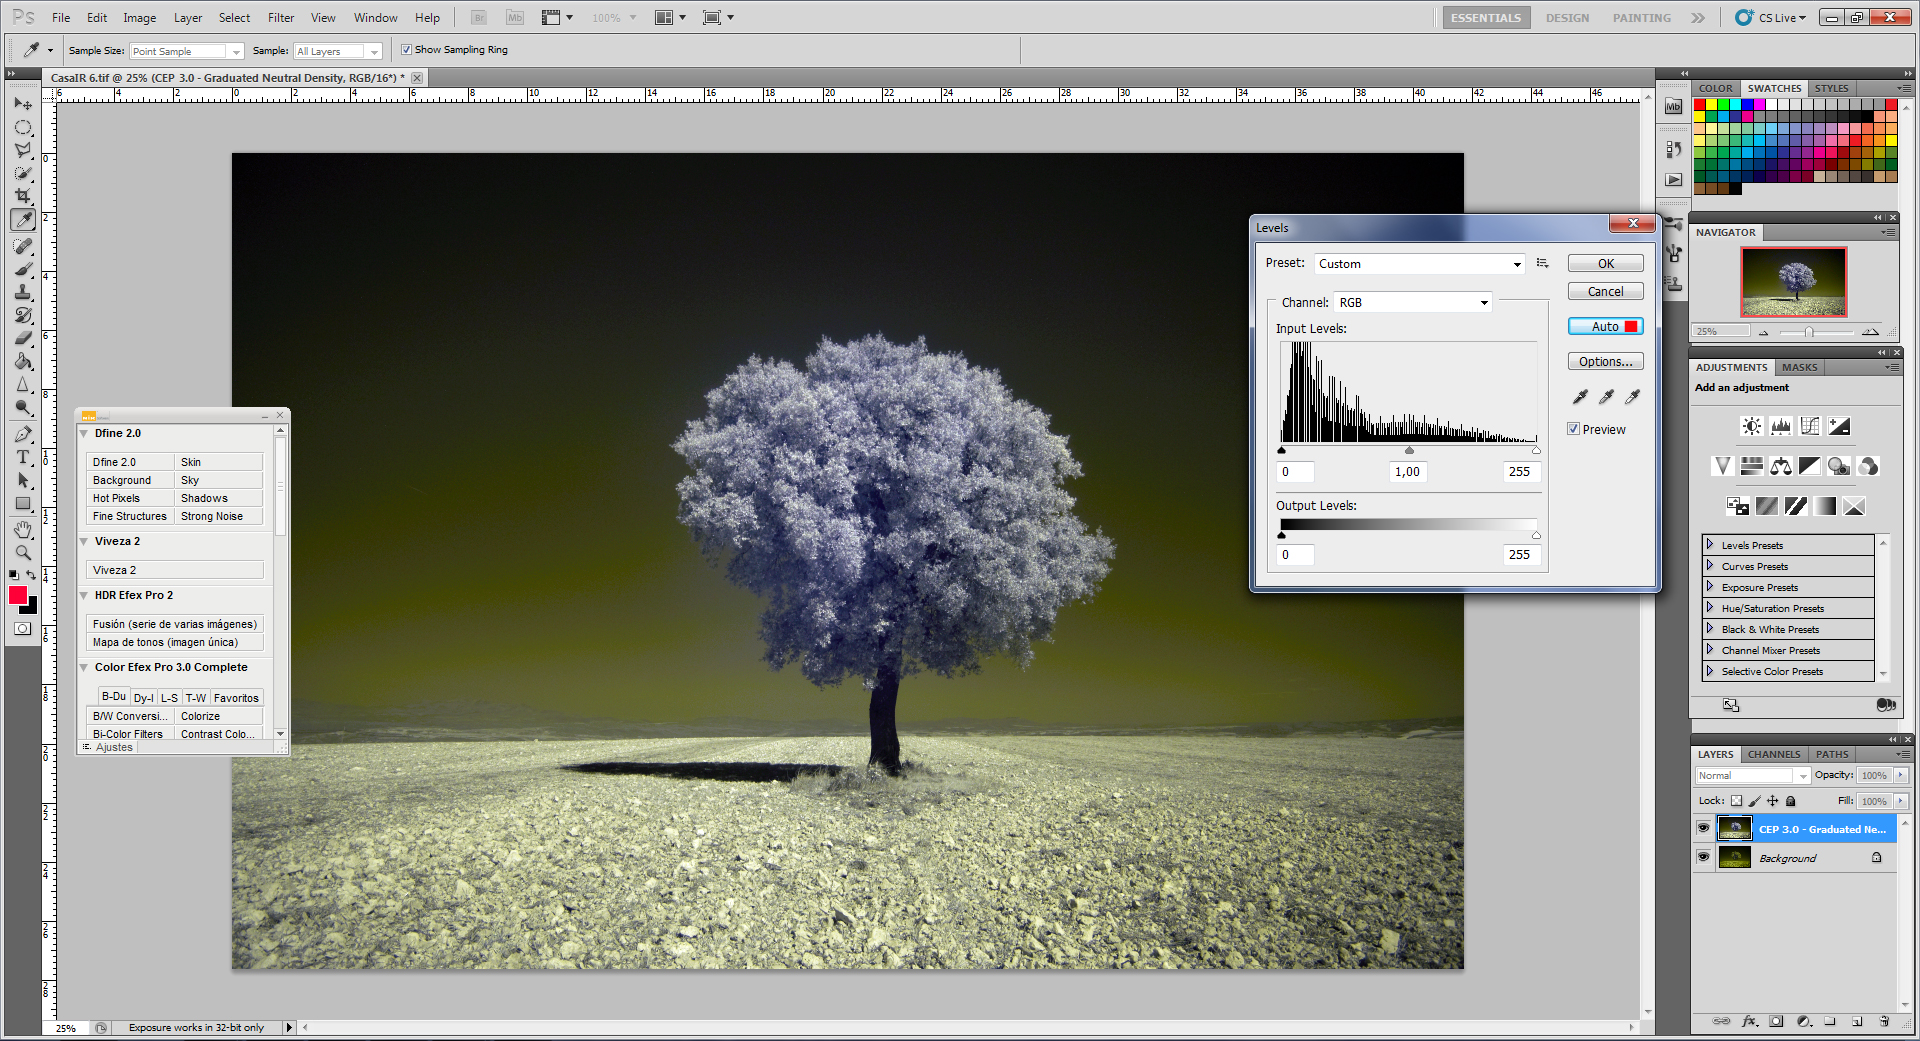
Next, I bring the photo into Photoshop, open the image, and select: Image > Adjustments > Levels > Auto, to remove more neutral tones and brightening the image as needed.
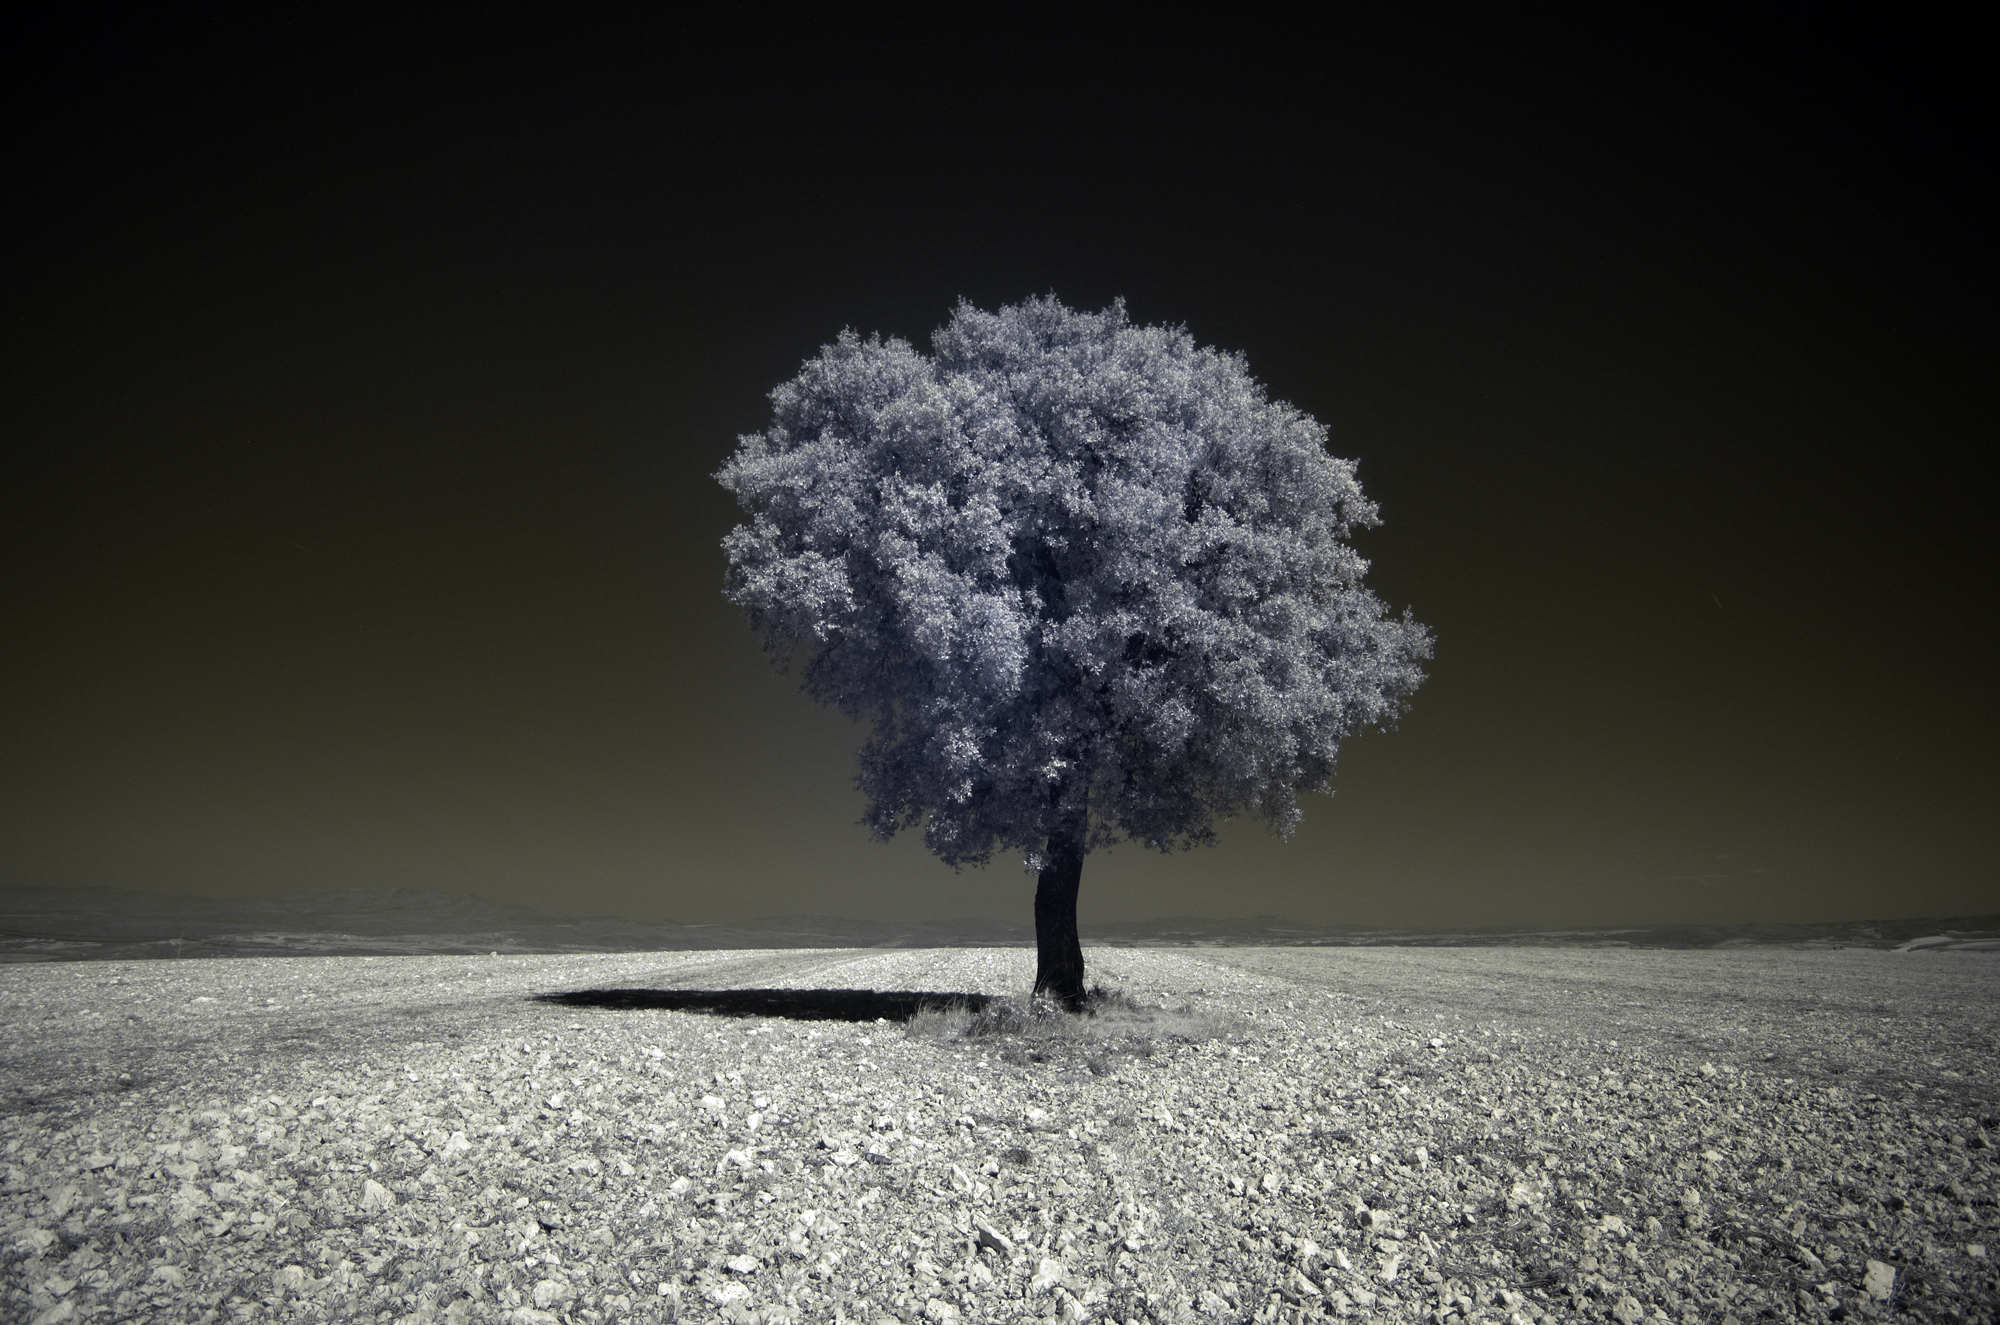
Now it’s time to reverse the channels and begin to infuse some color back into the photograph. There are several options for this, but we’ll go to Image > Adjustments > Channel Mixer and select the red channel. In that channel, we reverse the red (0 to 100) and blue (0 to 100), but leave the green as it is.
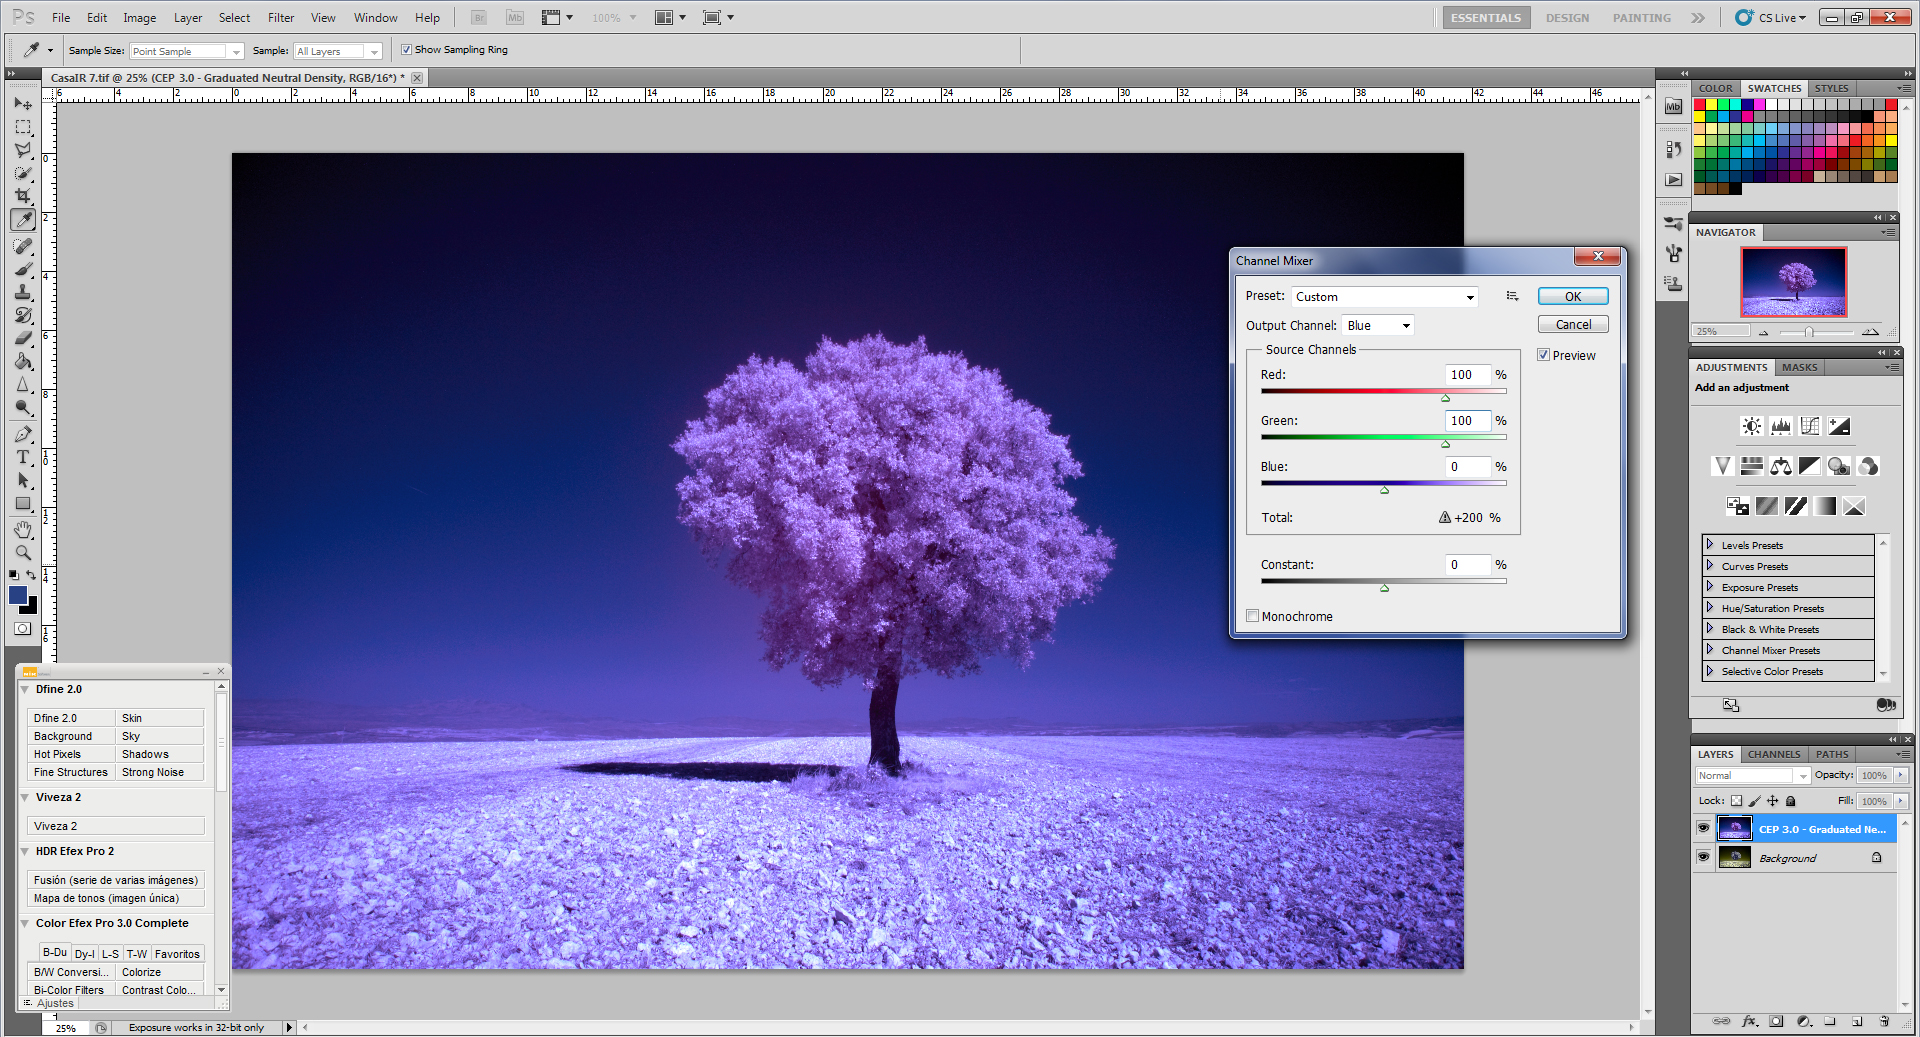
Then do the same with the blue channel, but in this case, to obtain the color of this photograph, we change red from 0 to 100, blue from 100 to 0, and this time raise green from 0 to 100. The photo should look like this:
Then we clarify the picture. There are several ways to do this; I use a trick that is critical in my workflow: I insert the original (standard color) image as the top layer, set the blending mode to lighten, and change the opacity to 50%. This eliminates imperfections in the sky and helps add some clarity.

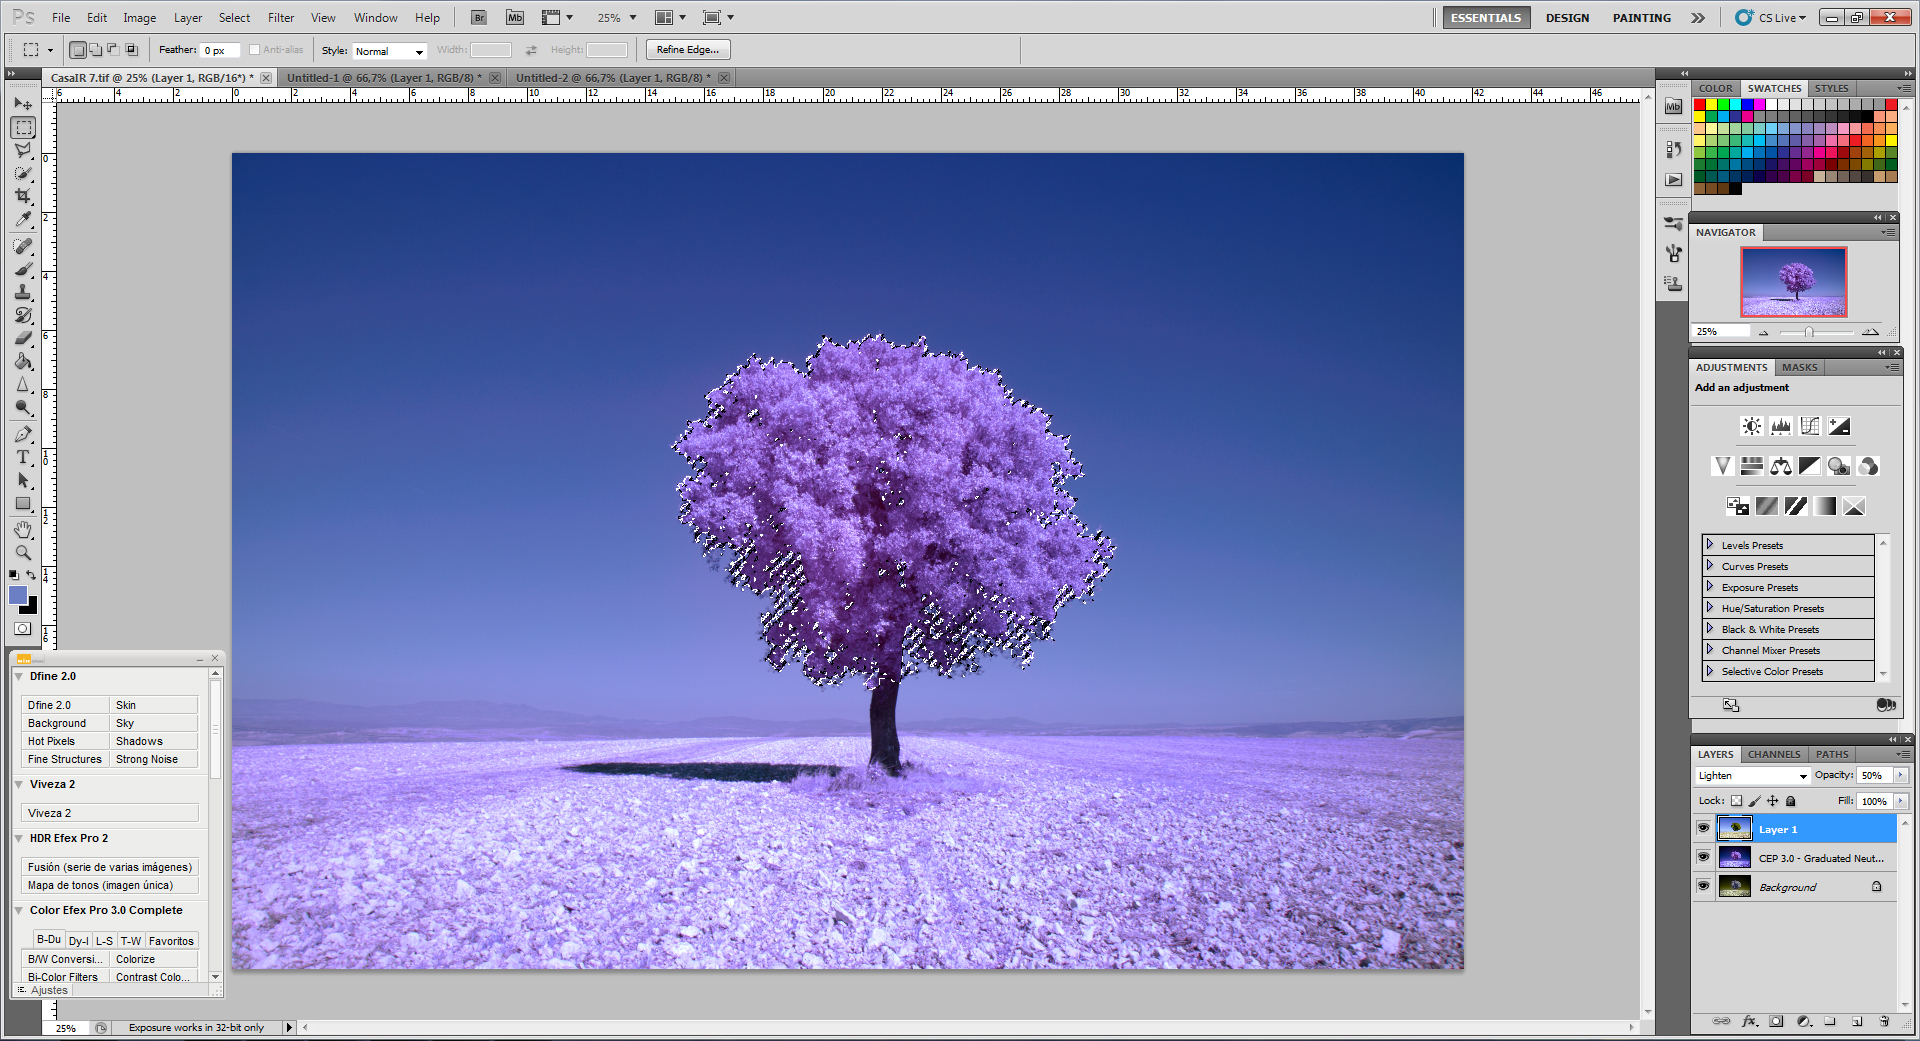
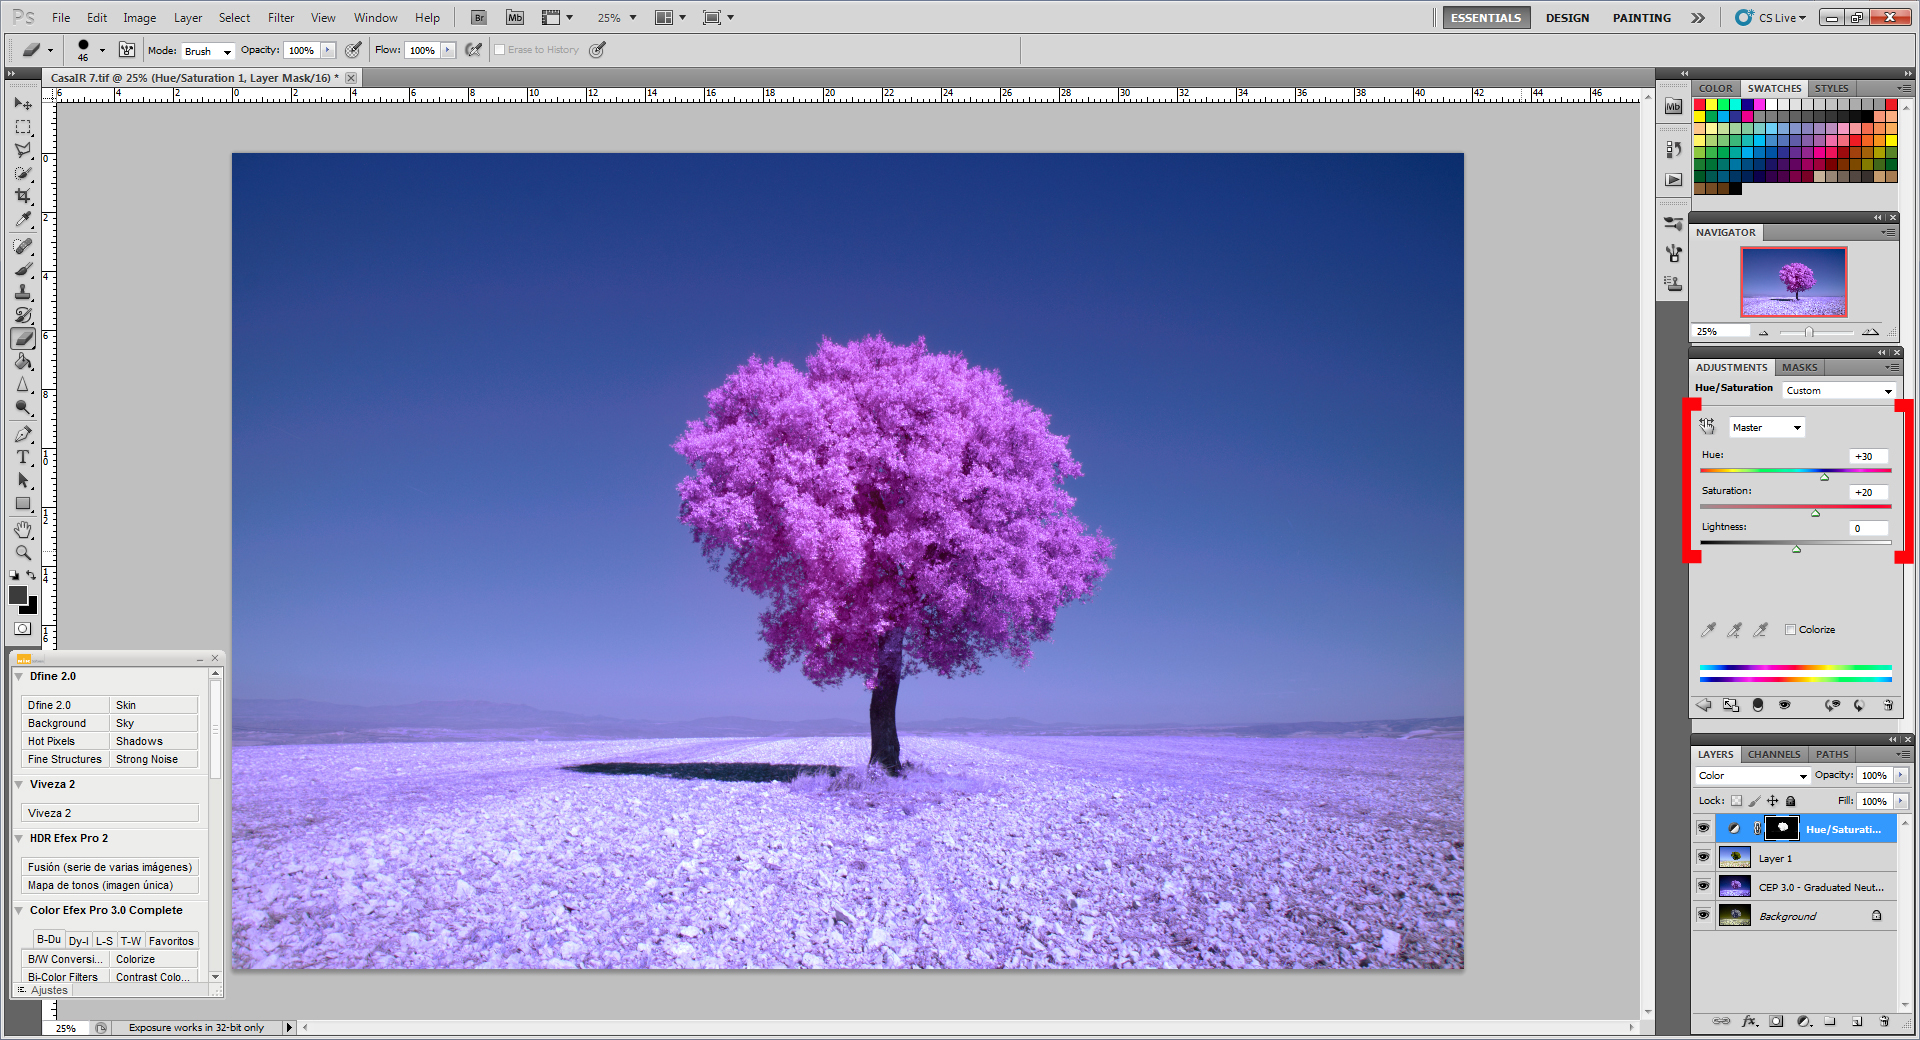
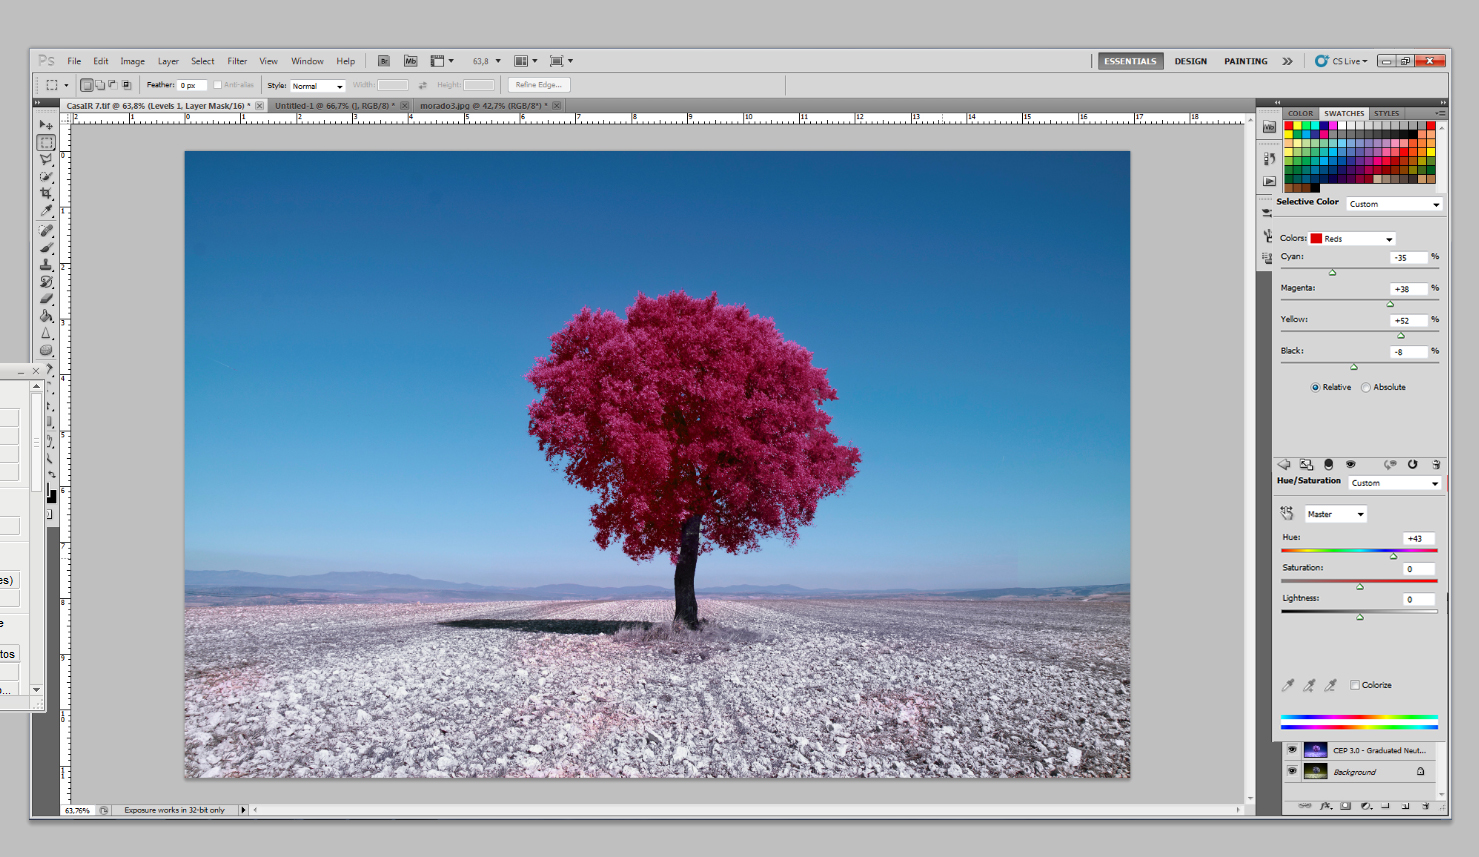
What we have left is to change the color of the leaves of the tree to purple. To do this, select the leaves, which is what we want to change the color of, open a new Hue/Saturation adjustment layer, and play with the colors until you’ve got the desired tone.
For example, in this case we will put Hue: +30 and Saturation: +20. This is the result:
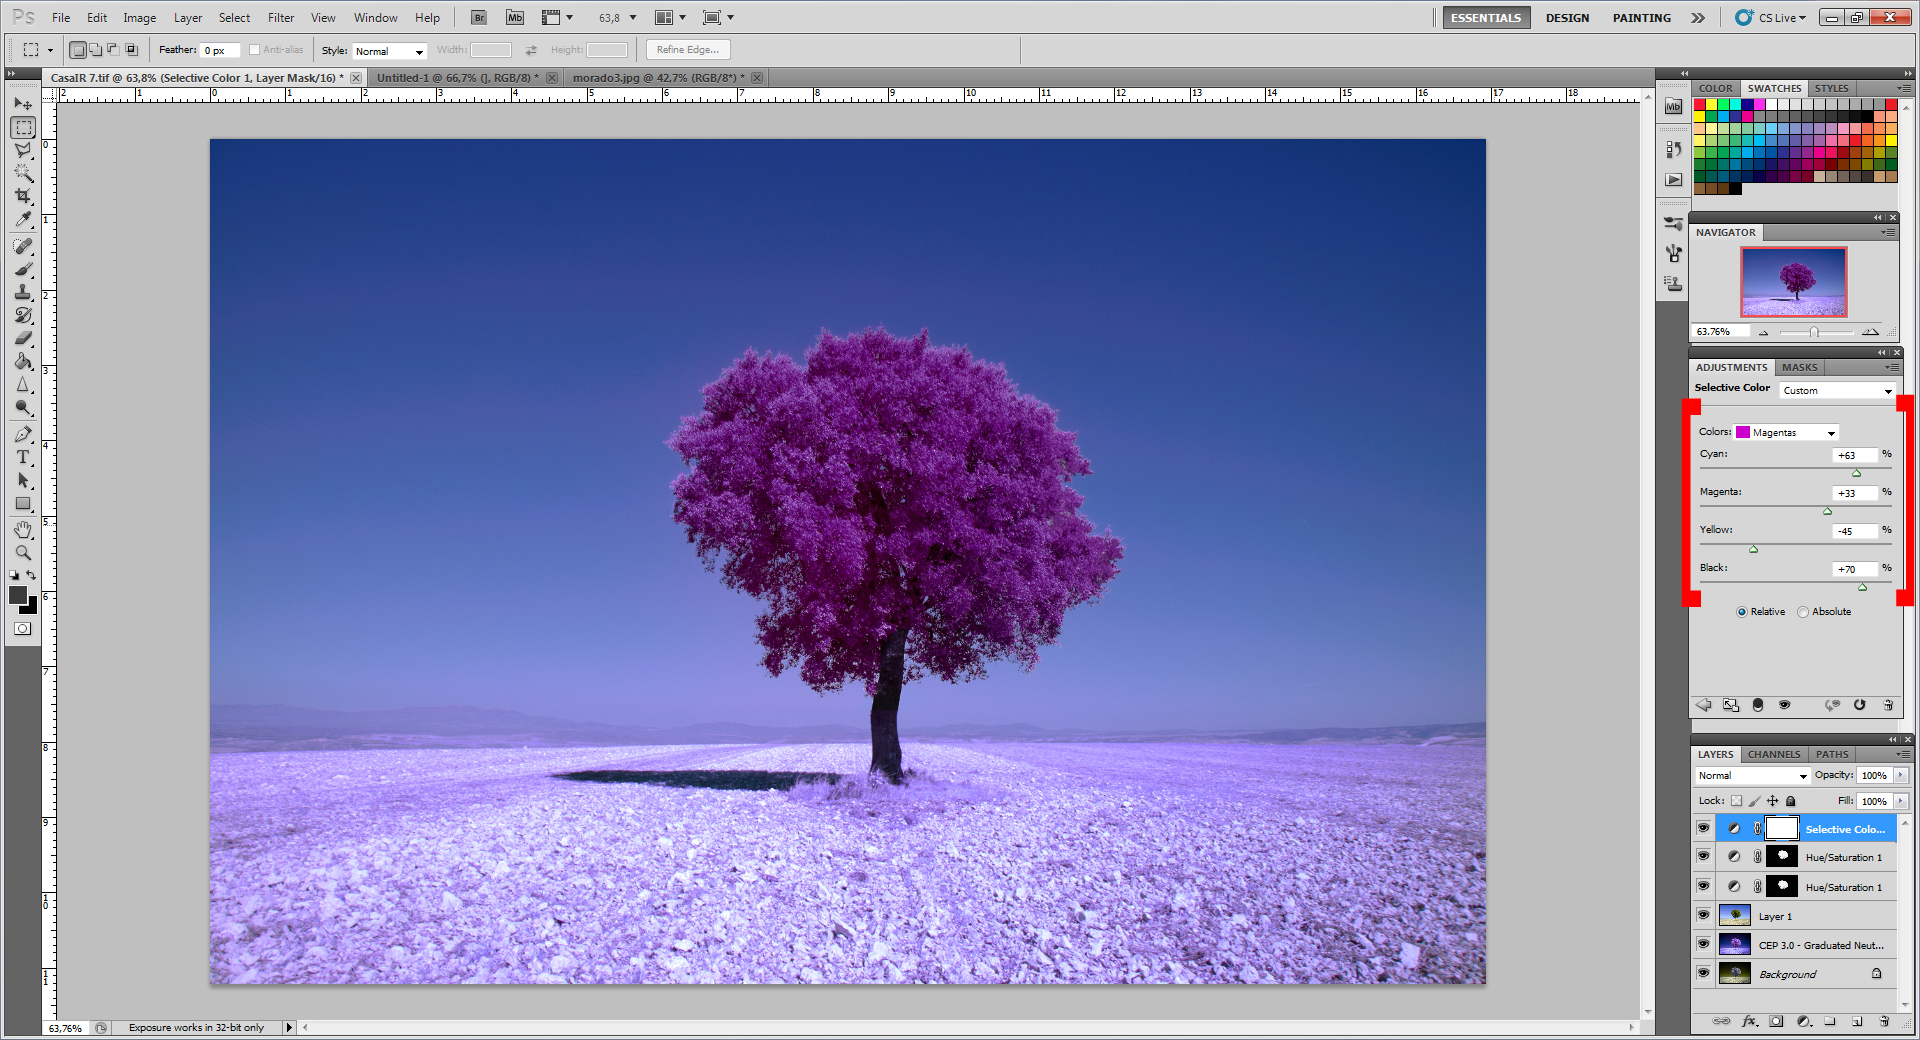
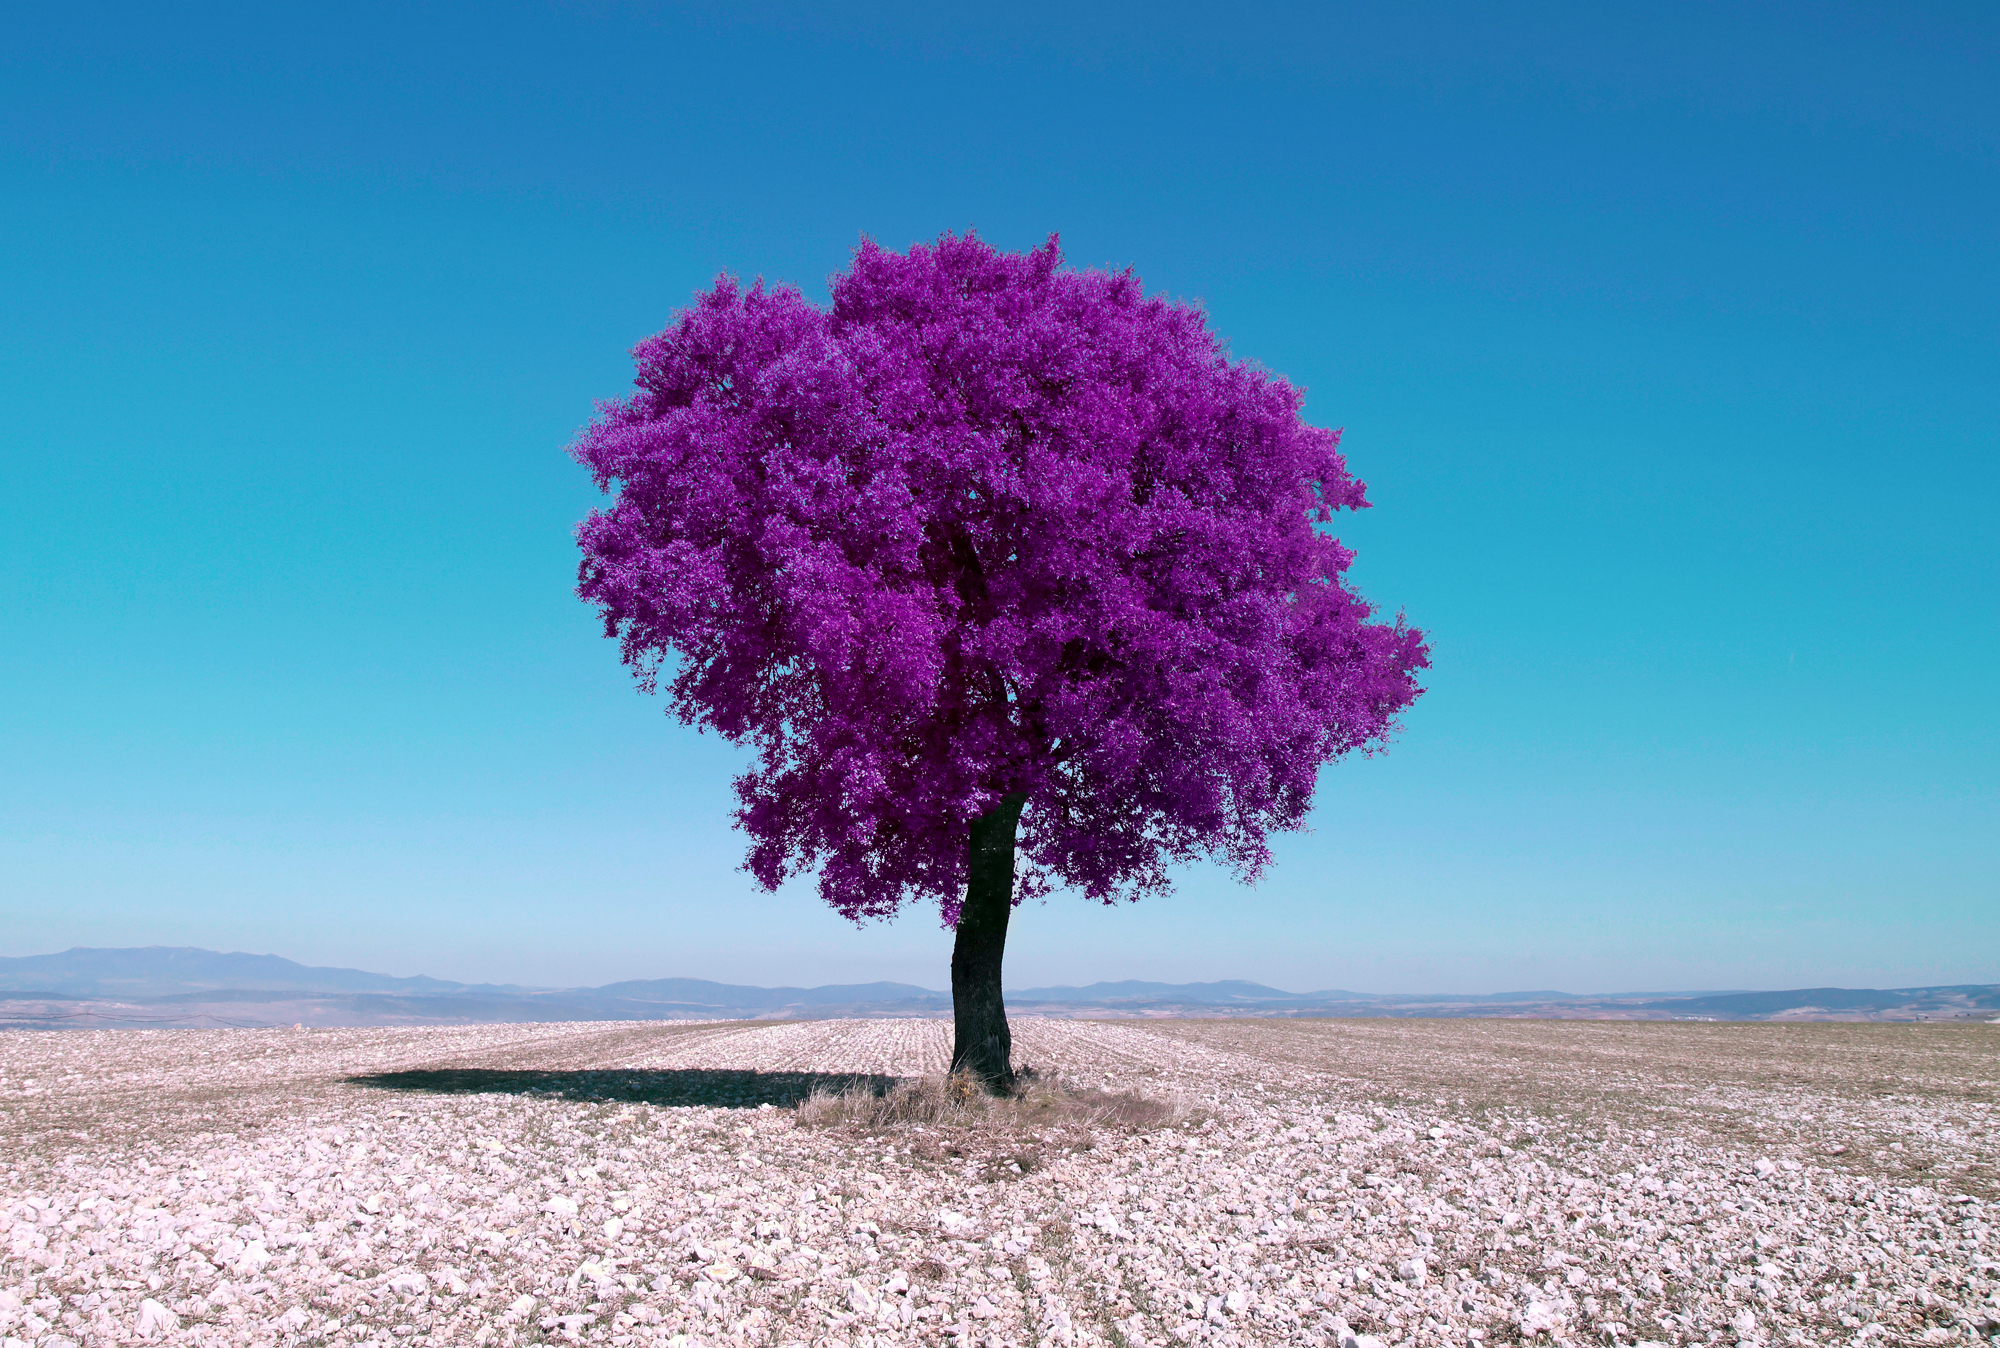
Almost there! To get the purple color of the tree, we open a new adjustment layer, in this case a selective color layer, and play with colors. Specifically, we’ll play with magenta until we get the color we want. For me, that would would turn out like this:
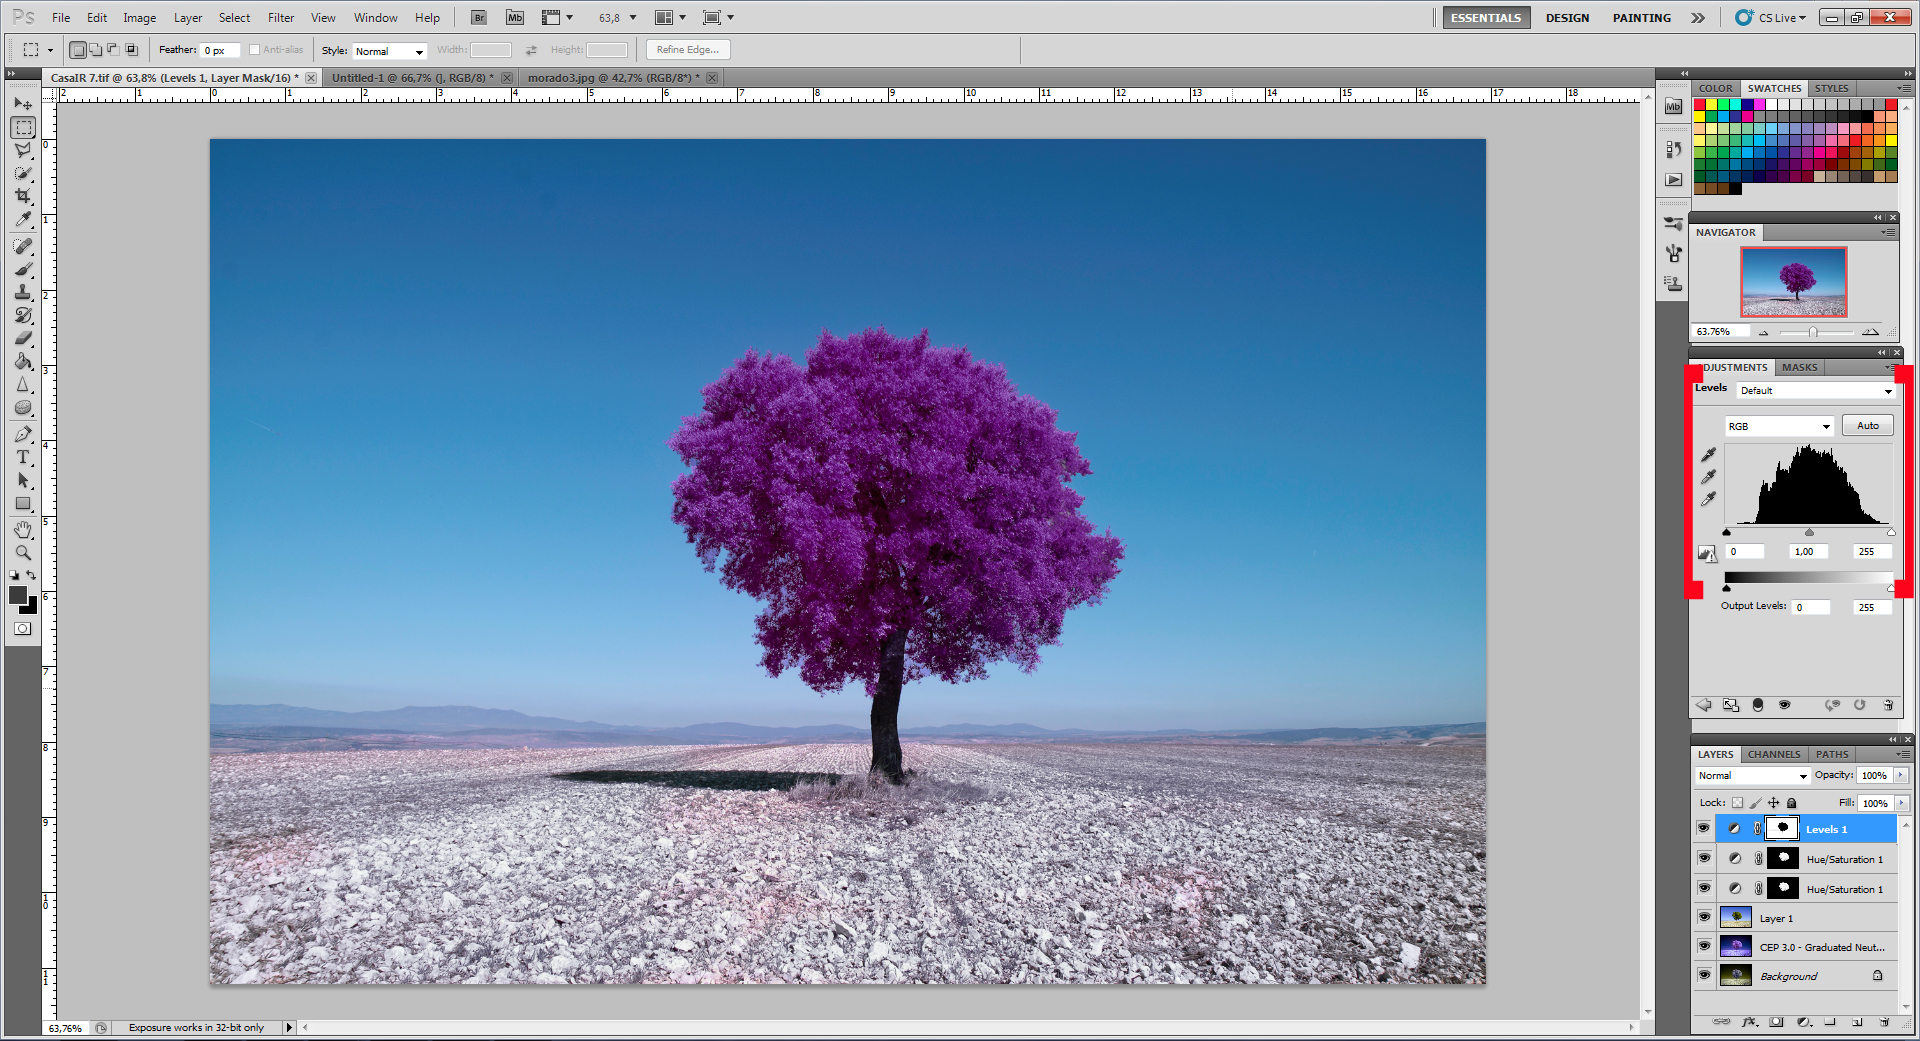
Finally, we just need to improve the sky and ground in the photo a bit, so that the photograph is not so colored. For this, we invert the selection around the tree and adjust it as you like best. There are several ways you could do this, what I do is desaturate the bottom and give the sky blue shades and a little clarity using levels, until I see the final image I want. This would look like:

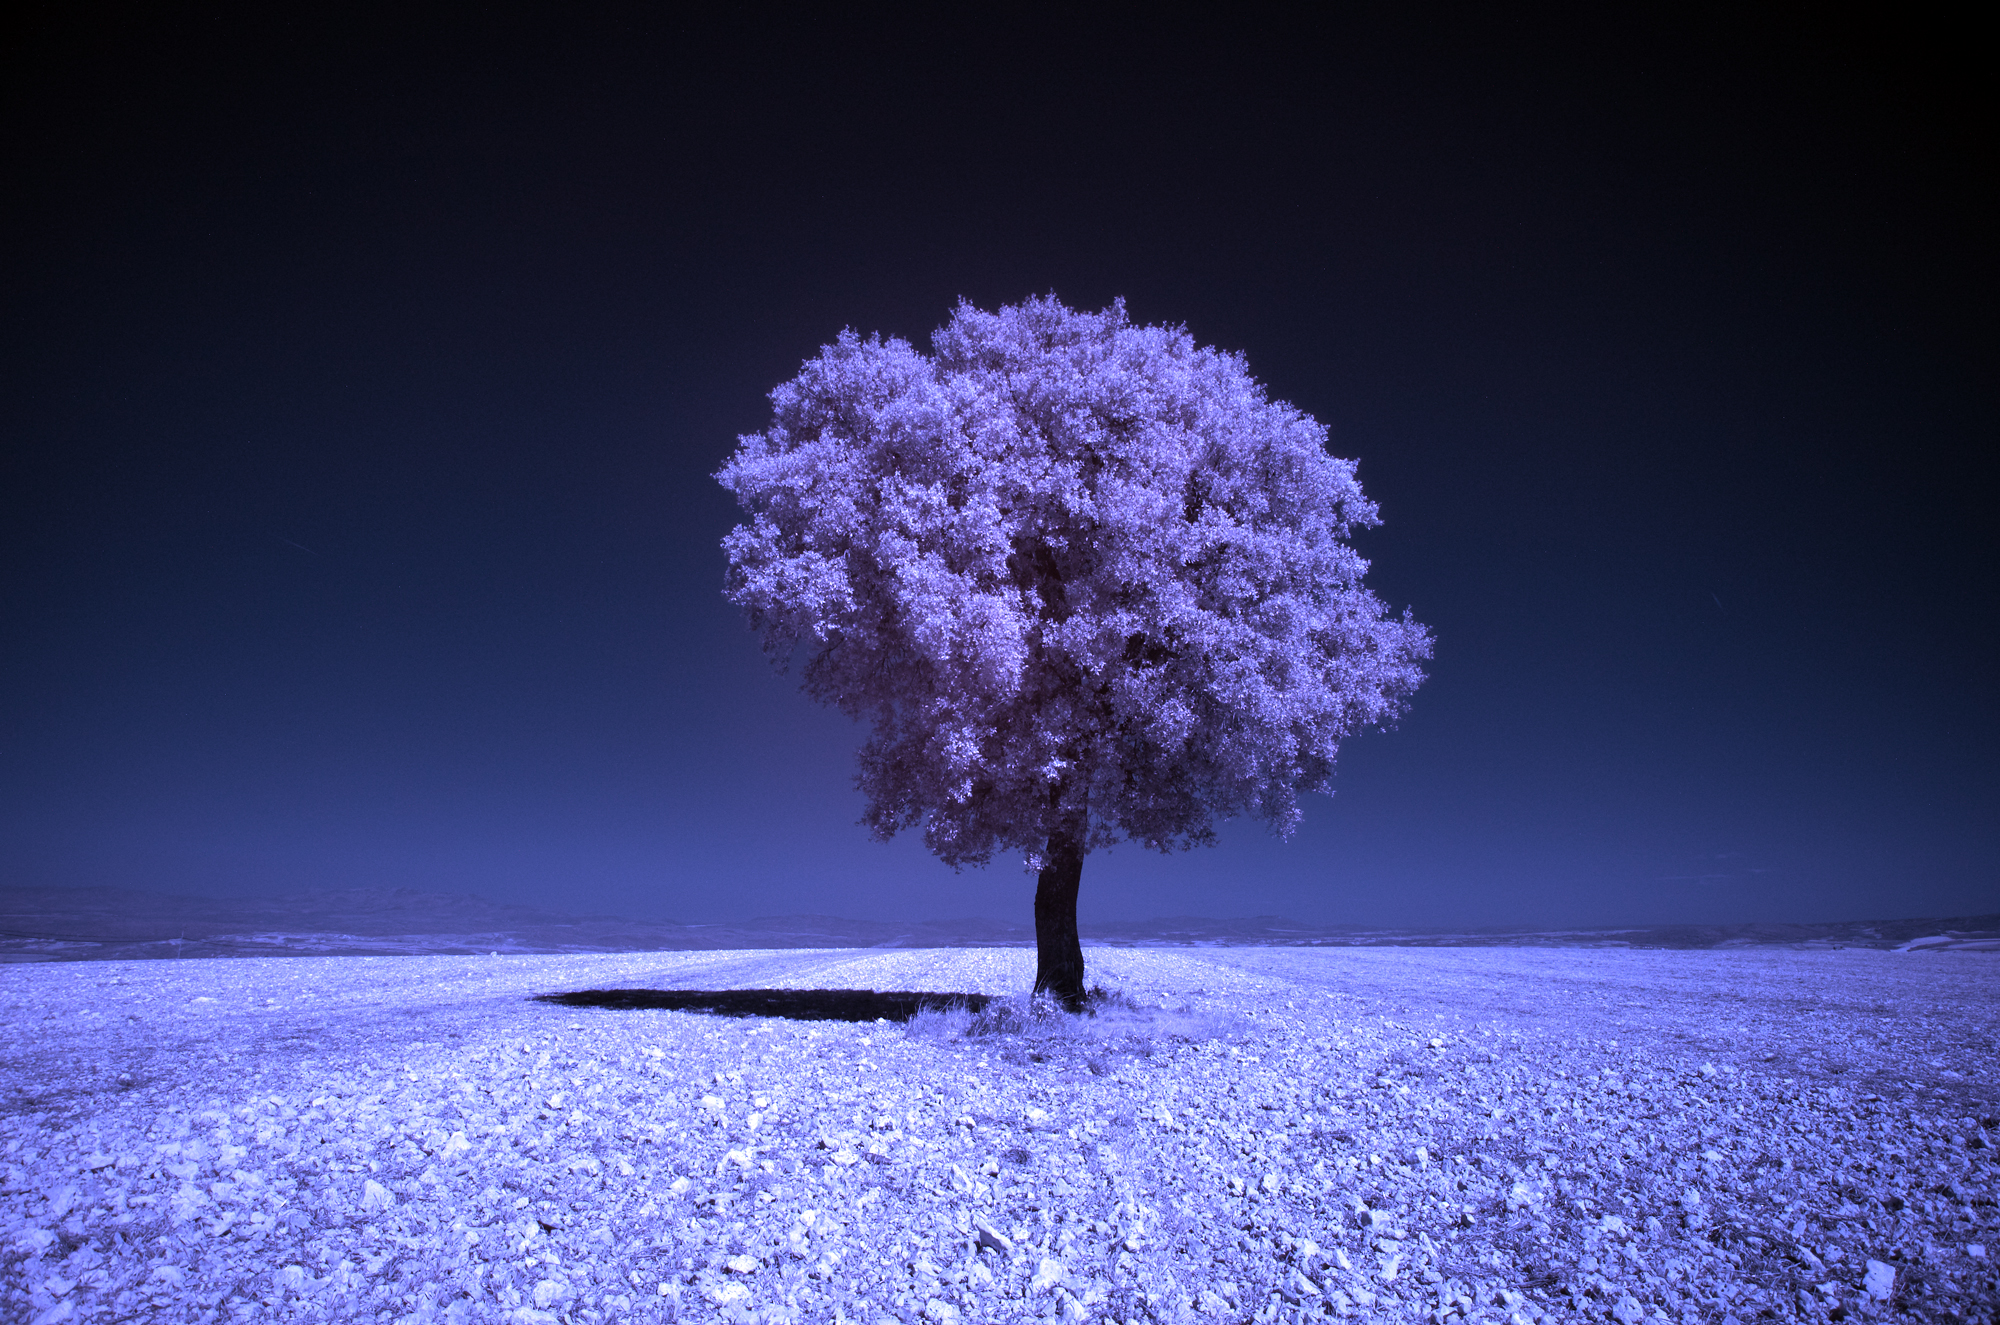
We now have an infrared version of our photograph. From there, we can continue spicing up the image however we see fit; for example, we could apply selective focus, give it a bit more sharpness, or whatever you’d like. The end result would look something like this:


Leave a reply