
Jeff Carlson is the author of The iPad for Photographers, Second Edition” (Peachpit Press) and “Adobe Lightroom mobile: Your Lightroom on the Go” (Peachpit Press). You can check out his personal website to learn more about Jeff’s work, and the newest tool in your camera bag — the iPad. In this tutorial, he will show you how to get the best out of your iPad.
How An iPad Can Improve
Your Photography
by Jeff Carlson
I’ll get this out of the way up front: I’m not suggesting you sell your current camera gear and shoot photos with just an iPad. Although the cameras in the latest iPad models are vastly improved over the iPad 2, the iPad is far more valuable as a tool for working with photos you import from your camera and for improving your overall photography.
It’s lighter than a laptop (especially the iPad mini), offers a great screen for previewing images and presenting a portfolio, and, thanks to a growing assortment of photo apps, lets you edit images, rate and tag photos, share shots quickly, and even control cameras remotely. An iPad can’t completely replace a personal computer, as I’ll discuss shortly, but it serves as an essential tool in your camera bag.
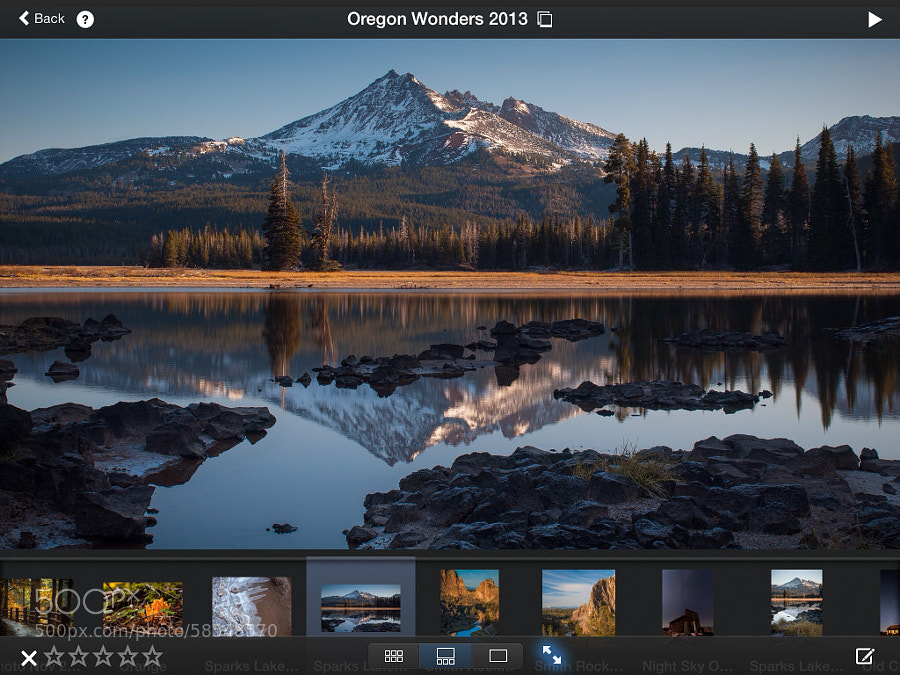
Show Off Your Portfolio
Using an iPad to present a portfolio is the “gateway drug” of photography on the iPad. If you’ve ever hauled a book of prints to client meetings, you’ll appreciate the ability to flip through photos on the iPad’s vibrant 9.7-inch screen. (The iPad mini’s 7.9-inch screen is no slouch, but the larger device makes a better impression for portfolios.) Using an optional adapter, you can also connect the iPad to a projector or HDTV for larger presentations.
To showcase photos, one option is to sync photos from your computer to the included Photos app, but several portfolio apps give you more options. For example, in Portfolio for iPad ($12.99) you can build multiple portfolios, letting you switch between landscapes, weddings, or other classifications. It also includes options for customizing the look of the title page.

Review Photos in the Field
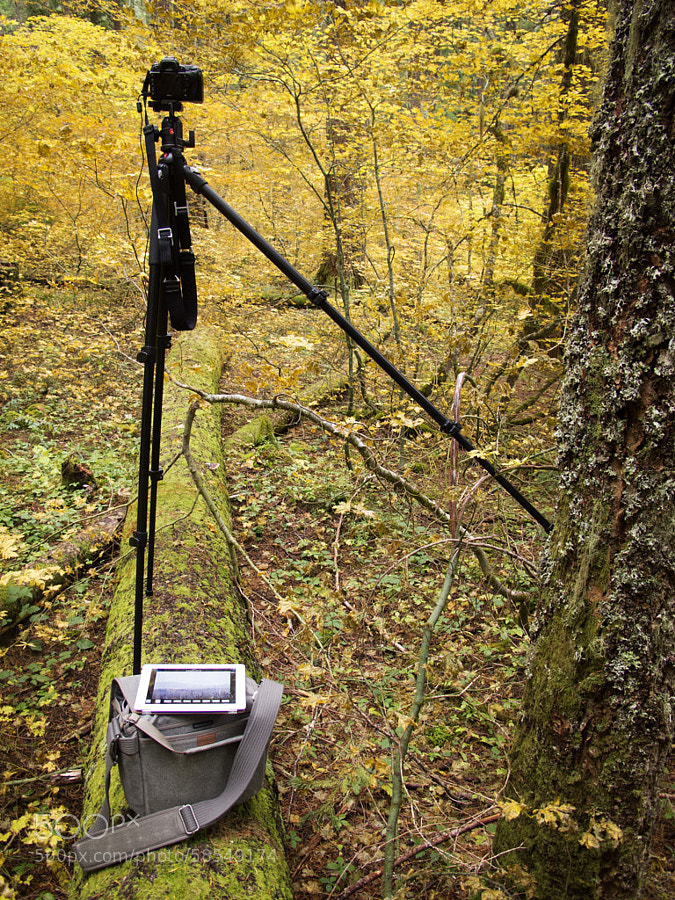
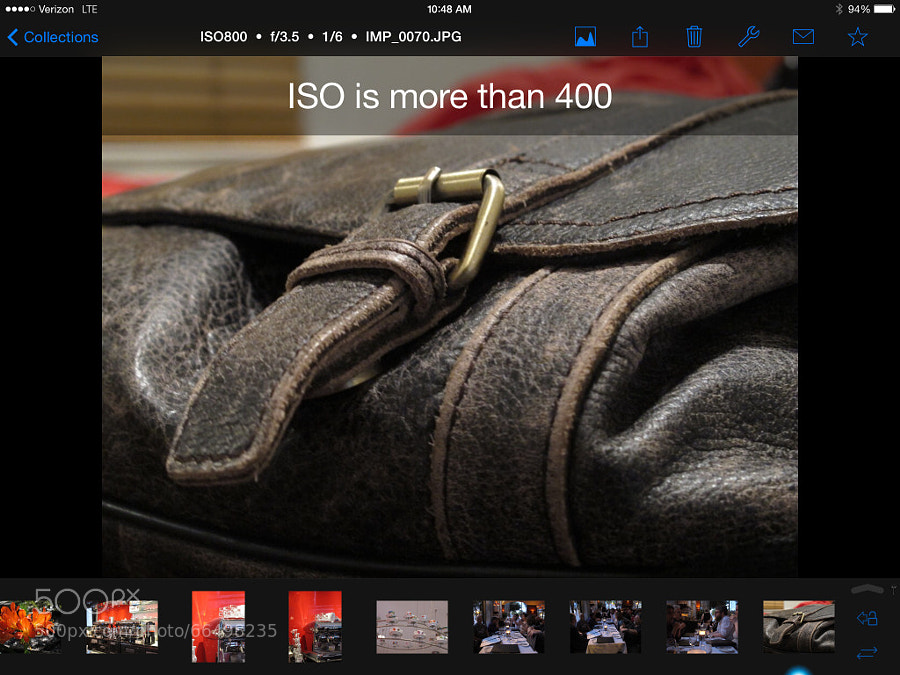
We’ve come a long way since it was necessary to wait several days for film to be developed, but often there’s still a delay between when you capture the shot and view it on a computer screen. One strength of the iPad as a photographer’s tool is being able to preview and work with images anywhere. It’s great for checking focus (since focus appears sharper on a three-inch camera screen), and getting a good sense of exposure, white balance, and color. Most important, you can review photos as you’re capturing them, versus discovering hours later that you missed something important. Using Apple’s camera adapters ($29), you can connect your camera or an SD card to the iPad and import images into the Photos app. I prefer to transfer the images wirelessly, though. I capture photos to an Eye-Fi Mobi wireless SD card, which creates its own Wi-Fi network. (Wi-Fi cards are also sold by Toshiba and Transcend, and many cameras now include built-in Wi-Fi capabilities.) The iPad connects to that network and the app ShutterSnitch ($18.99) pulls photos from the card while I’m shooting. In less than a minute, I can see what I just shot and make adjustments in the camera as needed. ShutterSnitch helps me avoid dumb mistakes, too, such as displaying a message (that I configure) when I’ve forgotten to dial back the ISO after an earlier shoot.

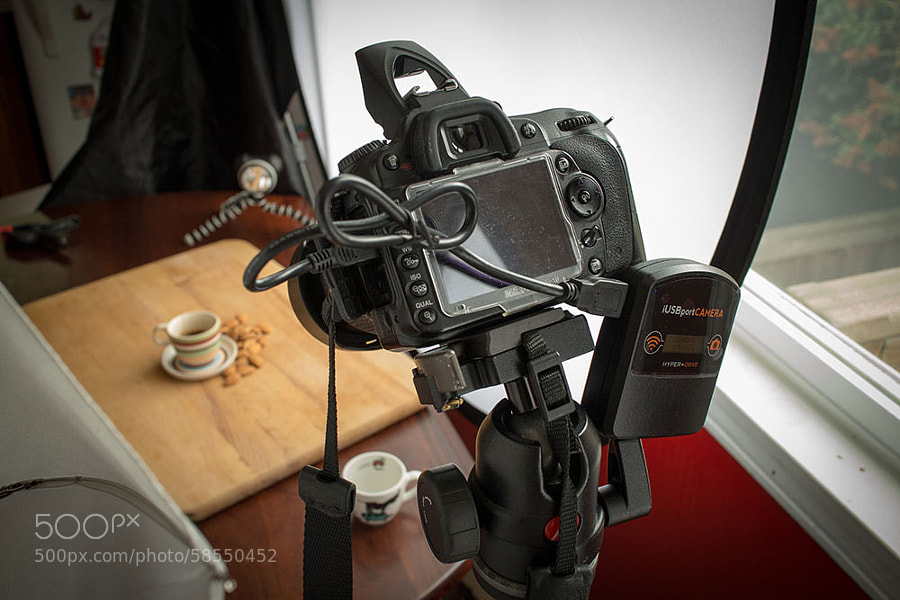
Another option is to control a DSLR camera remotely using a device such as the CamRanger ($299) or iUSBportCamera ($199). You can set aperture, shutter speed, ISO, and other settings from the iPad, which is especially helpful when the camera needs to remain locked down (such as for product photography). The devices’ apps also include features such as exposure bracketing and focus stacking, an intervalometer, live view shooting, and review modes so someone can see what’s coming out of the camera without crowding the shot. (I wrote more about these devices for TechHive.)

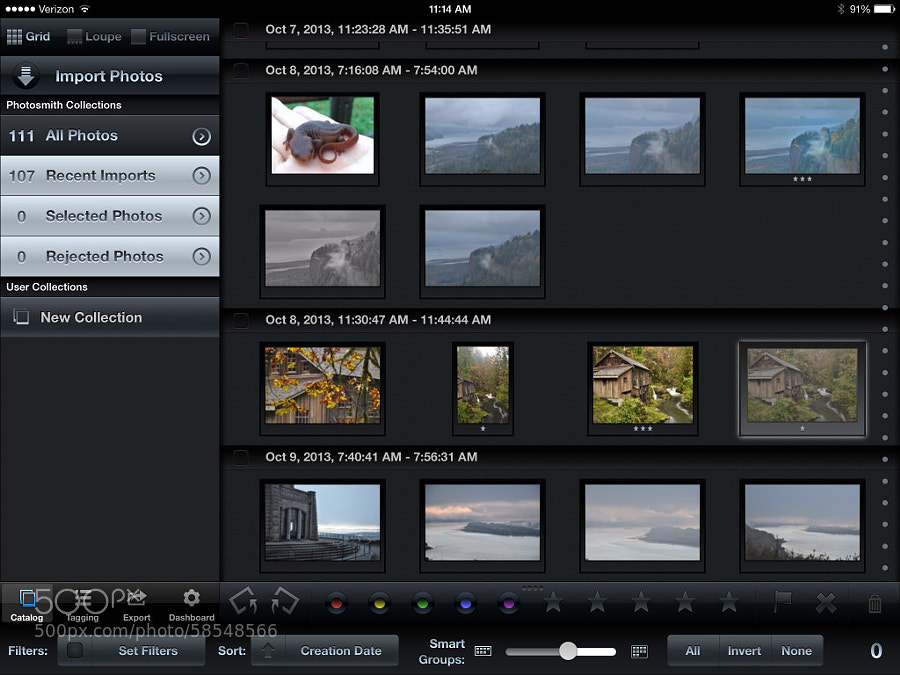
Rate and Tag Photos
I’m a big believer in rating and tagging photos so I can easily find them later. (I wrote a book last year, Take Control of Your Digital Photos on a Mac, precisely for that purpose.) But this is an area that’s susceptible to camera-computer lag: you typically have to wait until you get back to your computer to import and tag the images, which can be a short amount of time (the laptop sitting in your hotel room) or a long delay (the desktop computer at home after a vacation). At that point, you need to dedicate additional time to rating and sorting, and too often this valuable step is bypassed.
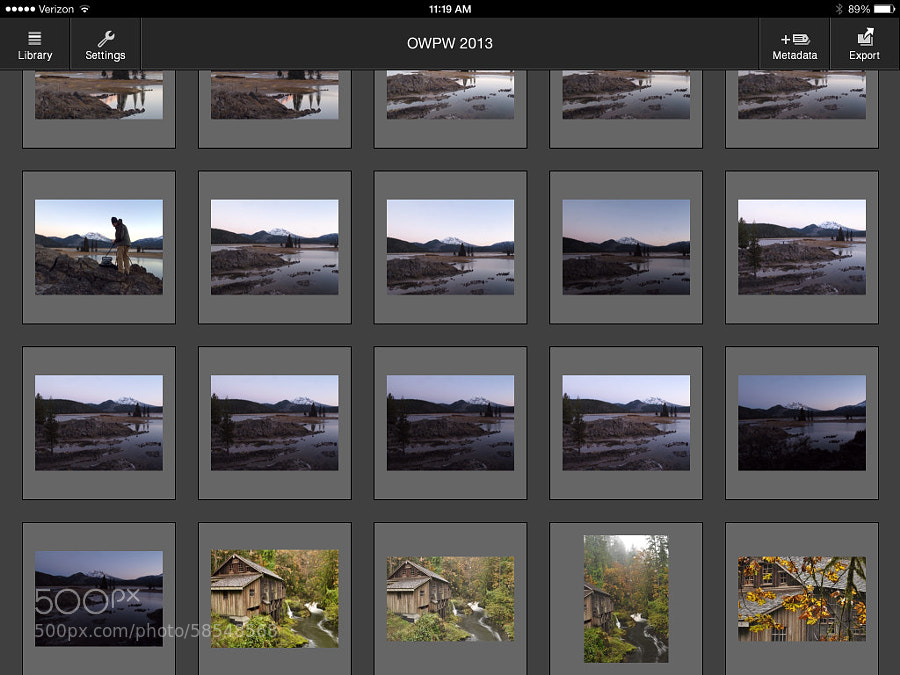
If the photos are on the iPad, however, rating and tagging can happen when it’s more convenient, such as in a coffee shop or on the plane or drive home. When you do get back to your computer, the photos are already tagged and ready for import into your favorite photo organizer. Photosmith ($19.99) syncs directly to Adobe Photoshop Lightroom; PhotosInfoPro ($4.99) can export XMP sidecar files for import into any application (like Lightroom or Apple Aperture) that supports them.
Edit Photos on the iPad
I don’t shoot everything perfect in-camera, although I hope I at least get points for trying. You’ll find hundreds of apps in the iTunes Store that edit photos in one way or another, but most of the time I come back to a handful of editors. Apple’s iPhoto for iOS ($4.99) corrects exposure, color, white balance, and cropping, and can do a fairly good job fixing blemishes or wayward dust spots.
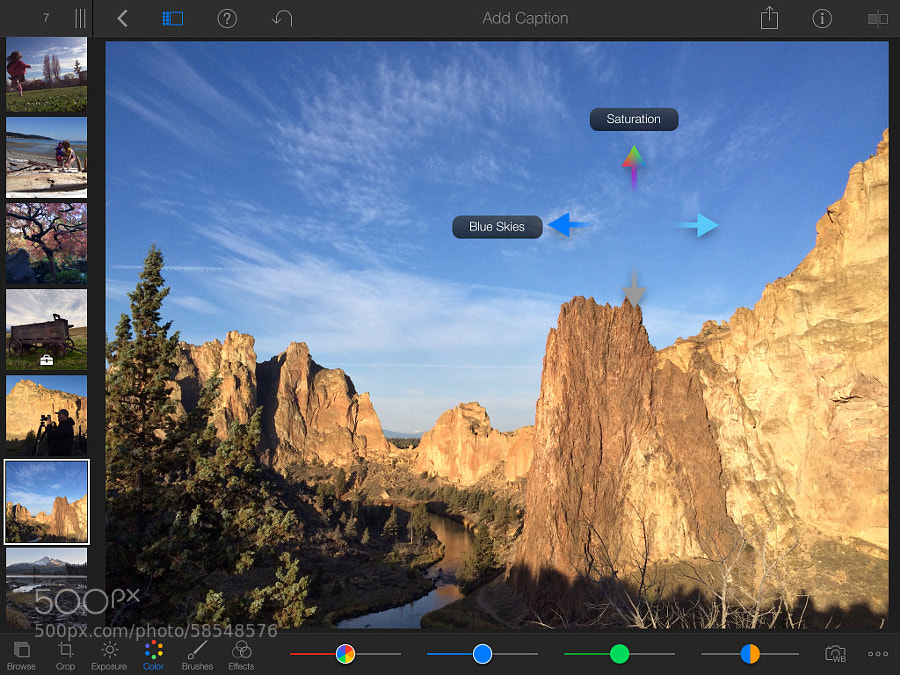
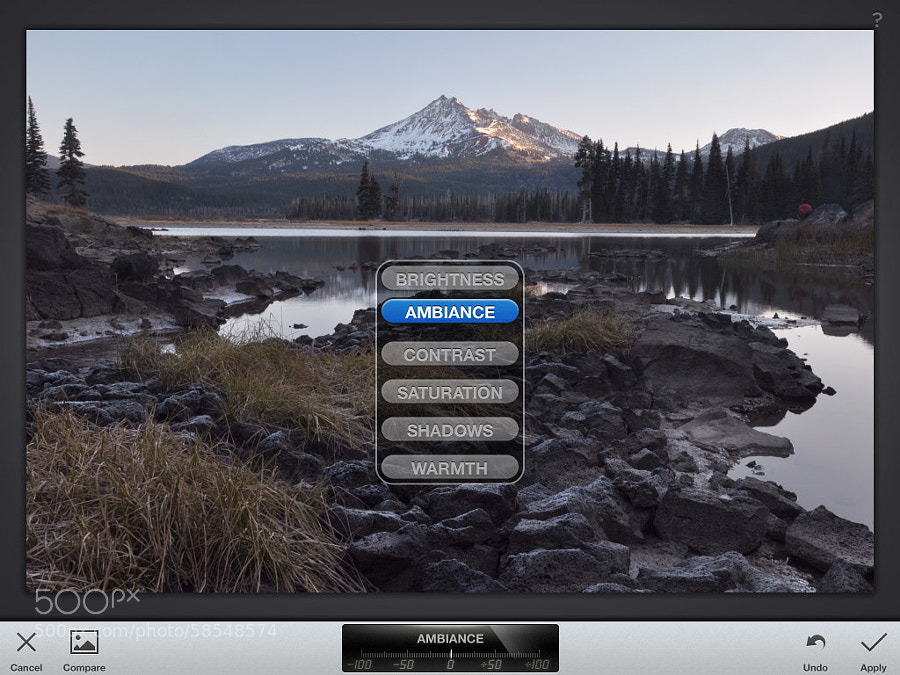
Google’s Snapseed (free) is my favorite app for quick tonal corrections, while Photogene ($2.99) delivers Photoshop-style controls (sliders galore!). Adobe’s own Photoshop Touch ($9.99) gives you the engine behind the imaging powerhouse in a stripped-down interface.
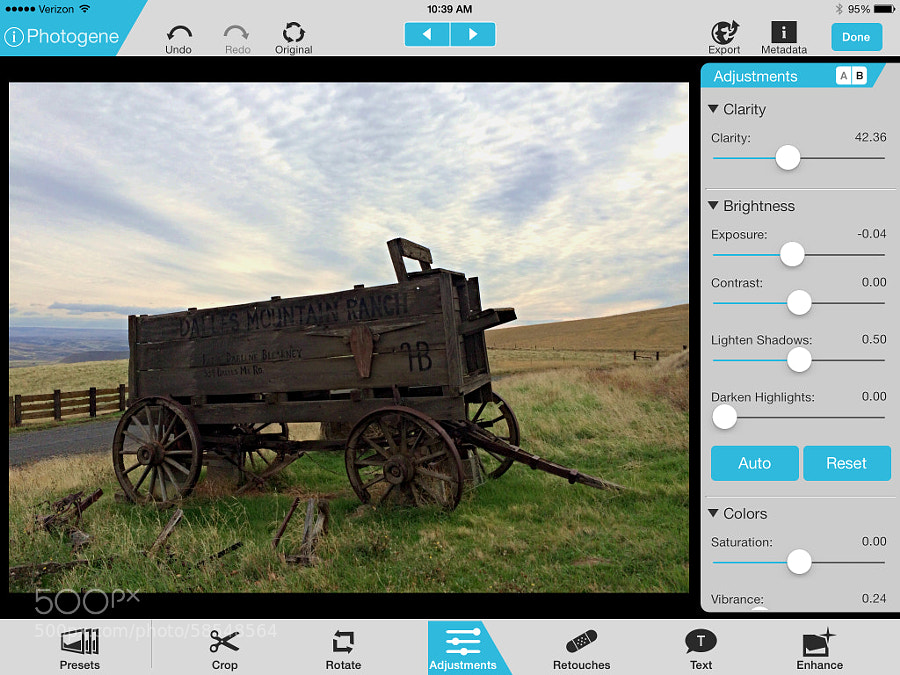
For reviewing and editing images in my Lightroom library, Lightroom mobile (free with Creative Cloud subscription) syncs photo collections and includes all of the adjustment controls found in the Basic pane of Lightroom’s Develop module. Changes transfer back to Lightroom as soon as you’ve edited a photo.
(I mentioned earlier that an iPad can’t entirely replace a computer, and this is the area where it’s most apparent. Here’s why: the iPad doesn’t directly support raw images. If you shoot in raw to get the most flexibility when editing your photos, you’ll find that iOS apps can only edit JPEG images; if you import only raw files, versus shooting Raw+JPEG format, the iPad recognizes only the JPEG previews created by the camera. So what you end up editing isn’t the full image. A few apps, such as piRAWnha ($9.99), can edit raw files, but performance is slow and, in my experience, spotty, mostly due to the hardware limitations of the iPads, which include surprisingly little working memory.)
Share Quickly
Thanks to smartphones, we’re quickly growing accustomed to being able to snap photos and share them online right away. Every iPad can connect to the Internet, and the cellular models can do so without a nearby Wi-Fi hotspot. Anything you capture with your camera and import into your iPad can be shared online to social networks or personal contacts. For example, the official 500px app supports uploading images from the iPad to your profile, as does PhotoStackr for 500px ($0.99).
Digital Photo Assistant
Of course, the greatest appeal of the iPad is that it does everything else an iPad can do: access email, write and publish blog posts, keep track of your schedule and contacts, watch movies, and all the rest.
The iPad is also handy for storing your camera and equipment manals and favorite photo books as PDFs or ebooks for easy reference without packing any paper. Using 500px’s FREE model and property release app, Releases, allows you to fill out model releases on the spot. I also like using TPE (The Photographer’s Ephemeris)($8.99), which shows you which direction the sun is shining at any given time during the day, no matter what location you choose.
The iPad can’t position a light stand for you (although in a pinch I suppose it could help make the stand level), but overall it’s a fantastic photo assistant.

Follow Jeff Carlson on 500px to see more of his work.


Leave a reply