Alexandria Huff is a studio portrait photographer in San Francisco by night and a product photographer & copywriter at BorrowLenses.com by day. In this tutorial, she will share with you how to create Great Gatsby-esque portraits — perfect for weddings, parties, and events. Need some gear to try this tutorial? Get 10% off any BorrowLenses rental with this discount code: 500px
Scroll down and try these creative portraits with your friends and clients!
How To Create
Great Gatsby Portraits
by Alexandria Huff
EQUIPMENT
- Litepanels 1×1 Daylight Flood and Spot Light Kit
Substitutions: Arri Locaster LED Panel Double Kit or any continuous lighting source where temperature is easily adjustable or gels can be fitted - Kino Flo Celeb 200 DMX LED Center Mount Kit with 90 Degree Grid
- C-Stand
- Camera. Canon 5D Mark III
- Canon 50mm f/1.0
Substitutions: Canon 50mm f/1.2L or any fast aperture prime lens. - Shower Curtain
- Christmas Lights
- Costumes and Props
- Any editing program that allows spot editing
- Nik Software Color Efex Pro or any saturation-killing filter of the vintage persuasion
 Continuous lighting and a fast aperture prime lens are used in this shoot.
SETUP
I hang an average, translucent, plastic shower curtain in front of some average Christmas lights. This isn’t the first time I used a bath item as a light modifier. In this shot I fired gel-covered small flashes through a hotel shower door.
Behind the shower curtain, I place 1 Litepanel Flood and aim it over the model’s shoulder (with some directional variation for each model). I filter this with a full CTO Gel.
For my key light, I place the Kino Flo Celeb 200 DMX LED on a C-stand and aim it above and pointed down on the model at an angle. The 90 degree grid helps focus my light — otherwise it just spills out like a light bank. Depending on the position of the model, this gives me side lighting, Rembrandt lighting, and butterfly lighting. I set my temperature to around 4000k and dim and brighten to taste.
For my fill, I place 1 Litepanel Spot slightly below my model at the opposite side as my key light. I filter this with a A1/2 CTO Gel.
I wanted a dreamy and soft look for these portraits and also wanted my little Christmas lights to really spread and glow. For this effect, I used the rare Canon 50mm 1.0 lens. As a Nikon shooter who cannot shoot at these ultra-fast apertures due to mount constraints, this was a treat to use and really challenged my usual habit of shooting at the safe f/8, which is typically what I shoot at for my Chiaroscuro portraits. It also challenged the way I think about my light — even the light coming in from my window and the bare bulb hanging from the ceiling of the room were having small effects on my image.
My camera is set to ISO 100, 1/125th of a second shutter, and 1.0 aperture.

Flowers attached to light stands allow for fast and easy scenery adjustments.

Christmas lights behind a shower curtain create a cool, sparkling party effect.
MOOD AND MODEL DIRECTION

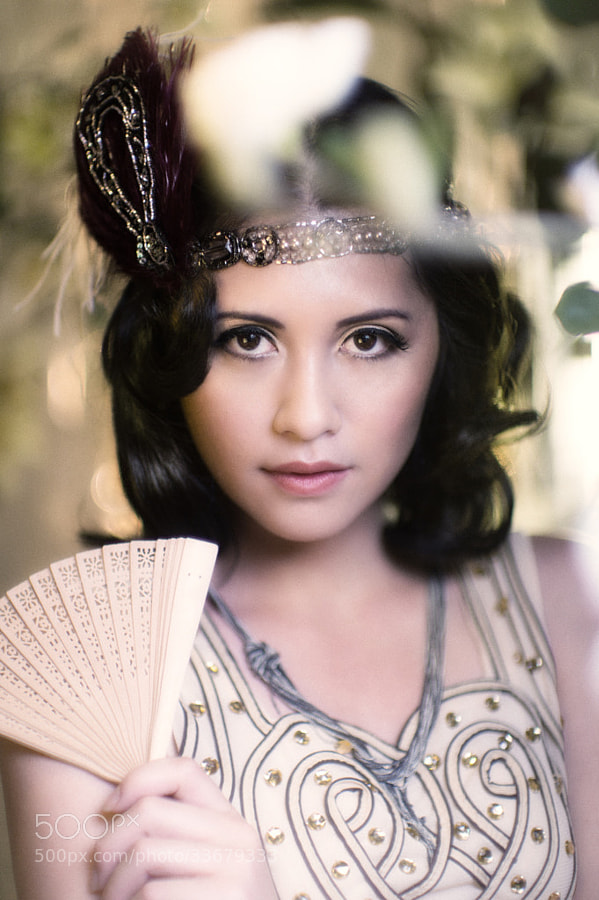
My models are standing among a bunch of silk flowers that I attached to light stands so that I could easily move them up and down. I really wanted to see both my foreground and my background blurred out so I set some of the flowers very close to the camera and the rest behind the model. Further back still are my Christmas lights, all bokeh’d out to seem like far-off party lights.

The hair and makeup was done by Jessa Reanin. I recommend working with a makeup artist when possible — collaboration is great practice.

The boater hats were provided for the shoot by Goorin Brothers.

I had the headpieces custom-made by a local crafter Christy Howery.
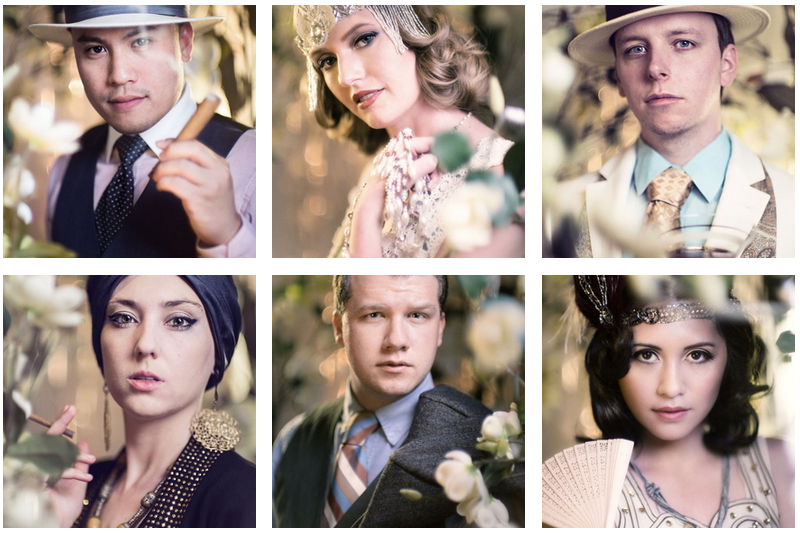
Fortunately, all of my models are aware of The Great Gatsby story. If your models are not familiar with the particular era or story you are trying to convey, give them a sense of character to help them find the right body language and expression. Several of my models from the Game of Thrones shoot were unfamiliar with the show, so providing some background information helps. Magazine clippings and keeping a mirror on-hand are also helpful when giving a model direction.

I have my models each hold an item that at least tangentially fits the theme of my shoot: drinks, smokes, jewelry. This is a personal artistic choice but I also find that people love to have something in their hands so that is another excuse for using small props.

POST-PROCESSING
Adobe Lightroom and Nik Software are the editing programs I use. I use Lightroom mainly for broad edits, such as exposure or clarity adjustments, or for blemishes. I use Nik Software to be creative.
 The RAW file in Lightroom with no edits.
1. The RAW file is pretty much already where I want it. I increase the exposure a bit.

2. I use the Adjustment Brush in Lightroom to increase the clarity in key areas such as the straw hat (to regain some of the lost texture from overexposure), and the edge light on the cheek where there is smoke. I also added some increased saturation to the shirt to bring in more of the pink color.

Spot adjustments in Lightroom allow for editing in key spots of your image.
3. Going right into Nik Color Efex Pro as a plugin from Lightroom, I go into the Vintage FilmEfex menu and choose film version 1. It’s much too strong for me as-is so I reduce both the film strength and the opacity. You can adjust the strength of any filter in Nik Color Efex Pro — you are not forced into marrying a super strong effect for your images. Optionally, you can use Control Points to apply the filter onto, say, the entire image except the face. Sometimes, I will use Control Points to keep a filter from applying to the eyes so that the color of the eyes stay true no matter how dramatically a filter changes the look of my image.

I like the look of the Vintage FilmEfex for this particular project.

Use control points in Nik Color Efex Pro to keep a filter from applying to certain parts of your image (or, conversely, apply the effect to only certain parts of your image).
Use control points in Nik Color Efex Pro to keep a filter from applying to certain parts of your image (or, conversely, apply the effect to only certain parts of your image).
4. Lastly, I put an art deco frame around my collection that I made in Photoshop just to add a little extra flair. If you are into this, check out Evan Eckard’s tutorial on creating the Gatsby-esque poster effect.

Thanks to Alex Huff and to BorrowLenses for sharing this tutorial.
Have fun creating your own cast of Great Gatsby characters! Share your shots in the comments below. We are excited to see your work!


Leave a reply