![Everything A Beginner Needs To Know About Astrophotography [Guide & Tips]](https://iso.500px.com/wp-content/uploads/2020/05/stock-photo-mt-bromo-under-the-stars-46785278-1.jpg)
Want to master astrophotography? Want to learn the art of capturing an awesome meteor shower, or the next supermoon, or the Milky Way galaxy across the night sky? This monster guide with just about everything you’ll want to know about the wonderful world of astrophotography should help! We’ve gathered tips from the pros, optimal camera settings, and some breathtaking examples to educate and inspire you to look up at the sky and get shooting.
First things first, budding astrophotographers need to know that planning, patience, and persistence are the name of the game. Obstacles, from bad weather and bad timing to landslides and equipment failures, can all make it a very frustrating pursuit. But in the end, despite all the obstacles, when you finally do nail the shot, astrophotography becomes one of the most rewarding forms of photography there is.
Types of astrophotography
Astrophotography is a bit of a catch-all term. In reality, there are various types of astrophotography that you can pursue, each with different techniques, gear, and planning required.
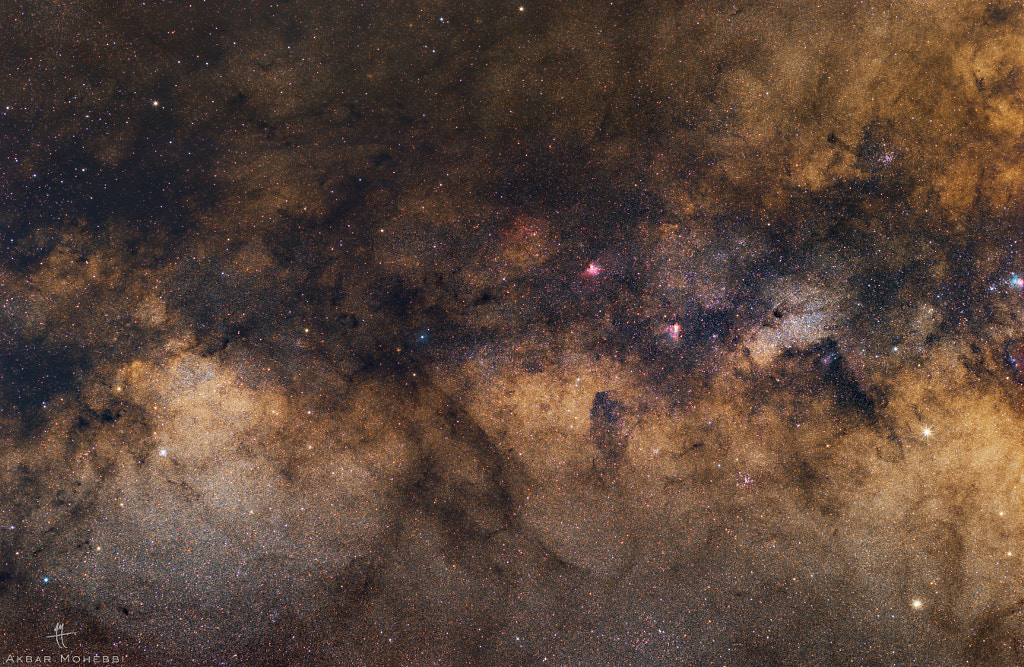
Deep space astrophotography
Deep space astrophotography refers to mages that are taken with the use of a telescope, of objects beyond our own solar system. These are those stunning images you see of distant galaxies and nebulae, and this is the most technical and difficult form of astrophotography.
Solar system astrophotography
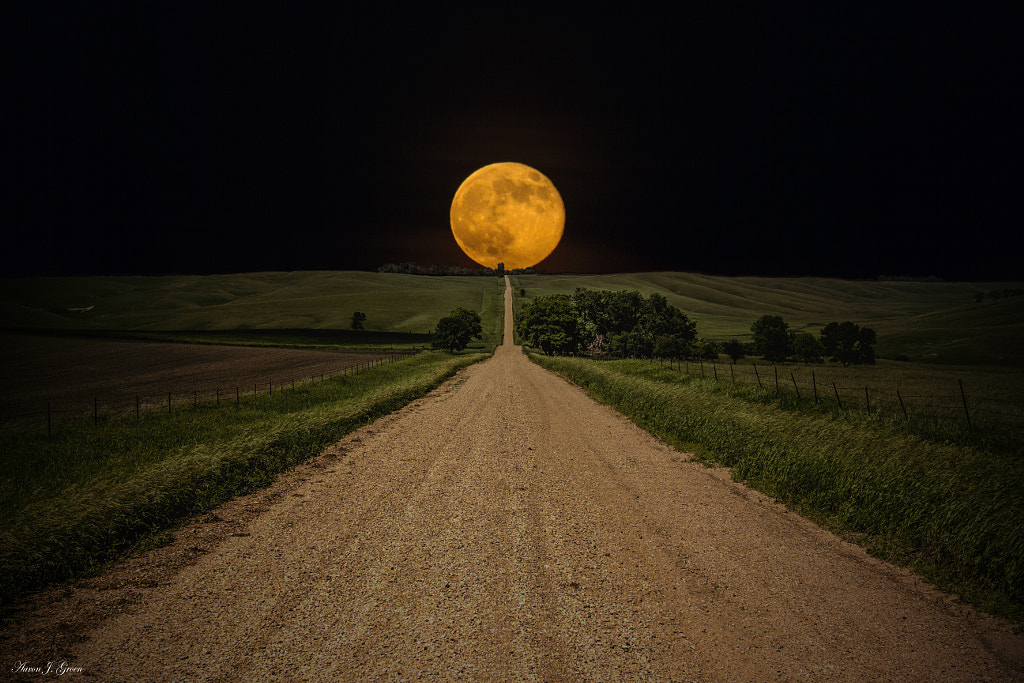
These are images of the planets, moons, and the sun of our own solar system. Again, the images are mostly photographed through telescopes, but a super-telephoto lens on a DSLR camera can also give you a good result.

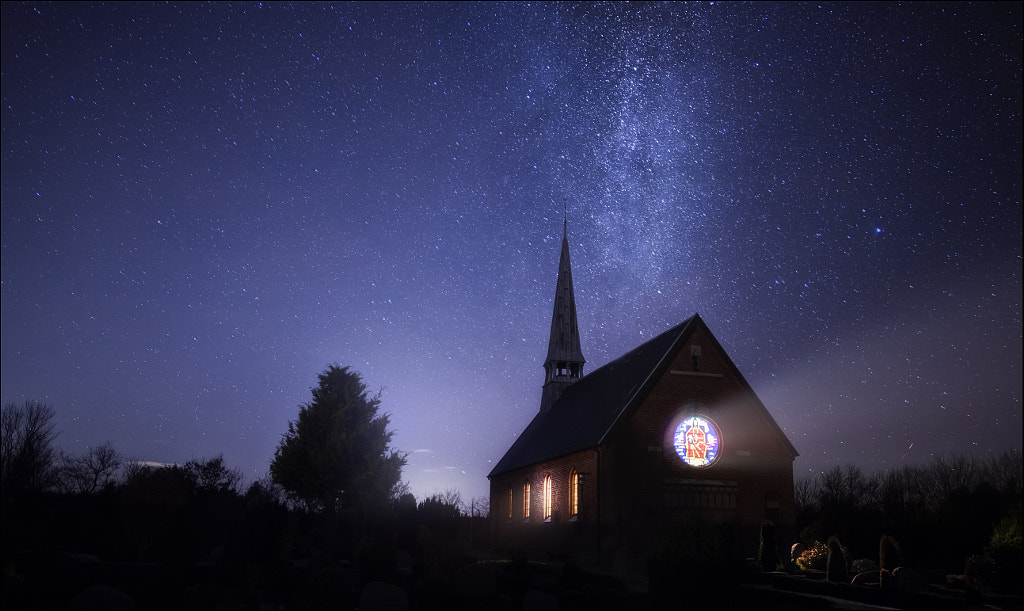
Wide field astrophotography
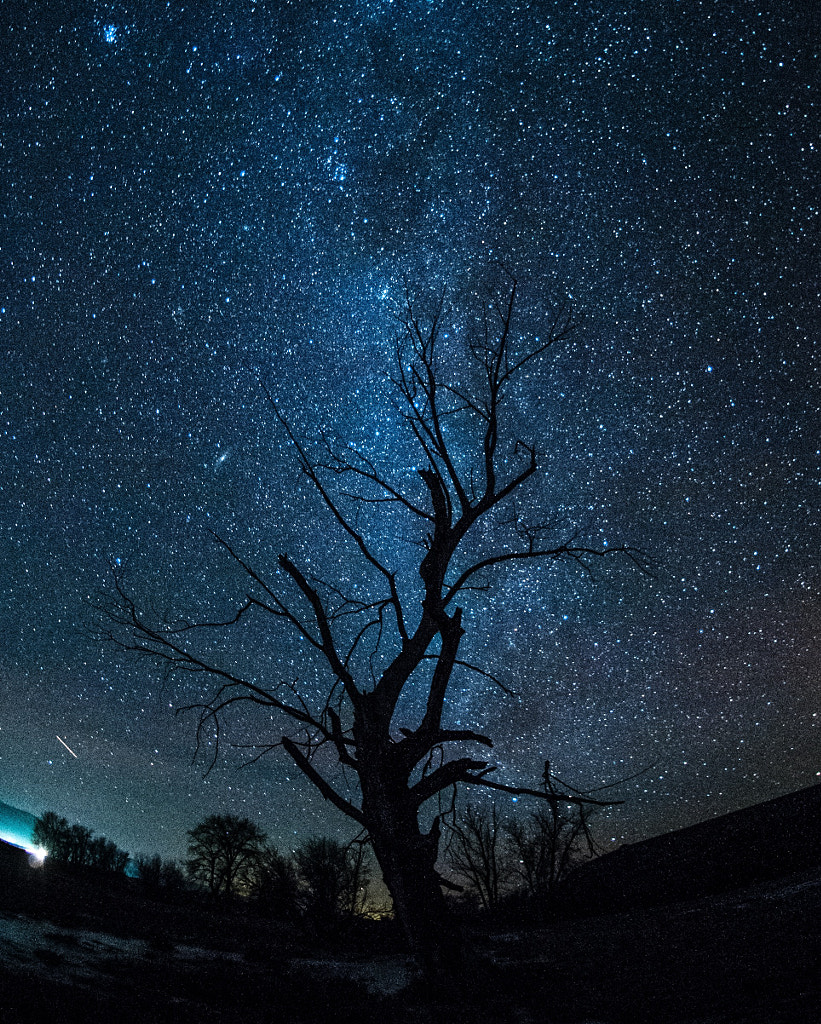
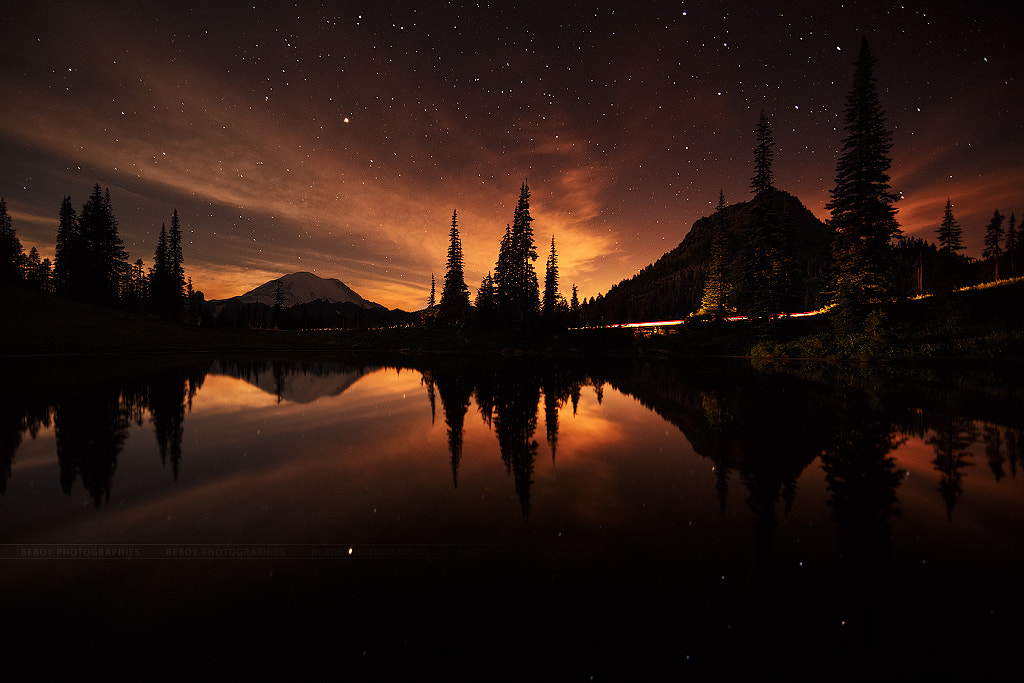
This is astrophotography that is taken with a DSLR camera and lens with a wide field of view, like the wide-angle lens. These are the images you see that include a starry sky or star trails above a landscape—certainly one of the more accessible forms of astrophotography for beginners.
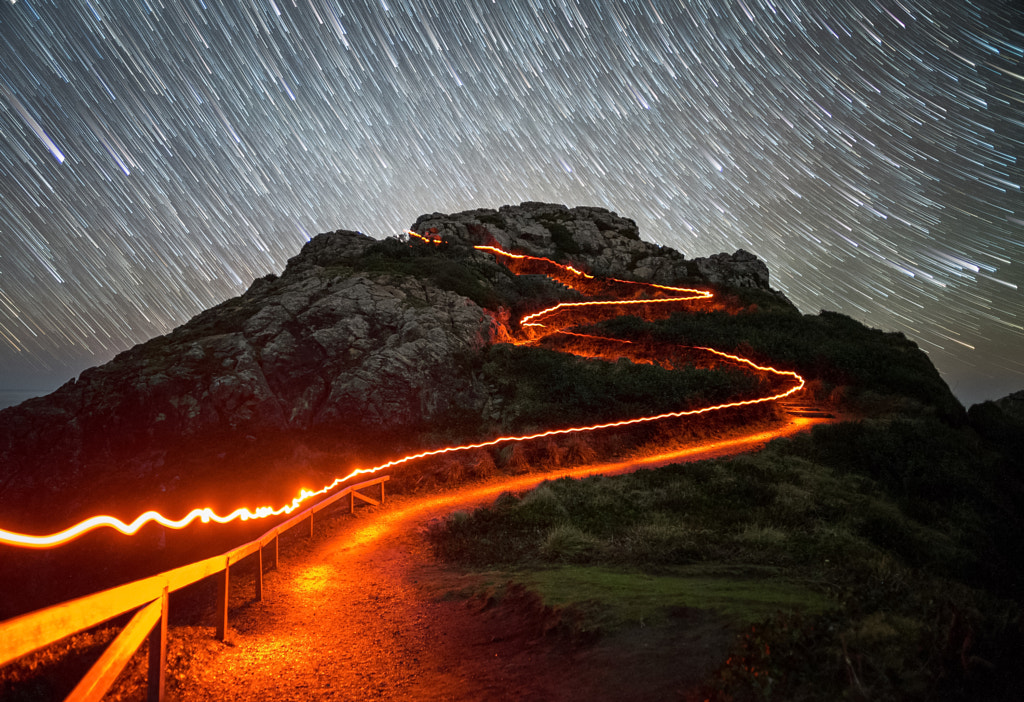
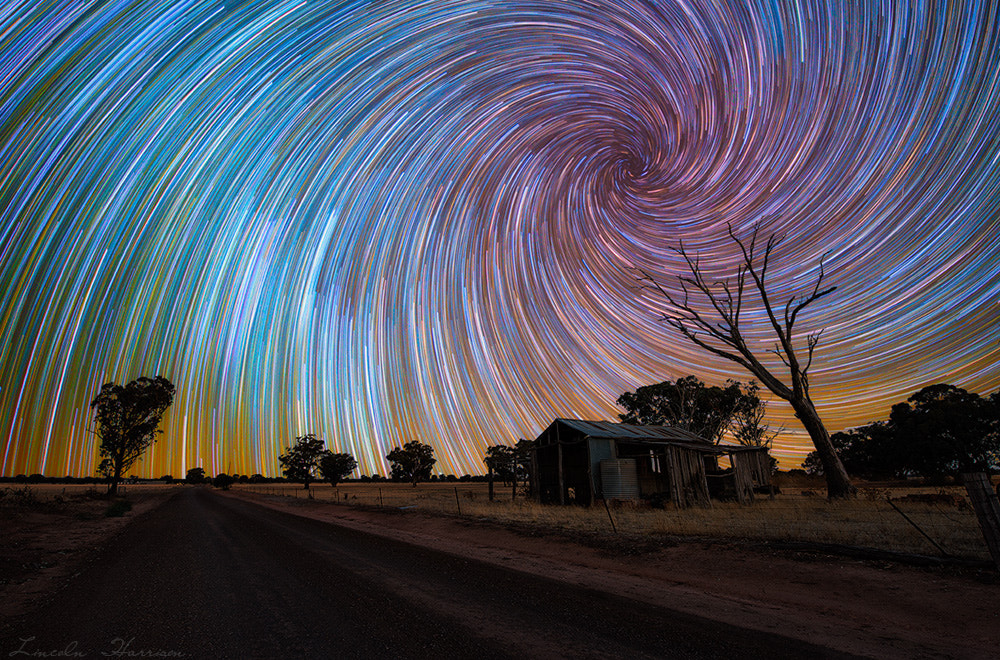
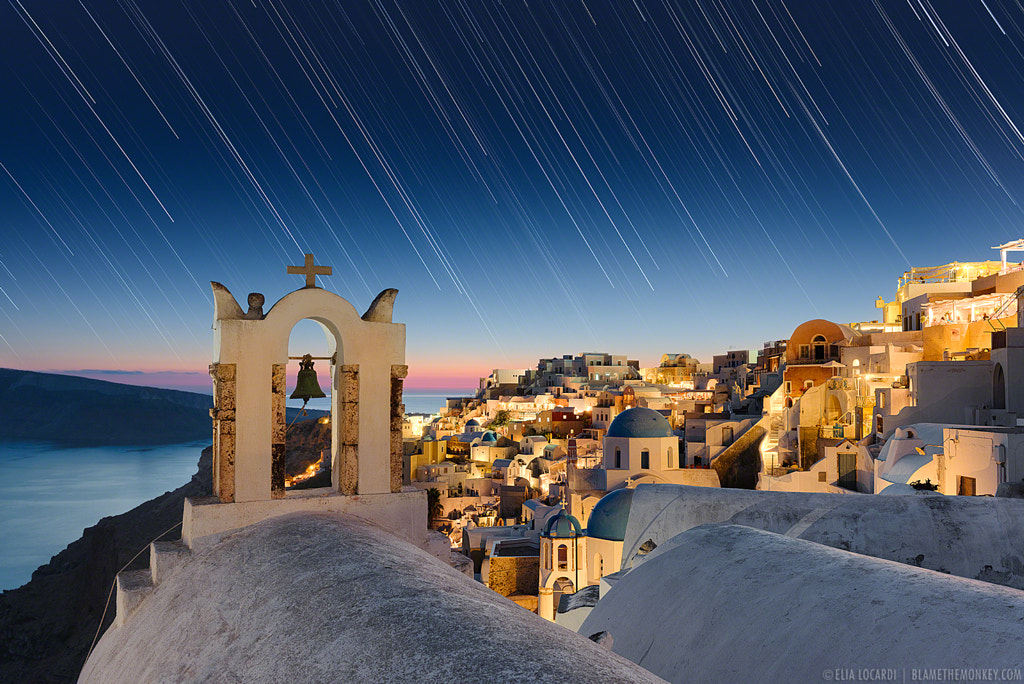
Time-lapse astrophotography
This is just an extension of wide field astrophotography. The only difference is that you take lots of exposures over time, and then combine the frames to make a time-lapse video. The same technique can be used to make a star trail image.

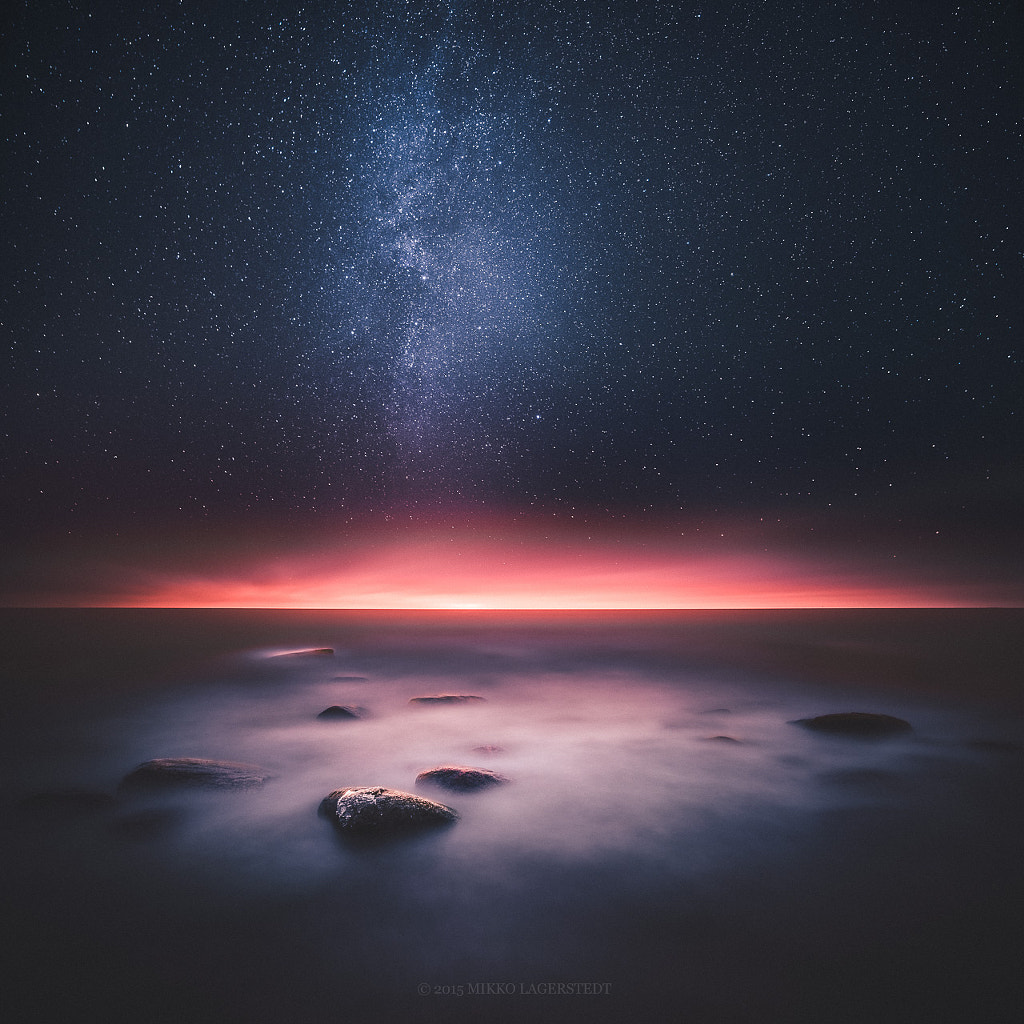
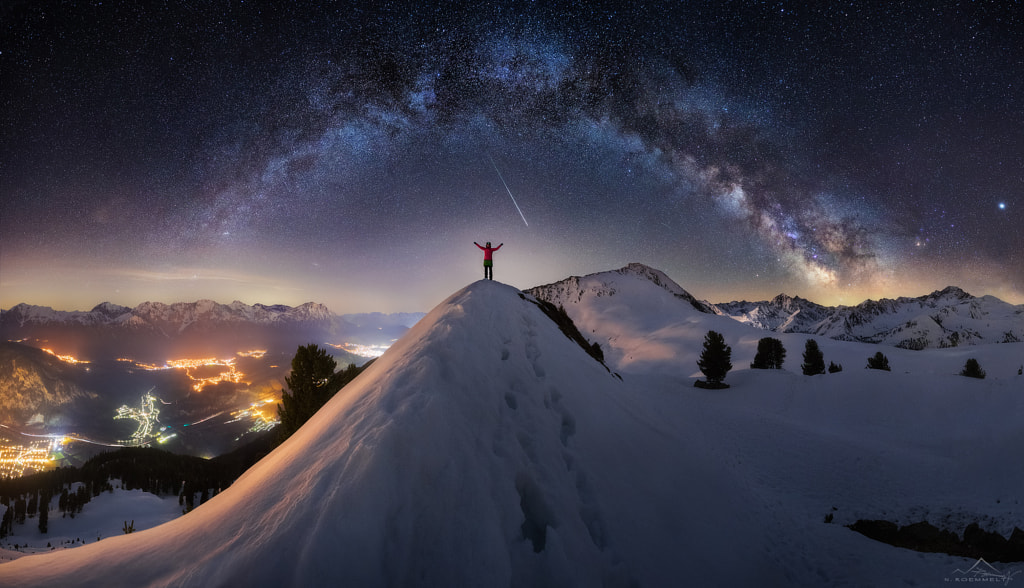
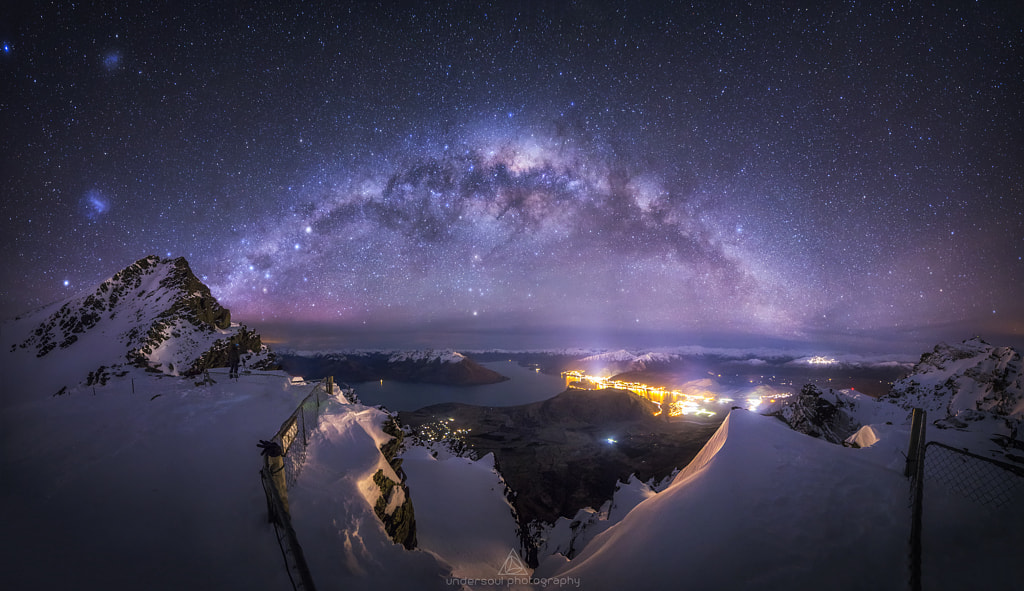
Milky way astrophotography
Often taken in the desert or other low-light pollution environments, milky way astrophotography can be a little elusive for city dwellers. When it comes to gear, most decent DSLRs with a manual mode will do the trick—location is infinitely more important than gear when it comes to capturing the galaxy.
Gear guide for astrophotography
In the modern age of digital photography, wide field astrophotography is now within almost anyone’s reach. Equipment-wise, all you need is a modern DSLR camera with good low light capabilities, a fast lens, and a good sturdy tripod. This will get you out there, taking good quality night sky images.
Beyond that, you can also add additional accessories to your kit that will allow you to do a little more, like an intervalometer, which will allow you to do time-lapses and star trails. Of course, you can go out and accumulate a whole lot of other specialized equipment, like equatorial mounts, which follow the rotation of the night sky, and robotic camera mounts for capturing large panoramic images, but for now, we’ll concentrate on the basics.
What camera is best for astrophotography?
A DSLR with great low light capabilities is perfect for astrophotography. Ideally, you want a full framed sensor camera like the Canon 5d MkII and MkIII or the Canon 6D, as you want to have the maximum sensor area to capture as much light information as possible. You can also get reasonable results with crop sensor cameras like the Canon 7D, which may suit your budget a little more than the full-framed counterparts.
What are the best lenses for astrophotography?
When shooting the stars, you want a lens with a large aperture to allow as much light as possible through the lens. Ideally, a maximum aperture of at least f/2.8 is best, but you could still get good results with an f/4.0 lens. Unfortunately, the larger the aperture, the more expensive the lens.
The good thing about astrophotography is that you only ever use manual focus, so a lens like a Rokinon 14mm Ultra Wide-Angle f/2.8 is a great piece of glass for the right price. As far as focal length is concerned, stay in the ultra-wide range.
Do I need a tripod for astrophotography?
Believe it or not, a tripod is one of the most important pieces of equipment you can have for astrophotography. You need your camera platform to be rock solid as you will mostly be dealing with exposure times of 10-30 seconds, so it’s important to have a sturdy tripod that will keep your camera in place.
What is the best telescope for astrophotography?
There are a couple of factors you’ll want to keep in mind when choosing your telescope. Most importantly, you’ll want to choose a telescope with a motorized mount, which will let you use longer exposures to capture the more elusive wonders of the night sky. Focal length, aperture, and more advanced features like WIFI connectivity and automatic alignment are all things to consider when looking for a telescope.
Astrophotography tips for photographing in low light
Locking it down
With any form of astrophotography, you will be dealing with long exposures. This means that for best results, you need to eliminate any camera movement or vibration. The obvious way to do this is to mount your camera on a sturdy tripod. But there are other issues which cause movement and vibration when using your camera.
Simply pressing the shutter button can cause the camera to move slightly. You probably won’t notice this movement in your wide field astrophotography images, but if you are trying to photograph the moon with a telephoto lens, even the smallest of movements will be amplified. The best way to resolve this is to either use a shutter release cable, or set the self-timer on the camera to, say, two seconds.
Another cause of vibration that is present in DSLR cameras is the vibration that the mirror causes as it is rotated up out of the way of the sensor when the shutter button is pressed. Thankfully, most cameras these days have a mirror lock function, so the first press of the shutter button locks the mirror up, and then a second press fires the shutter while the mirror is locked up in place.
Finding your frame
It seems obvious to say, but when you go out to shoot the night sky, you’ll be in darkness. That means framing your shot won’t be as easy as just looking through the viewfinder and lining something up like you do in daylight. The best way to go about this is to use your own eyes to find an area of sky and landscape that you think will make a good composition, and line the camera up in that general direction.
You’ll then have to do test shots to see exactly what you are actually capturing. It will probably take a few goes of moving the camera around on the tripod to find something interesting that will work for you—make sure to allow for some composition time when you’re planning.
How to focus for razor-sharp photos
Focusing can be a challenge for many new astrophotographers. Switch your camera into manual and find the brightest star in your field (you can even use the moon). Use your camera’s Live View, increase your ISO, and lower the aperture to give yourself the best chance of getting it just right. Take your time—if your shot isn’t in focus, you won’t be able to save it in post.
How to plan for astrophotography shoots
You’ve got the gear, but even the best camera, lens, and telescope aren’t going to get the results you’re looking for without meticulous planning.
Location, location, location
Astrophotography in urban environments can be almost impossible due to light pollution. In order to get truly stunning shots, you might want to head out of the city and find a more secluded spot. There are a number of apps and services that can help you track down a great location, or simply grab your gear and set off on an adventure.
Know where the stars are with a list of the world’s best stargazing sites
Part of planning for astrophotography is knowing where the part of the sky is that you want to shoot, and how it lines up with your planned composition. Our own planet is rotating at 1,000 miles per hour and is also hurtling through space at 67,000 miles per hour! So, as you can imagine, the night sky is constantly moving, with the position of the stars and the Milky Way constantly changing throughout the year. So, it’s important that you know where it’s going to be when you are heading out to photograph it. There are a few apps for your smartphone to help with this planning, such as Starwalk.
Account for the weather
Is it really a plan if you don’t account for the weather? The last thing you want is unexpected rain or cloud cover blocking your shot, so make sure you prepare. There are a multitude of apps that can give you a detailed forecast, such as Dark Skies, Accuweather, Photophills, and more.

What are the best camera settings for astrophotography?
How to determine exposure time
There are two main factors that control your exposure in photography. One of them is the time your shutter is open—shutter speed—and the other is aperture. The combination of these two determines how much light hits your sensor for giving you the final image. In astrophotography, you will be dealing with long exposures as you are photographing objects in the dark.
Shutter speed is the amount of time your camera shutter is open to allow light onto the sensor. In astrophotography, we need a long shutter speed. We also have to consider that the longer you leave the shutter open, the more star trails or streaking of stars you are going to get due to the earth’s rotation. Generally, you want to avoid them in your wide field astro photos, so it’s important to know how long you can expose for before you get star trails.
This will vary depending on what focal length lens you use. The longer the focal length, the shorter the exposure time will have to be before getting star trails. Thankfully there is a formula for this called the 600 rule. This rule is simply 600 divided by the true focal length of the lens you are using. And by true focal length, it’s the focal length of the actual lens only if you are using a full-frame camera. If you are using a camera that has a smaller sensor, you need to factor the crop factor into the focal length. For example, if you were using the Canon 7d, which has a crop factor of 1.6 with a 10mm lens, then your true focal length would be 10 x 1.6, which is equivalent to a 16mm field of view on a full-frame camera.
Now, since you’ve grasped the crop factor concept, let’s go back to our 600 rule. So on a full framed camera, the maximum shutter speed you could use before seeing star trails when using, say, a 24mm lens is: 600 divided by 24mm = 25-second exposure. If you were using that same lens on a smaller sensor with a crop factor of 1.6, your maximum shutter speed would be: 6 00 divided by (24mm x 1.6) = 15.625 seconds.
Aperture is the diaphragm mechanism of your lens, which controls how much light gets through to the sensor in the camera by opening and closing. You can think of it as the same way the pupil of your eye works—the pupil gets wider in the dark, allowing more light through your eye, but narrower when there is a lot of light, to allow in less.
We define aperture as stops, and the setting you will change to control your aperture on your camera are f-numbers. In astrophotography, we need as much light to pass through the lens and hit the sensor as possible, so we generally shoot wide open, or at your lens maximum aperture. Shooting something brighter, like the moon, would call for something like f/9 in order to really develop surface details.
Modern DSLR cameras are capable of high ISOs, which is great for astrophotography, as by setting a high ISO, your camera is able to pick up more detail than the naked eye can see. An ISO in digital photography measures the sensitivity of your image sensor in your camera. The higher the ISO value, the more sensitive or amplified your image sensor is to light. The only downfall is that the higher the ISO, the more noise you get in your image, but this can be rectified to a certain degree with noise reduction in post. And since we are shooting in darkness, we want to be able to shoot at the highest ISO possible without getting too much noise in the image that we will not be able to control with noise reduction. For example, on a Canon 5D MkIII, this is between an ISO of 3200 and 6400. For other cameras, this may vary, and you might not be able to push your ISO so far, but it’s worth experimenting to see just how far you can push your ISO without too much image degradation.

White balance is the process of removing unwanted color casts and instead giving you an image with neutral whites. This value will vary under different lighting sources, so that’s why it is important to manually set this value for astrophotography. Some people set the white balance to one of the presets on their camera and then neutralize their white balance in post.
This is totally ok when shooting RAW. If you are shooting JPEGs, then you need to get your white balance as correct as possible—this will need to be set manually. For astrophotography, this can vary between 3200k to 4800k, depending on the lighting conditions.
What settings do I use?
There are numerous factors for determining your settings, but it will mostly depend on the type of camera and lens you use, and how dark your shooting environment is.
For example, award-winning photographer and 500px community member Mark Gee shoots with a Canon 5d MkIII and a 14mm f/2.8 lens. In a dark sky environment, his typical settings are a 30-second exposure, aperture f/2.8, and ISO 3200. These settings may vary for you when taking into account the environment and the equipment you are using, and are something you will need to experiment with until you get a result you’re happy with.
Composition when shooting astrophotography
With wide field astrophotography, no matter how spectacular the night sky is, marrying the landscape with the sky in an aesthetic way is a must if you want to end up with an image that stands out from others. With the correct settings, anyone can point a camera and take an ok picture of the night sky. But the difference between an ok picture and a great picture is usually composition.
There are simple rules to help you with composition, and if you are aware of and plan your shots around these rules, then composition may start to come more naturally to you.
The rule of thirds
This is a rule based on breaking an image down into thirds, both vertically and horizontally. The idea is that you place your point of interest on one of the intersections of these thirds to give you a pleasing composition.
Points of interest
An image without a point of interest will not hold the viewer’s attention for long. It could be something as simple as a tree in the foreground silhouetted by the night sky, or the Milky Way hanging low over the horizon of a mountainous landscape.
Make sure your horizon is straight
Unless you are deliberately going for a Dutch tilt, it’s very important in any landscape photo to make sure your horizon is straight. This same rule applies to wide field astrophotography if there is a horizon in your shot.
Astrophotography post-processing
Software like Photoshop, Lightroom, and Aperture give you a lot of freedom with your processing techniques, especially when you are shooting RAW.
This is great for astrophotography, as it can give you a lot of control over your image, but it can also be a double-edged sword. To the untrained eye, an over-processed shot might go unnoticed, but it is important when producing good quality astro photos that you keep your processing in check. Don’t crush those blacks!
Processing is very personal, and the style of your processed image will vary from one person to another. A great way to discover your own personal style is to see how the pros do it, and use that as a jumping-off point for your own experimentation.
Exploring astrophotography with Tanner Wendell Stewart
Tanner Wendell Stewart is an Emmy-award-winning photographer who loves telling stories with his photography.
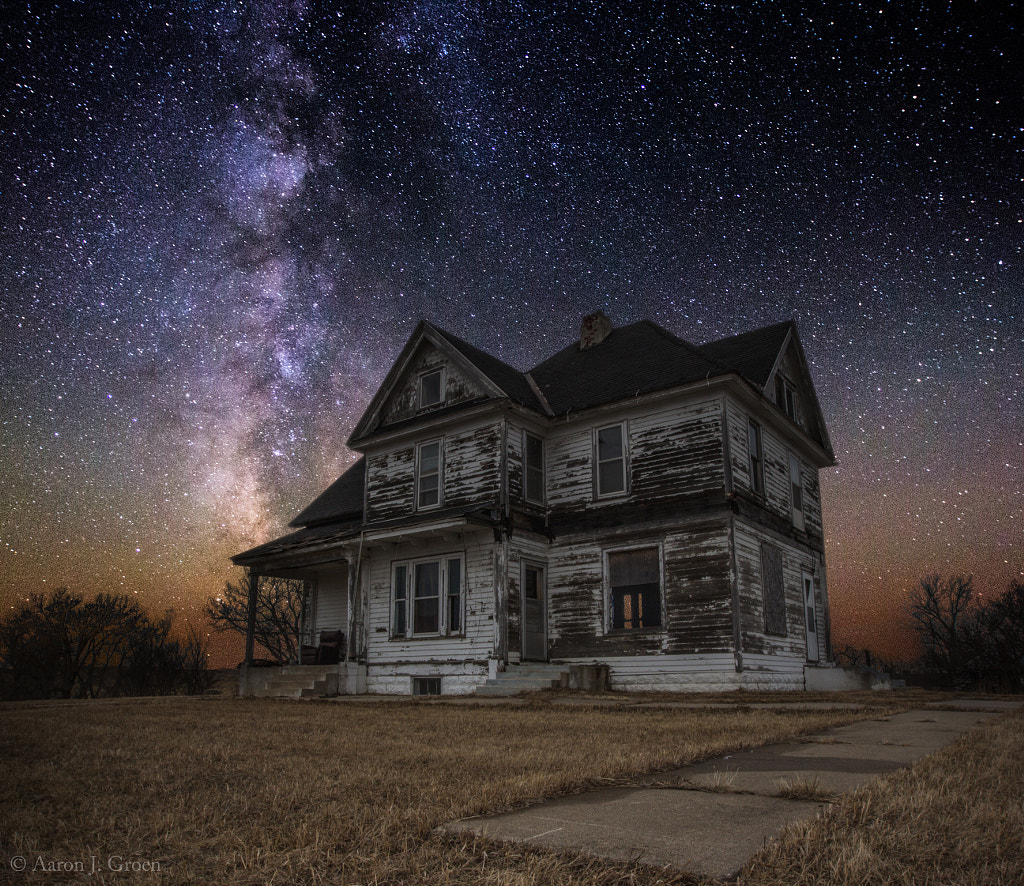
A day in the life of astrophotographer Aaron Groen
As we touched on earlier, there are many different kinds of astrophotography. To get the best shot, you need to know ahead of time, and plan accordingly, for the type of shot you’re looking to achieve.
Using astrophotography in sports photography
Combining astro- and sports photography is a great way to add drama and complexity to your shots. But be warned—this is going to take lots of preparation and planning. On top of all of the prep work we’ve already discussed, you’ll need to brush up on your sports photography skills too. Taking a look at the results, however, you can see how your efforts could really pay dividends.

How to photograph the sun
No matter what kind of astrophotography you are into, the reality is you’ll always be working with the sun as your light source. There are many different kinds of solar photography, and the type you choose will depend on the equipment and process you use.
Sunset photography tips
Timing is everything when capturing dramatic sunset images. We recommend arriving on location at least 45 minutes before the forecast sunset time to get setup. A tripod is also a must when taking longer exposures, so don’t get caught without one. Keep your shutter speed nice and slow, and don’t be afraid to try out different filters in order to maximize your exposure.
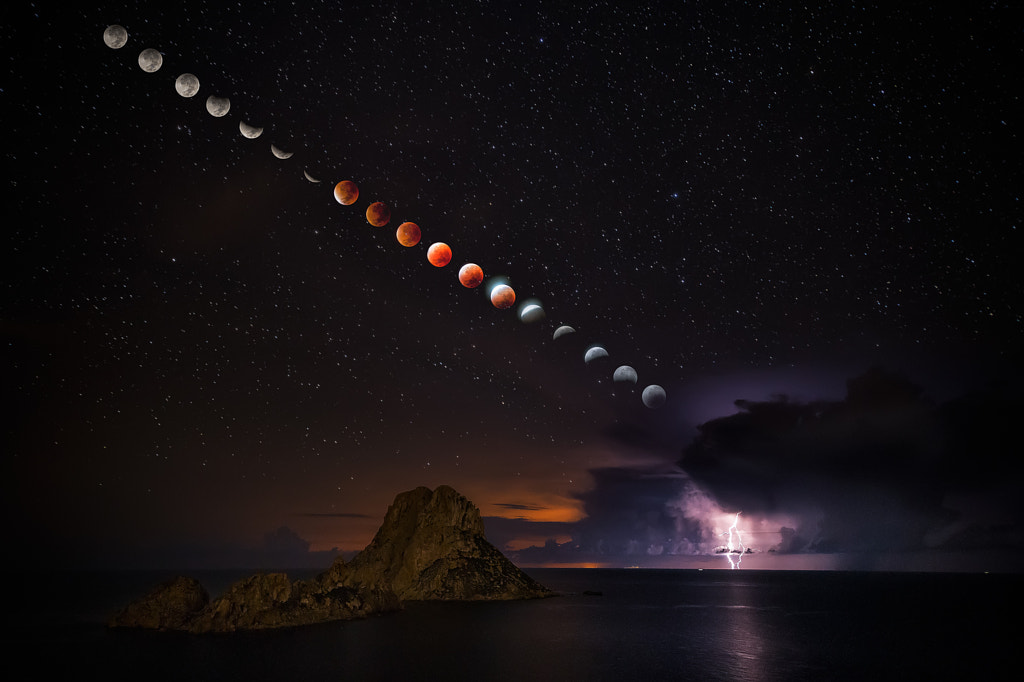
Examples of Astrophotography
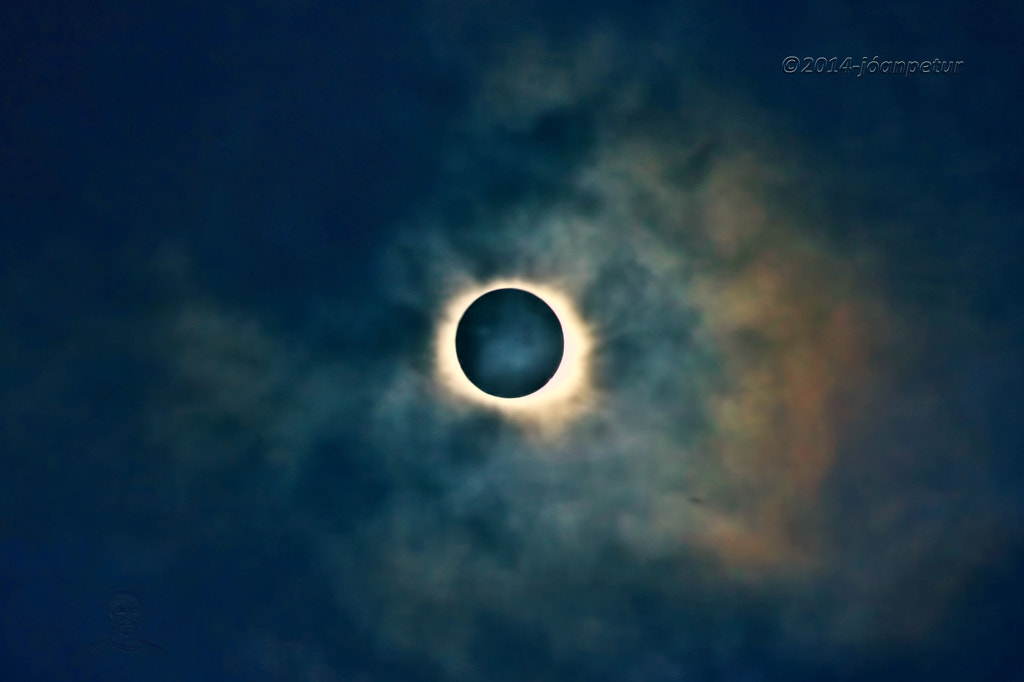
Solar eclipse photography
A solar eclipse is definitely an event worth capturing, and as you can see, it can produce show-stopping images. Safety is always the first concern when a solar eclipse is involved, You should never look directly into a solar eclipse, and that goes for using a viewfinder too—a solar filter will protect your eyes and your gear. Again, a tripod is a must, and you may want to consider a super-telephoto lens to get that dynamic close up of the eclipse.
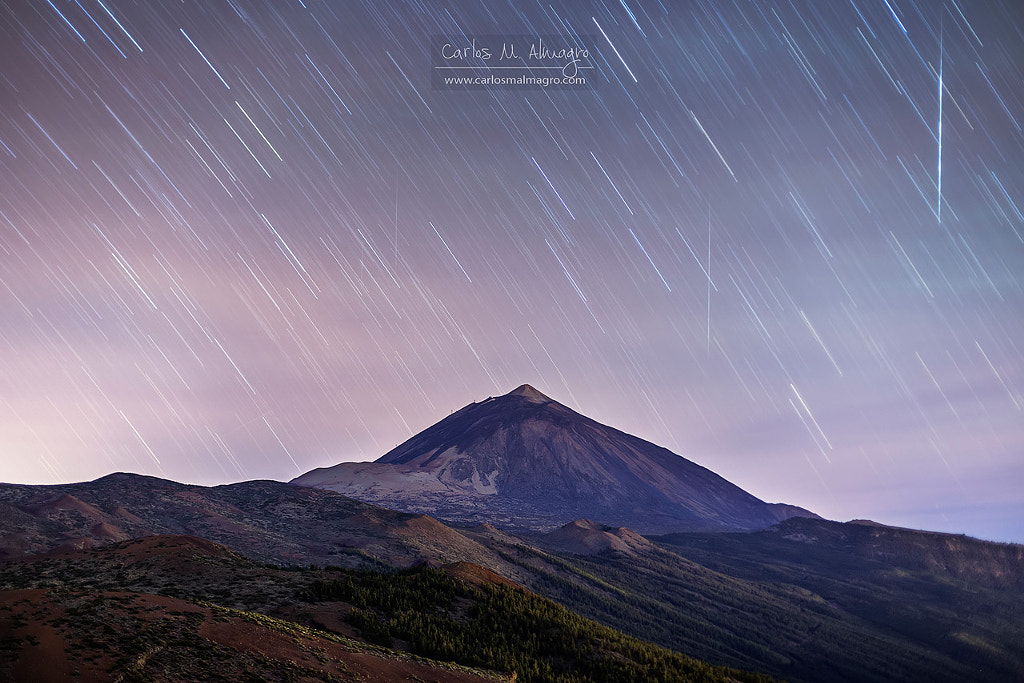
Meteor shower photography
Photographing a meteor shower takes a lot of preparation and quite a bit of gear. You’ll need to be taking lots of photographs over an extended period of time, because you never truly know when you’ll actually see a shower. Read the gear guide put together by pro photographer Tom O’Brien (linked above), and then get inspired by these gorgeous images from the 500px community.
20 meteor show photos that will inspire you to shoot the Leonids
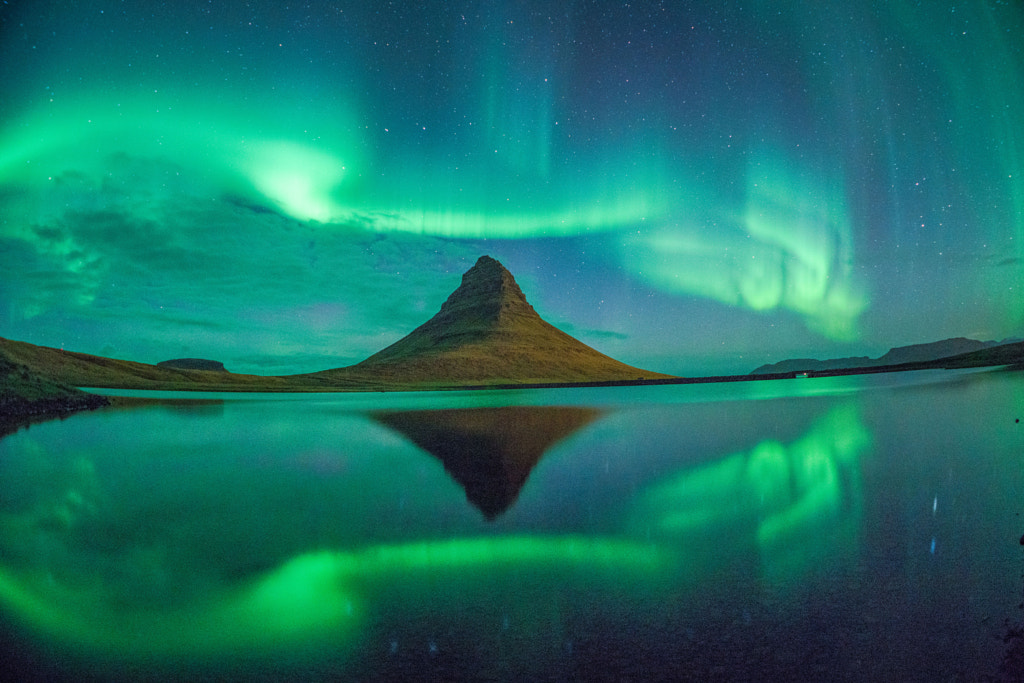
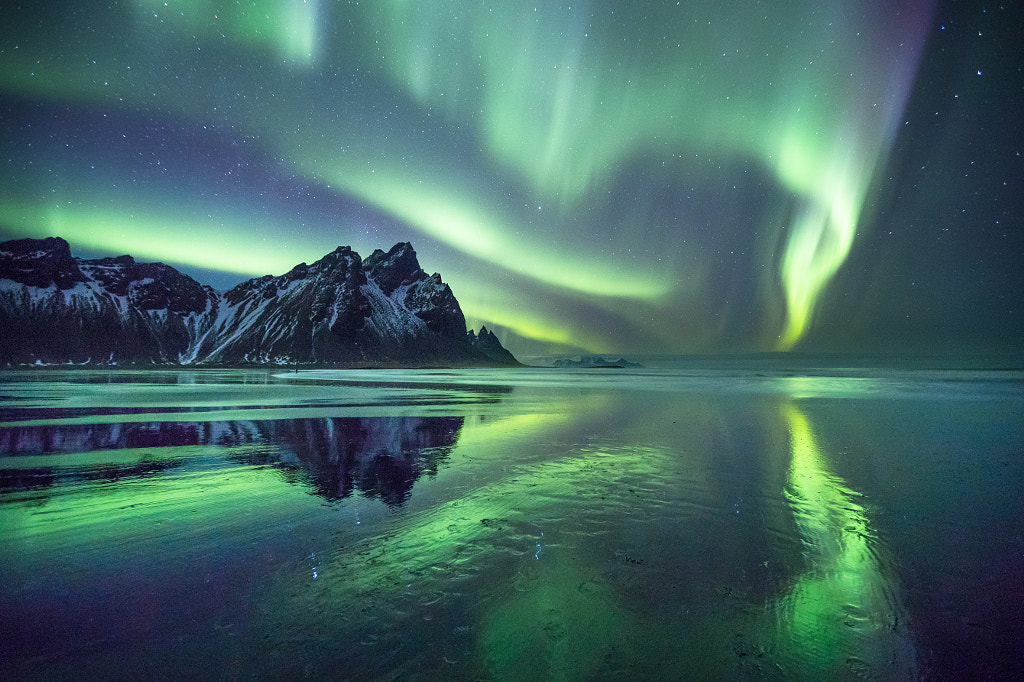
There are few more stunning sights than the Northern Lights. What photographer fortunate enough to see them could resist the urge to try to get a shot of this celestial phenomenon? Much like other forms of astrophotography, a solid plan is essential. Take a look at our beginner’s guide, and start planning your trek up north.
Northern Lights photography
If you’re thinking about trying to photograph the Milky Way, check out our range of tutorials, tips, and tricks.
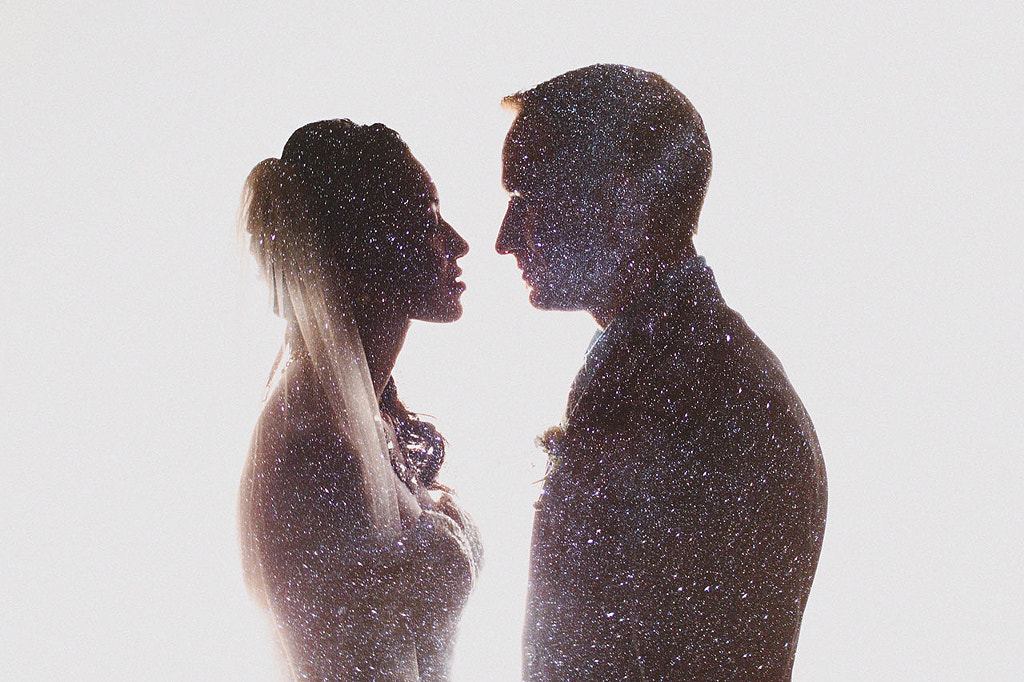
Milky Way double exposure tutorial
Husband and wife duo Dylan and Sara Byrne created a beautiful Milky Way couples double exposure photograph, and we talked to the 500px community members to find out just how they got their inspiring shot.
Can you photograph the Milky Way with a smartphone?
You’re probably noticing that a lot of astrophotography can be gear-intensive. But is it possible to capture the Milky Way with just a smartphone? Read our interview with Ian Norman, a photographer, engineer, and entrepreneur based out of Los Angeles, California, to find out whether or not your phone is up to the task.
Milky Way self-portrait tutorial
Another community favorite, take a quick lesson with Qatar-based photographer Hammad Iqbal, and discover the secret to the Milky Way self-portrait. These stunning shots are definitely not your standard selfie.
Milky Way photography post-processing
Your Milky Way photos are really going to come to life in post, so we’ve pulled some of the top talents in the 500px world to develop extensive tutorials for processing your Milky Way photography in Lightroom.
27 Milky Way photos from Hawai’i
If you’re not inspired yet, take a look at this incredible set of Milky Way photographs from Rogelio Bernal Andreo‘s trip to Hawai’i.
Breathtaking Milky Way photos from Yosemite
Still need a more convincing? These incredible shots of the Milky Way captured in Yosemite are practically packing your gear bag for you. Get out there and get shooting!
About the Author
Dan Ophaug is a content writer based in Toronto, Ontario. His passions include film, photography, technology, and great storytelling.
Not on 500px yet? Sign up here to explore more impactful photography.


Leave a reply