Jimmy Mcintyre is a travel photographer, educator, and 500px ISO contributor. His photos have been published in local and national magazines, including the BBC. His online courses on digital blending and post-processing can be found in his official website.

Luminosity Masks have been revolutionary for many photographers in recent years. They have allowed us to take greater control over our workflow, and produce stunningly clean images. Those who have begun the journey into Luminosity Mask mastery know that it can be a challenging learning curve. But the rewards are there for those who persist.
If you are taking your first steps in this exciting technique, I encourage you to read these two articles before reading on:
Exposure Blending with Luminosity Masks
Why Use Luminosity Masks?
Once your skills with Luminosity Masks increase, you begin to realize that they are excellent exposure blending tools. Combined with other techniques, they can open up a whole world of precision editing. In this article we will look at some advanced Luminosity Mask techniques that you may not be aware of.
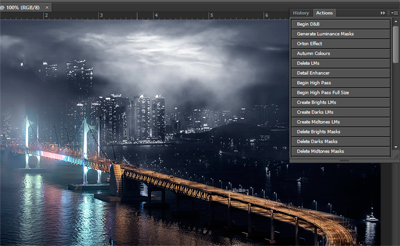
Actions
Before we begin, creating Luminosity Masks is a challenging process. That is why I created an 18-point Luminosity Mask action set. You can download it for free here: Free Luminosity Mask Actions
1. How To Blend More Than 2 Exposures
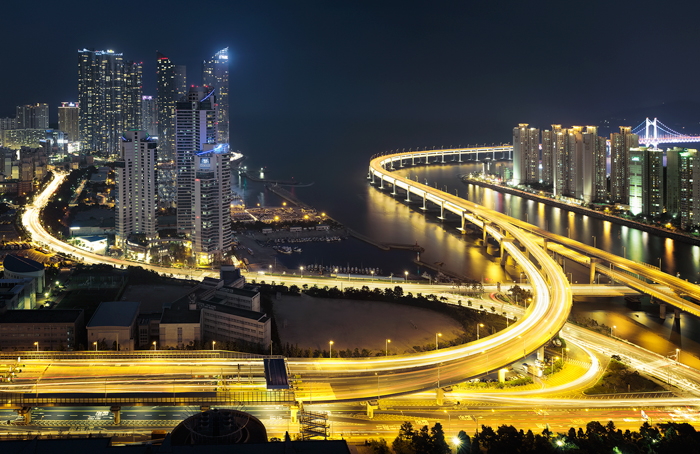
With the increase in quality of our sensors, we can now capture a much wider range of light in fewer images than ever before. Since the Nikon D800 has such an incredible sensor, I often need just 2 exposures to create an image with a high dynamic range of light. Sometimes, however, a scene contains a high degree of contrast and requires more exposures.
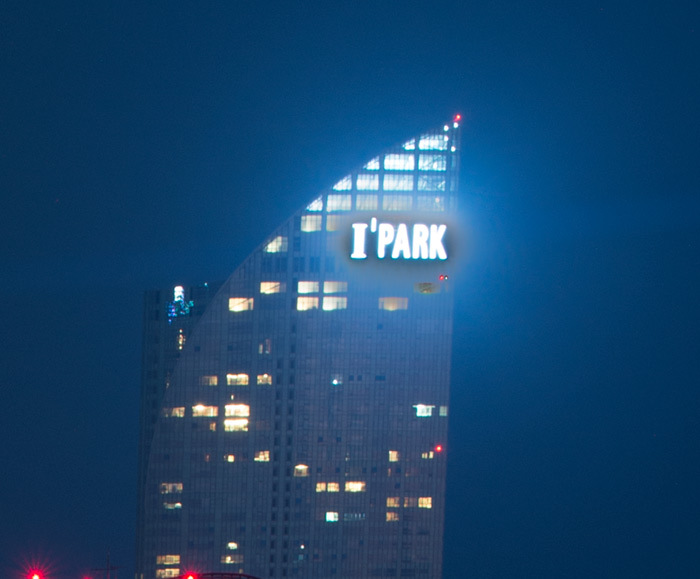
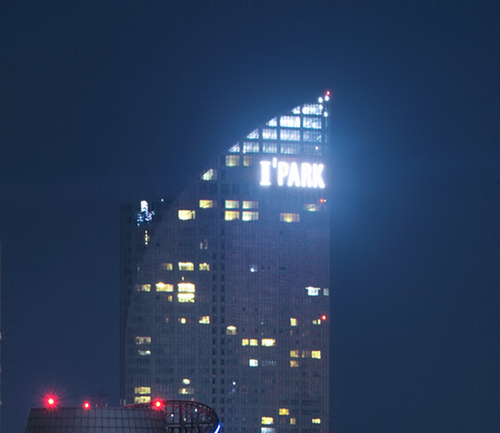
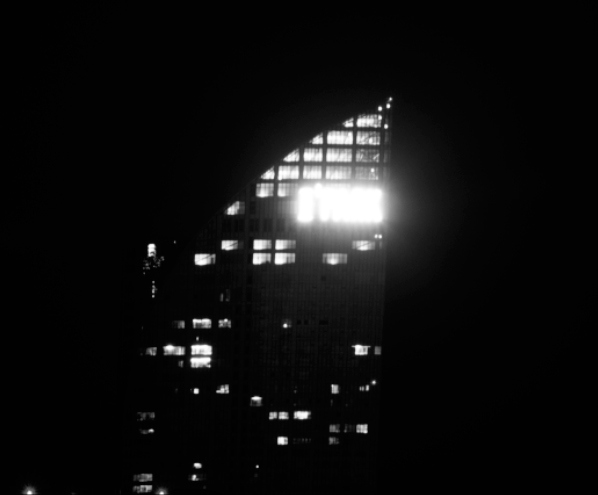
Take, for example, the image below. The tallest building, just to the left, has an extremely bright sign. In order to expose for the sign, I had to shoot 4 stops lower than the base image I was using.
These are the four exposures I used in the blending process:
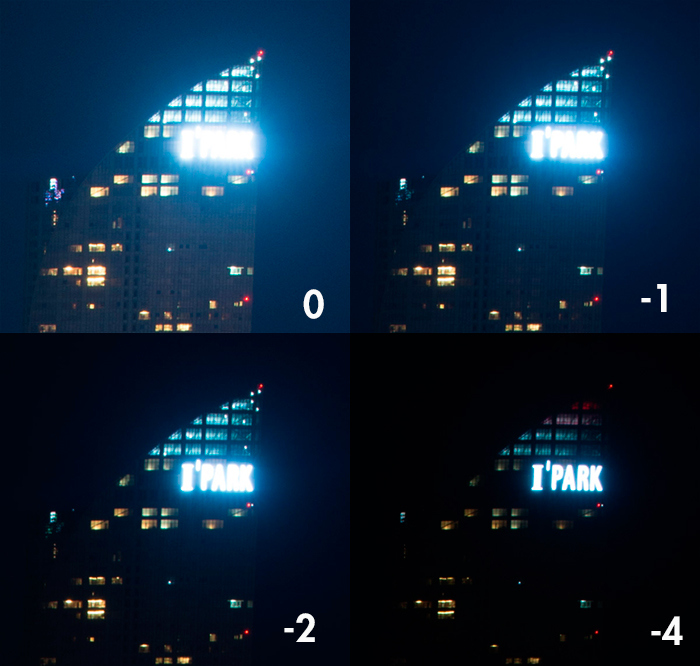
You may be thinking, “Well, okay, you have a base image and an image 4 stops darker for the sign. Why not just blend those two instead of four?” Let me show you how the image comes out using just these exposures:
As you can see, the result is less than great. This is because there is too much difference between the 0 exposure and the -4 exposure. It is almost the same as trying to blend a daytime image with a nighttime shot of the same scene – they’re just too different to create a nice, smooth blend. For more information on how many exposures you need for Digital Blending, see here: How Many Exposures Do I Need For Digital Blending?
Instead, we can use the other exposures to bridge the gap between the brightest and darkest exposures, so that we finally come out with a smooth blend.
Final image
The Process
I layered the 4 exposures in Photoshop. The brightest exposure (the base exposure) was on the bottom. Next was the -1 exposure, then -2, and finally, on top, was the darkest exposure, -4.
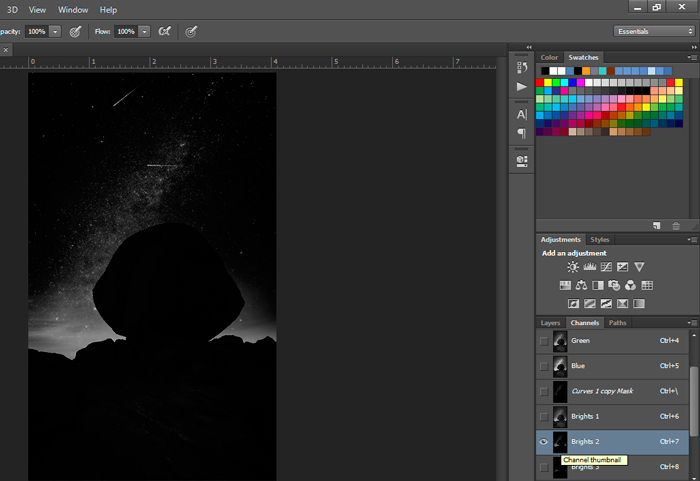
I placed black layer masks on all exposures, apart from the base layer. I ran the Brights Luminosity Masks actions, and then selected Brights 2, which you can see below.
Brights 2
This allowed for a great selection of the sign, and since the glow around the sign is grey, it was also partially selected.
With this selection, I chose a white brush set to 15% opacity, and began painting in the -1 exposure. Then I did the same for each exposure above it, slowly painting back the sign. Blending exposures this way allows us to create a very smooth, natural final result.
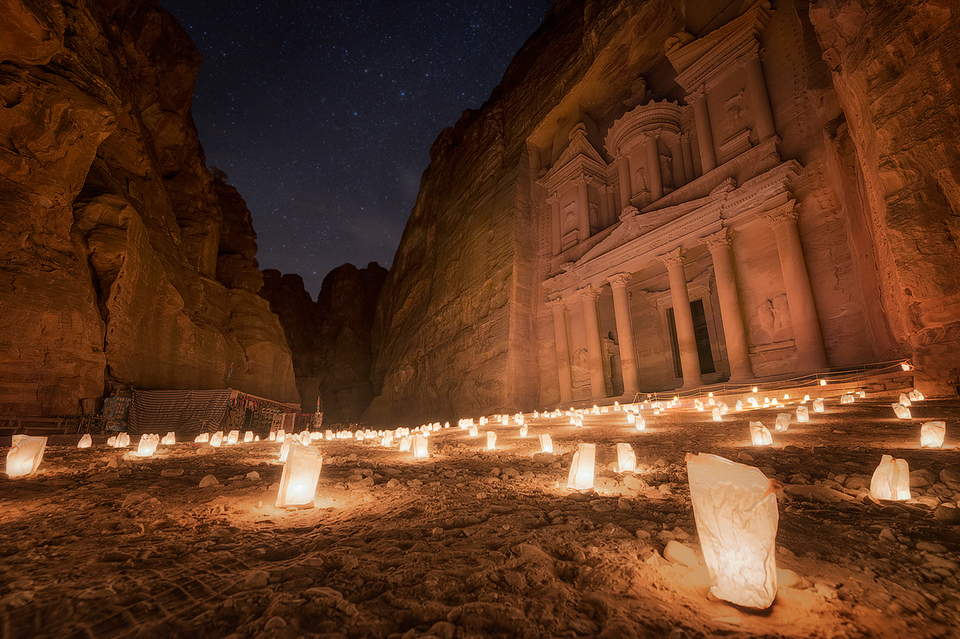
I used the same process on the image below from Petra, to restore the blown-out lights. This technique is also excellent for restoring over-exposed sunsets.
2. Manually Alter Masks for More Advanced Selections
As you can see in the last point, Luminosity Masks are a wonderful exposure blending tool. They work beautifully when there is enough difference in brightness between the areas we wish to affect and the areas we don’t wish to affect.
For example, in the image above, we wanted to select the sign without affecting the building or sky to the right. This was very easy because the sign was significantly brighter than these areas.
On some occasions, however, we may create luminosity masks and find that the selections aren’t as accurate. This happens because we have a flat scene, and there isn’t a large enough difference in brightness values between the areas we wish to select and the areas we don’t.
But there are ways to combat this challenge. We can manually alter the masks and create the contrast we need to make the selection. Let’s look at an example to make this point clear.
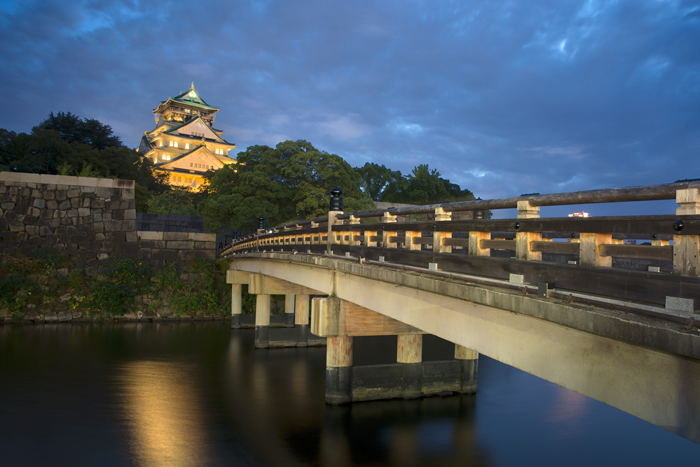
Below we have a base exposure of Osaka castle. The castle, as we can see, is over-exposed. Our job is to use 2 lower exposures to restore those blown-out highlights. The challenge is that the sky, which is also relatively bright, may also be included in the selection.
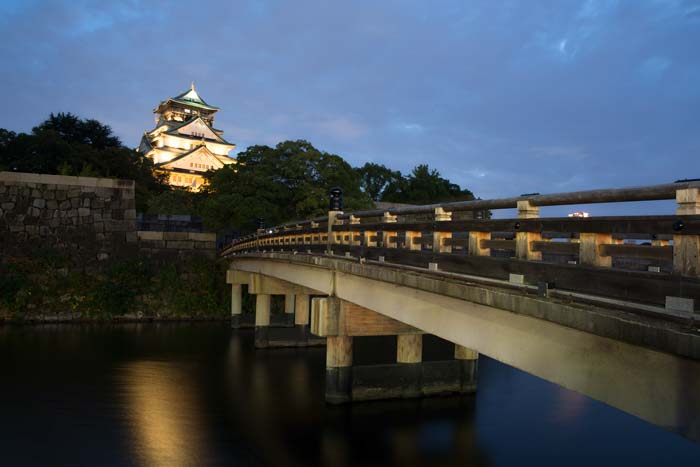
This is a closer look at the castle:
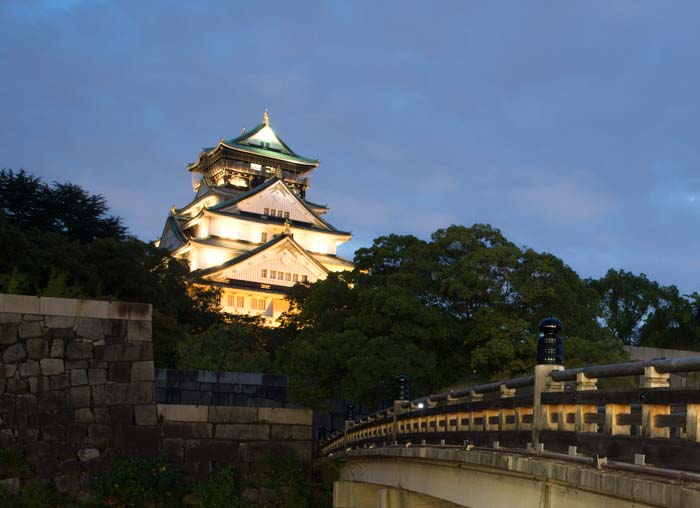
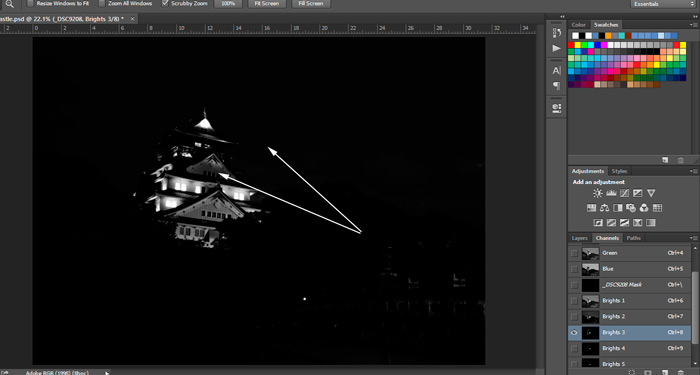
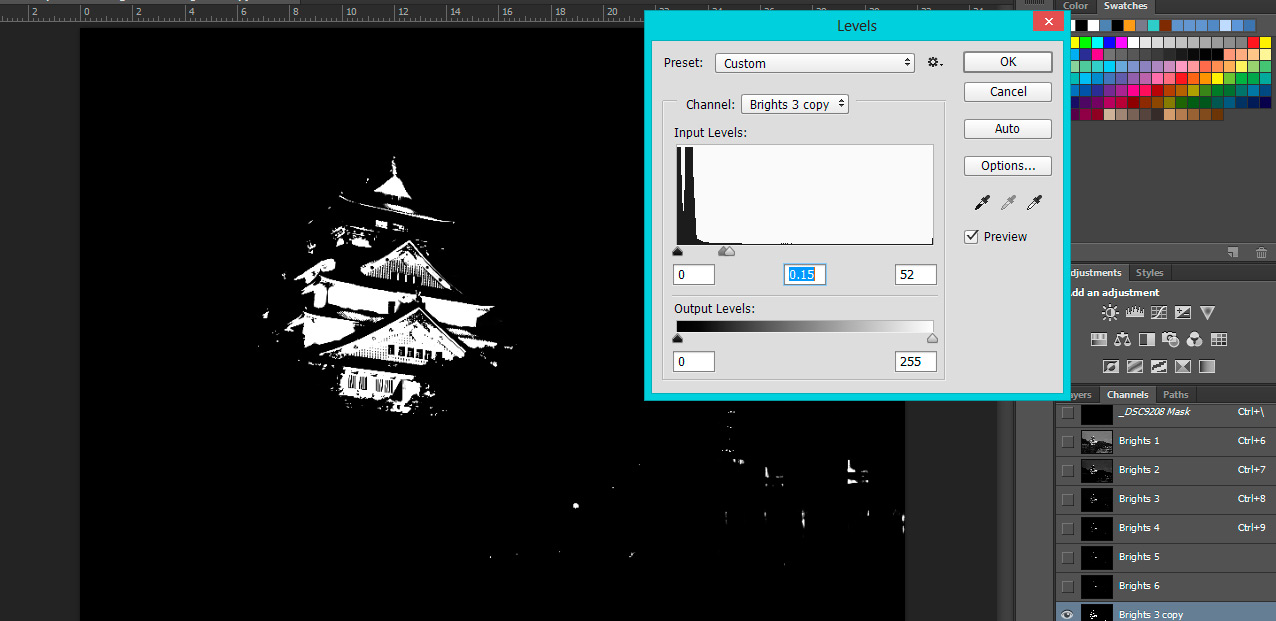
When we run luminosity masks on this image, we can see that Brights 3 has selected much of the building, but some of it is grey, as is the sky, so the selection won’t be contained within the building. It may also affect the sky.
Brights 3
In the image below, you can see that we’ve restored some of the highlights in the castle using Brights 3, but there is a dark halo around the sky.
To solve this problem, we simply need to alter Brights 3 to make the building brighter and the sky darker. We do this by going into our Channels palette, where the Luminosity Masks live, right-clicking on Brights 3 and duplicating the channel. This Brights 3 copy will go to the bottom of the Luminosity Masks. With the copy selected we go to Image>Adjustments and choose Levels. Now we simply adjust the sliders until we’re happy with the mask.
Below you can see what the new Brights 3 mask looks like:
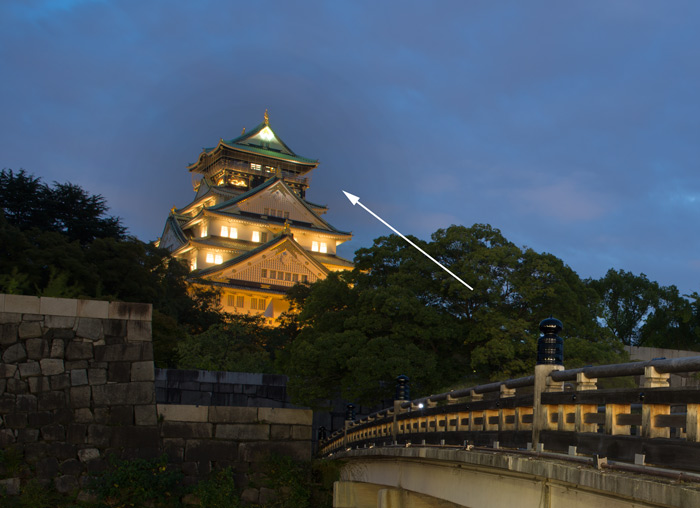
With this new selection we have completely eliminated the sky, and at the same time brought more of the castle into the selection. This is how it looks after blending lower exposures using this selection.
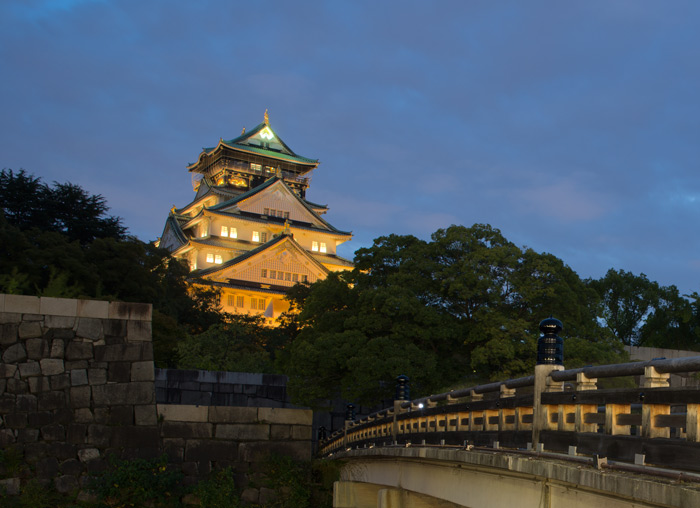
Now we have restored the highlights without affecting the sky! And this is the final image:
3. Increase Milky Way Brightness
Since Luminosity Masks allow us to make selections based on brightness, we can be very creative in how we apply this to certain scenes. For example we can use Luminosity Masks to brighten up and add more drama to a Milky Way image. Below you can see a cropped image which shows before and after applying Luminosity Masks to the stars.
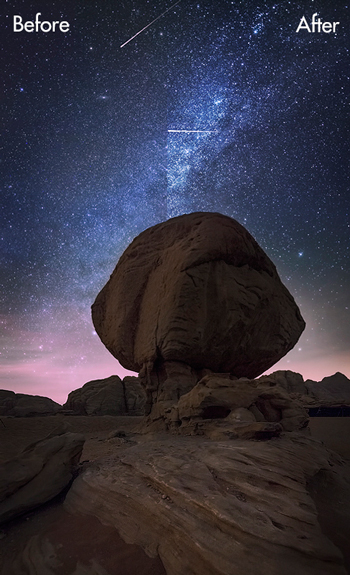
This process is relatively quick. We just need to create Brights Luminosity Masks and choose one which contains a good selection of the Milky Way, like Brights 2 below.
You can see that this selection will also include lights from the horizon and the some of the foreground. This will be very straightforward to fix.
Once you’ve made the selection, go to your image and open a Curves adjustment layer. You will see that the histogram of this layer will only include a narrow band of highlights. Raise the curve as high as it will go. You will see that the highlights brighten. With the mask of this layer selected, choose a black paintbrush and paint out any highlights you don’t wish to affect, like on the horizon and foreground, so only the stars were affected.
If the Milky Way isn’t bright enough, with the Curves layer selected, hold Ctrl+J, or CMD+J on a Mac, to duplicate the layer. This will multiply the effect.
Targeted Contrast Changes
Following on from the last point, we can make targeted contrast/brightness changes to any parts of our image, based on brightness. For example, if our shadows are not completely under-exposed (in other words, we have some information to work with), we can raise them by choosing a Darks mask and changing the brightness of the area through a Curves/Levels layer.
We can, alternatively, change the contrast throughout our image but at the same time protect our highlights from becoming over-exposed, or our shadows from becoming under-exposed.
In the example image below from Kyoto’s Bamboo Forest, the sky is extremely bright, which is how I want it. But the mid-tones and shadows are too dark.
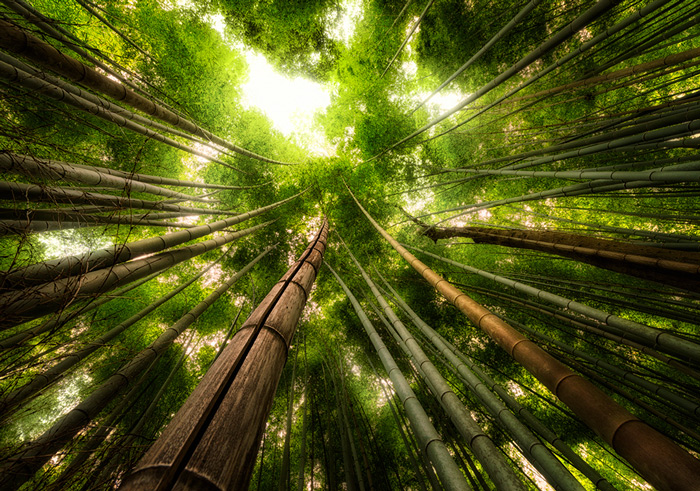
I want to raise these shadows and midtones without affecting the highlights. We can give our highlights 100% protection by subtracting a Brights Luminosity Mask selection from the scene. This is very easy to do.
First, we run the masks and look for a mask that only includes the highlights, in this case I used Brights 4. Before selecting anything, we press Ctrl+A, or CMD+A on a Mac, to select all of the image. Marching ants will appear around the screen. Now we go to our mask and hold Ctrl+Alt+left-click on the mask. This will subtract the mask from the current selection.
Now, if you go back to the layers panel and open a Curves layer, you will see that the mask is an inverted version of your Brights mask. This is what mine looked like:
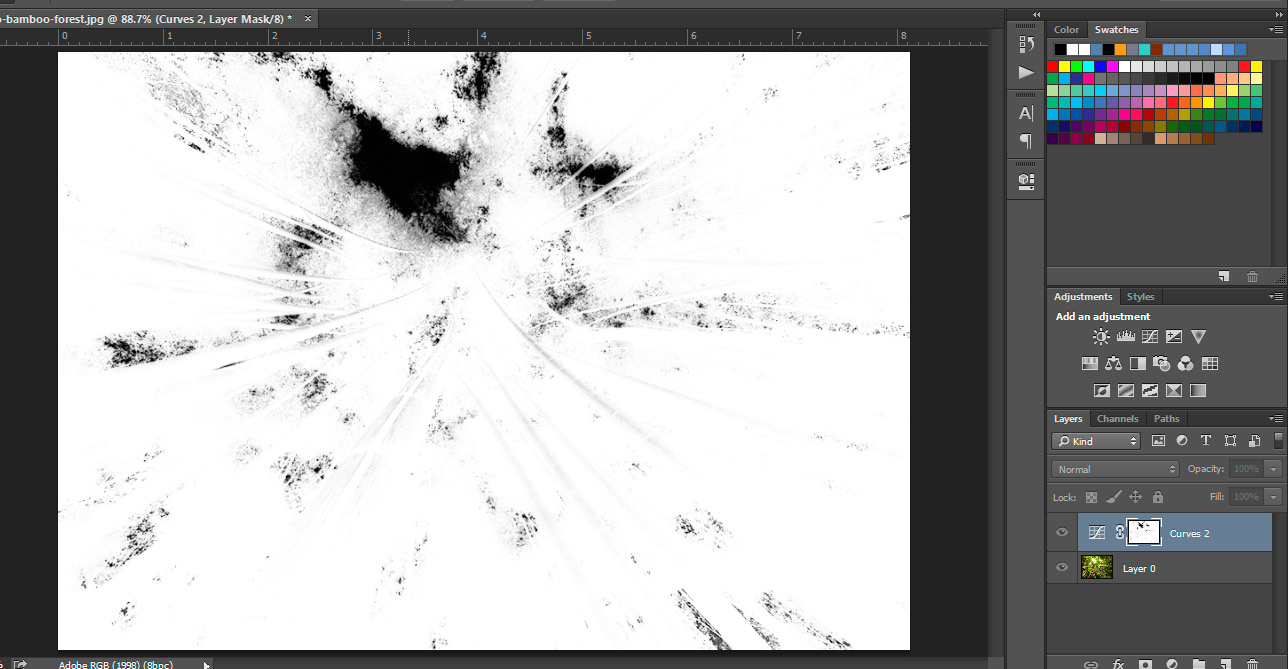
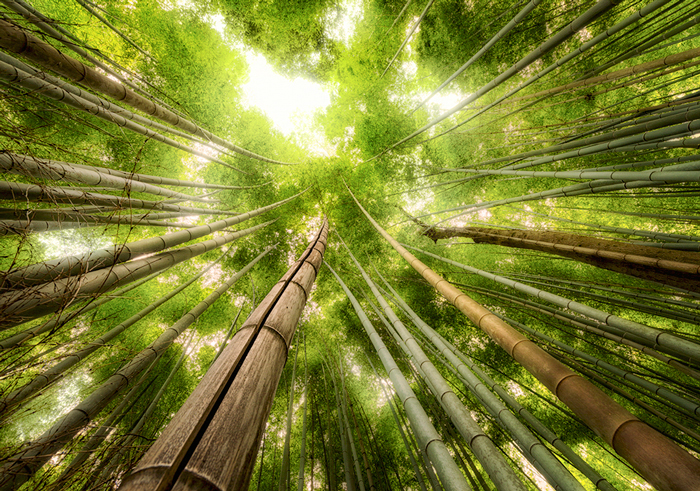
We can see that this mask will include everything in the image apart from the highlights. Now we just need to raise the Curve until we’re happy. Here is the final result, with the shadows and midtones raised and highlights preserved:
This is just four of the many ways these advanced selection tools can help your workflow. I encourage you to experiment with Luminosity Masks and discover the power of these wonderful tools for yourself. They will add precision and cleanliness to your workflow, like no other process.
Feel free to also join us over on the Digital Blending Discussion Group on 500px.
I’m always happy to connect with other photographers! You can visit me through the links below:
My website
My Facebook page
My photography newsletter Including Free Actions—sign up now!


Leave a reply